What is Orbital vs Orbit Sander? A Practical Comparison
An objective comparison of orbital and random orbital sanders, covering finish quality, removal speed, dust control, and best practices for floors, decks, and walls. Learn which tool fits your project and how to maximize results.

TL;DR: For most DIY projects, a random orbital sander (RO sander) delivers a smooth finish with minimal swirl and great dust control. An orbital sander removes material quickly on rough surfaces. Choose RO for finishing and fine control; choose orbital for aggressive stock removal and a simple tool. Selection depends on project type and finish requirements.
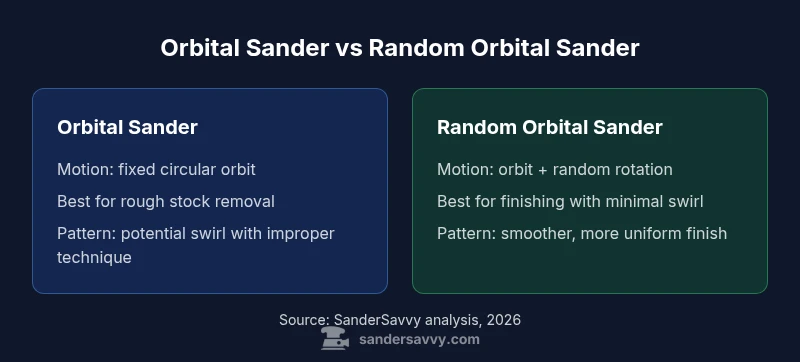
What is orbital sander, and how does it differ from a random orbital sander? At first glance, both tools appear similar: they use a sanding pad that moves across a surface under a powered motor. But their motion patterns differ in critical ways. What is orbital vs orbit sander? An orbital sander has a fixed circular orbit; the pad moves in tight circles without rotation around its center, cutting consistently but with a higher risk of leaving swirl marks on soft woods if pressure is not controlled. A random orbital sander combines a circular orbital motion with a random rotation of the entire pad, effectively scrambling the scratch pattern and reducing visible swirl. According to SanderSavvy, this combination generally yields a smoother finish with less need for refinishing. In practice, this means RO sanders are often the better choice for finishing work, while a dedicated orbital sander can excel where aggressive stock removal is needed. Understanding these basics helps set expectations for performance, finish quality, and project workflow.
How orbital sanders work: mechanical details. An orbital sander uses a motor that drives a pad in a fixed circular orbit. The orbit diameter is typically small, often around 1/8 to 3/16 inch, but exact values vary by model. Because the pad does not rotate around its own axis, the scratch pattern tends to be more predictable if the operator maintains consistent pressure and passes, though heavy pressure can still create noticeable swirl on soft woods. Users should pair orbital sanders with medium to coarse grits for stock removal and switch to finer grits for finishing work. The mechanical simplicity of a pure orbital motion generally translates to robust performance and straightforward maintenance. When used correctly, you can achieve effective surface leveling and material removal without complex technique.
How random orbital sanders work: combining orbit and rotation. A random orbital sander blends two motions: a fixed orbital path and a random rotation of the pad housing. This dual action produces a randomized scratch pattern that minimizes swirl marks and improves the chance of a consistent finish across a variety of woods and coatings. Because the random rotation helps disguise minor surface imperfections, RO sanders are often favored for finish work on floors, cabinetry, and furniture. Practically, this means you’ll typically see a smoother surface with fewer subsequent steps needed before finishing. From a safety standpoint, RO sanders also benefit from efficient dust collection when used with a proper dust extraction system.
Finishing quality: swirl patterns, surface texture, and when to expect good results. The finish quality is the most visible difference between these two tools. An orbital sander can remove stock quickly, but the fixed orbit makes it more prone to creating consistent swirl lines if pressure is uneven or if the operator overlaps poorly. For hardwood floors and clear finishes, those swirls may require extra sanding or buffing. A random orbital sander, on the other hand, randomizes the scratch pattern, reducing swirl and often yielding a more uniform surface after a single pass. In practice, many DIYers reserve RO sanders for the final smoothing pass and use a more aggressive tool for initial leveling. SanderSavvy analysis, 2026, indicates that operators who pair RO sanders with dust extraction and high-quality sanding discs typically achieve better finish consistency with fewer passes than relying on an orbital sander alone.
Material removal speed and surface prep workflow. When you need to remove material quickly from a rough surface, the orbital sander can outperform a RO sander due to its direct, aggressive action. However, this speed comes with a higher risk of gouges if not controlled. RO sanders provide balanced performance: they remove material at a steady rate while delivering a smoother final texture after the same number of passes. The ideal workflow often starts with a coarse grit on the orbital sander to level the surface, followed by finishing passes with the RO sander using a progressively finer grit sequence. For decks and floors, the combination helps manage both planing efficiency and finish quality, reducing the risk of visible sanding patterns. Remember to keep the sander moving, rotate the sander’s orientation regularly, and avoid lingering in one spot to minimize gouging or swirl.
Ergonomics, vibration, and noise: comfort during long jobs. Operator comfort matters for long sanding sessions. Orbital sanders are typically lighter and generate less complicated vibration patterns because of their single-motion design, but pressure control remains critical. RO sanders tend to be well balanced and comfortable for most users, while some models with larger pads can transfer more vibration to the hands, especially when used for extended periods. To protect your joints, choose a model with good vibration damping, a comfortable handle, and options for continuous dust collection. Wearing a dust mask and eye protection is essential regardless of the sander type, and using a vacuum connected to the dust port minimizes airborne particles.
Dust control options: bags, canisters, and dust extractors. Dust control is a central concern for sanding projects, both for health and for clean finishes. Random orbital sanders often pair best with a proper dust extractor connected to a standard vacuum or shop vac. Some RO sanders feature excellent exhaust paths that integrate well with canisters and dust bags, but the best practice remains a dedicated dust extractor or a high-quality vacuum with a suitable filtration system. For best results, ensure the dust collection port is compatible with your pad and that your dust extractor is powered and connected before you begin. Keep dust in check to maintain visibility, maintain air quality, and ensure a clean work environment.
Pad systems, grits, and sanding patterns: choosing the right pad. Pad type and grit choice are central to achieving the desired finish. Most orbital sanders use hook-and-loop discs with standardized sizes (5-inch or 125mm in many markets). RO sanders rely on the same disc system but benefit from random rotation to reduce pattern repetition. For heavy stock removal, start with a coarser grit on the orbital sander and progress through increasingly finer grits to a final polish with the RO sander. When finishing, use very fine grits (e.g., 180–220) and lighter touch on both tools to minimize scratch depth. Proper sanding technique—overlapping strokes, consistent speed, and avoiding heavy pressure—will produce predictable results across wood types, including softwoods and hardwoods.
Project workflows: floors, decks, and walls. Floors typically require aggressive removal in damaged areas followed by finishing passes with RO for a smooth surface ready for finish. Decks benefit from substantial stock removal on rough surfaces using the orbital sander, then a final pass with RO to refine the texture and prepare for sealants. Walls, especially in drywall or plaster, may only require RO sanding with fine grits for finishing coats. Adapting your approach to each surface ensures you maximize efficiency while achieving the best possible finish. Always test on a hidden area first to calibrate your technique and ensure the chosen pad and grit yield the intended texture.
Maintenance and pad changes: keeping tools performing at their best. Regular maintenance extends the life of both sander types. Clean dust from vents, inspect the pad for wear, and replace damaged discs promptly. When changing pads, align the screw holes to maintain balance and avoid wobble during operation. For RO sanders, consider using moisture-resistant discs in environments with humidity or dampness, which can degrade adhesive backing or pad performance. Maintain a schedule for replacing worn-out pads, particularly when floor or deck projects involve rough surfaces that accelerate pad wear. Proper maintenance reduces heat buildup, preserves sanding quality, and prolongs tool life.
Common mistakes and how to avoid them. A few frequent mistakes can negate any advantage of choosing between orbital vs RO sanders. Applying excessive pressure is a universal no-no; it causes gouges, inconsistent finishes, and faster pad wear. Failing to keep the sander moving leads to machine-induced divots or swirl patterns. Not testing grit sequences on a scrap area wastes time and materials. Finally, neglecting dust extraction can compromise finish quality and health. By following the proper technique—constant motion, appropriate grit sequences, and consistent overlap—you’ll see more predictable results and fewer reworks.
Quick start decision guide by project type. For rough stock removal on damaged floors, decks, or walls, choose an orbital sander as your starting point, followed by RO passes for finishing. For fine finishes and furniture components, start with RO sanding to minimize swirl while achieving a uniform texture. If the project involves multiple substrates (soft and hard woods), plan a two-tool workflow: orbital for initial leveling and RO for final smoothing. Always emphasize safety, proper dust collection, and appropriate pad and grit choices to maximize efficiency and finish quality.
Comparison
| Feature | orbital sander | random orbital sander |
|---|---|---|
| Motion pattern | Fixed circular orbit; no rotation around pad axis | Circular orbit + randomized rotation of the pad |
| Finish quality | Can show swirl on soft woods if pressure is heavy or overlap is poor | Typically smoother with fewer swirl marks due to randomized pattern |
| Stock removal speed | Often faster on rough surfaces | Balanced removal with finishing capability |
| Dust collection compatibility | Works with bags or dust extractors; performance varies by model | Typically excellent dust capture with integrated dust control options |
| Best for | Rough shaping and fast material removal | Finishing work and light stock removal |
| Price range | $50-$100 | $60-$140 |
What's Good
- RO sander often delivers a smoother finish with less visible swirl
- Orbital sander provides aggressive material removal for rough prep
- Both support compatible dust extraction for cleaner work
- Flexible pad systems and widely available replacement discs
Weaknesses
- RO sander can still swirl if pressure is excessive
- Orbital sander may leave visible scratches on delicate finishes if used aggressively
- Pad wear and dust build-up can reduce performance over time
RO sander generally offers the best balance for finishing and overall ease of use; orbital sander excels at rapid stock removal on rough surfaces
For most DIY finishing tasks, choose a random orbital sander to minimize swirl and maximize control. Use an orbital sander when you need fast material removal, especially on damaged or coarse surfaces. Pair both with proper dust collection for best results.
Your Questions Answered
What is the key difference between an orbital sander and a random orbital sander?
An orbital sander uses a fixed circular motion, which can leave swirl marks if used aggressively, while a random orbital sander combines the orbital motion with a randomized rotation to minimize swirl. This generally yields a smoother finish with less rework.
The orbital sander uses a fixed circle for sanding, which can leave patterns if you push hard. The random orbital sander adds a random rotation, so the finish looks smoother with less visible lines.
Which sander should I use for floors?
For floors, start with an orbital sander for fast material removal on rough areas, then switch to a random orbital sander for finishing to minimize swirl. This two-step approach balances speed and finish quality.
On floors, use the orbital sander to remove material fast, then finish with a random orbital sander to reduce swirl.
Can I use either sander on walls or drywall?
Both can work, but drywall sanding is usually done with RO sanders and fine grits to minimize damage and dust, whereas orbital sanding can be used for initial leveling on rough plaster. Always work in light passes and wear a mask.
On drywall, start with a fine grit RO sander and light passes; avoid heavy pressure.
What about dust control and safety?
Pair any sander with a dust extractor or a high-quality shop vac. Use a mask and eye protection, and keep the area clean to maintain visibility and health. Proper dust control reduces health risks and improves finish quality.
Always connect to a dust extractor and wear safety gear for sanding work.
Is it worth renting a sander for a one-off project?
For a single project, renting can be cost-effective, especially for RO sanders or orbital models with specialized features. If you foresee frequent sanding tasks, investing in a capable RO sander with a good dust system is worthwhile.
Rent if you sand rarely; buy if you sand often and need consistent performance.
How do I choose the right grit and pad?
Start with coarse grits (60–80) for initial leveling on rough surfaces, then move through medium (120) to fine (180–220) for finishing. Use compatible hook-and-loop pads with good dust extraction compatibility and replace worn pads as needed.
Begin coarse for rough spots, then step through finer grits for a smooth finish.
Main Points
- Identify the project goal: finishing vs removal
- Choose RO for smooth finishes; choose orbital for aggressive removal
- Pair with a dust extractor for best results
- Match pad type and grit to surface and finish goal
- Practice technique on scrap material before tackling the real project