Random Orbital Sander Rental Guide for DIY Projects
Learn how to rent a random orbital sander, compare rental options and terms, and follow a step-by-step guide to sand floors, decks, or walls safely and efficiently.

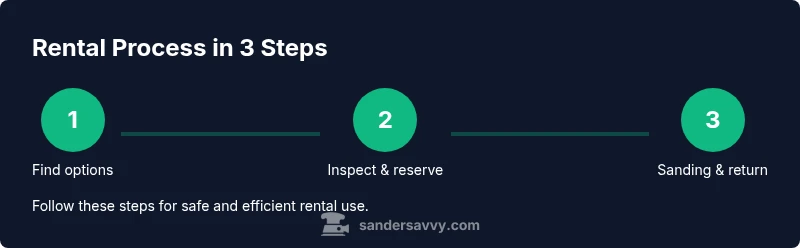
Renting a random orbital sander is straightforward and budget-friendly. To get started: 1) identify your project scope and rental window; 2) compare local tool rental shops and big-box stores; 3) inspect the unit at pickup, confirm included discs and accessories, and review safety instructions before use. This quick plan helps you finish floors, decks, or walls with a smooth, even finish.
Why Renting a Random Orbital Sander Makes Sense for DIY Projects
For homeowners tackling floors, decks, or walls, renting a random orbital sander is a smart, low-risk way to test performance on your actual project without a long-term commitment. According to SanderSavvy, renting lets you evaluate power, dust control, and finish quality before buying. The SanderSavvy team found that many DIYers value the ability to switch to a different grit or sanding approach mid-project, compare brands, and avoid maintenance costs associated with owning a tool you might only use occasionally.
In practice, a rental gives access to a capable, modern sander with adjustable speed and an integrated dust-collection system. You can use it to remove old finishes, smooth rough edges, or knock down raised grain on a plywood subfloor. This flexibility is especially helpful when you’re working on a tight schedule or testing a new material. This article explains how to choose a rental, what to inspect at pickup, and how to operate the sander safely and efficiently to achieve a professional-looking result.
Key Features to Compare When Renting
When you’re shopping for a random orbital sander rental, the most important differences are in pad size, orbit size, speed range, dust collection, weight, and ergonomics. Most rentals offer a 5-inch pad, but pad size can vary; larger pads cover more area but are less precise in tight corners. An adjustable speed control helps adapt to softwoods and hardwoods, while a dust-collection bag or vacuum connection keeps cleanup manageable. Look for a tool with a secure clamp system, a durable switch, a comfortable handle, and a cord long enough to reach your work area. Some rentals include spare discs, cleaning brushes, and a vacuum hose; others require you to provide your own replacements. If dust control is critical, verify that a vacuum adapter or integrated dust port is compatible with your vacuum system. Finally, verify the rental terms for damage coverage, late fees, and what happens if the tool fails during use.
Rental Options and What to Look For
Rentals are offered by hardware retailers, dedicated tool rental shops, and some larger home improvement chains. SanderSavvy analysis shows that most DIYers value flexible pickup times, clear return policies, and well-maintained, clean units. As you compare options, note what’s included (pads, discs, cleaning supplies), the condition of the pad and disc, the availability of dust extraction and a hose, and the process for reporting issues. Also compare daily and weekend rates, deposit requirements, and the policy on damaged accessories. If possible, ask about a sandbox test: can you briefly run a trial on a small scrap piece so you can judge finish quality and vibration? A reputable shop will offer safety briefings and a quick demonstration.
What to Bring and Check Before You Rent
Before you sign a rental agreement, gather the essentials: a valid photo ID and a credit card or other payment method for the deposit, plus any paperwork the shop requires. Bring PPE such as a respirator or dust mask, safety glasses, ear protection, and a lightweight notebook to record any setup notes. You may also want to bring drop cloths or plastic sheeting to protect adjacent surfaces and a portable vacuum or brush for quick cleanup. Some shops provide a basic dust bag or vacuum hose, but if not, plan to purchase or bring your own. Finally, review the tool’s operating instructions in advance so you can spot any unfamiliar controls without delaying your project.
Inspect the Sander on Pickup
On pickup, inspect the body and cord for cracks or fraying, and test the switch to ensure it turns smoothly. Check that the pad is securely mounted, the disc is clean and free of chips, and the dust collection bag or port is intact. Power up the unit briefly in a safe space to listen for unusual noises or excessive vibration; a wobble can indicate bearing wear or loose components. Take note of any accessories included (pads, discs, wrench) and confirm the correct grit sizes for your planned work. If anything seems off, request a replacement or a quick service check before leaving the counter.
Safe Setup and Operating Tips
Mount the appropriate sanding disc and verify the pad is clean and flat before use. Hold the sander with both hands, keep wrists relaxed, and let the machine do the work—apply only light, even pressure so you don’t gouge the surface. Start at the lowest speed and gradually increase as needed, especially on hardwoods. Move the sander in overlapping passes, following the grain where appropriate and avoiding circular grinding in one spot for extended periods. Regularly check the dust bag or vacuum hose and empty or clean it to maintain effective suction.
Dust Control, Sanding Technique, and Work Area Prep
Before you begin, seal off the work area with plastic sheeting to minimize airborne dust, and use a shop vacuum to capture dust at the source. Wear a respirator or a suitable dust mask, eye protection, and hearing protection. Use clamps or guides to control movement and prevent slippage on the surface. Sand small sections at a time, checking for finish consistency and grain raising after each pass. When you finish a section, brush away dust and inspect for scratches or swirl marks that may need a light touch-up.
Maintenance During Rental and Post-Use Cleanup
During the rental period, keep the unit clean and dry; wipe the exterior and remove dust from the cooling vents. If the sander has a replaceable dust bag, empty it into a trash bin and reinstall. After use, inspect the pad for wear and replace if necessary, and return the tool with all accessories in the same condition you received it. A quick wipe-down helps prevent corrosion and makes the next renter comfortable. If your rental includes a warranty or service plan, note any issues and document them with photos.
Return and Fees: What to Expect
Return the tool on time and in the same condition to avoid additional charges. Most shops require a brief post-use checklist and may perform a quick inspection for wear or damage. Ensure you have all discs and accessories, remove attachments, and return any protective covers. If the unit was used with a dust extraction system, confirm the hose is coiled and stored properly. It’s wise to request a receipt or emailed confirmation of the tool’s return state and any charges.
Common Mistakes and How to Avoid Them
Rushing the setup or using excessive pressure causing grooves; neglecting dust management; skipping the safety gear; not verifying inclusions or return policies; not testing the disc on scrap wood; failing to clean the tool before return; ignoring vibration or noise that indicates a problem.
Final Verdict and Practical Recommendation
Ultimately, renting a random orbital sander is a flexible, budget-conscious choice that helps you evaluate the tool before purchasing. The SanderSavvy team recommends comparing multiple rental options, ensuring dust-control features, and selecting a unit with a reliable dust collection system. By following safety guidelines and returning the tool promptly, you maximize value and minimize risk for your sanding project.
Tools & Materials
- Valid photo ID(Needed to rent; bring government-issued ID)
- Credit card or payment method(Used for deposit and rental charges)
- Personal protective equipment (PPE)(Respirator or dust mask, safety glasses, hearing protection)
- Drop cloths/plastic sheeting(Protects surrounding areas)
- Optional dust extraction supplies(Vacuum hose or dust bag if not provided)
- Scrap wood or sample boards(For test passes)
Steps
Estimated time: 3-5 hours
- 1
Define project scope and rental window
Clearly outline the area to sand, the finish to remove, and how long you’ll need the sander. This helps you choose the right rental duration and avoid late fees.
Tip: Write down the target surfaces and finish plan before you pick up the tool. - 2
Find rental options and reserve
Shop around at local hardware stores and dedicated tool rental shops. Reserve the unit for your planned dates and confirm pickup time.
Tip: Ask about availability of dust extraction accessories and spare discs. - 3
Inspect the unit on pickup
Check for cracks, worn pads, and a secure disc mount. Test the power switch and ensure the dust port or bag is in good condition.
Tip: If anything looks off, request a replacement before leaving the counter. - 4
Attach correct disc and test on scrap
Mount the correct grit disc, verify the pad is clean, and run a quick test on scrap wood to confirm performance.
Tip: Ensure the sander runs quietly and without excessive vibration. - 5
Set safe operating parameters
Start on a low speed, use light pressure, and move in overlapping passes. Avoid staying in one spot for long periods.
Tip: Keep the sander flat and parallel to the surface. - 6
Begin sanding and monitor dust
Proceed across the work area in sections, switching direction as needed for a uniform finish. Check dust collection regularly and empty when full.
Tip: A clogged dust bag reduces suction and finish quality. - 7
Clean up and return
Wipe down the unit, store discs properly, and return the tool on time with all accessories.
Tip: Document any damage with photos and get a return receipt.
Your Questions Answered
What is included with rental when I pick up a random orbital sander?
Most rentals include the sander, a power cord, and a basic dust bag or hose. Some packages include spare discs and cleaning brushes. Always verify what comes with the unit before leaving the counter to avoid missing accessories.
Most rentals include the tool and basic dust bag; extras vary by shop, so check before you leave.
Do I need a deposit to rent a random orbital sander?
Yes, most rental shops require a security deposit or hold on a credit card. The amount varies by shop and tool value. This deposit is typically returned when the tool is inspected upon return.
A deposit is common; it’s returned after the tool is inspected.
Can I rent for a weekend or longer?
Many shops offer weekend or extended rental periods. Be sure to confirm pick-up and return times, and ask about any late-fee policies. If you exceed the agreed window, charges may apply.
Yes, long rentals or weekends are often available; confirm timing and fees.
How do I choose the right grit and discs for my project?
Coarse grits remove finish quickly, while finer grits finish smoothly. Start with a middle grit for most projects and progress to finer grits for top coats. Bring or purchase the appropriate discs and confirm compatibility with the sander.
Start with a middle grit, then move finer for the final finish.
What safety gear should I wear when renting and sanding?
Wearing a respirator or dust mask, safety glasses, and hearing protection is essential. Ensure your work area is well-ventilated and keep kids and pets away during sanding.
Wear a mask, eye protection, and hearing protection for safety.
How do I avoid extra charges on return?
Return the tool on time, with all accessories, in the same condition. Keep a receipt or digital confirmation of the return state and report any issues documented with photos.
Return on time with all parts; keep proof of return.
Watch Video
Main Points
- Rent to test before buying
- Inspect and verify inclusions at pickup
- Use proper PPE and dust control
- Follow a methodical sanding sequence
- Return tool on time with all accessories