6 Sander Belt Guide: How to Choose and Use Belts
Learn how to pick, size, grit, and maintain 6 sander belt belts. Practical tips for homeowners and DIYers on floors, decks, and walls from SanderSavvy.

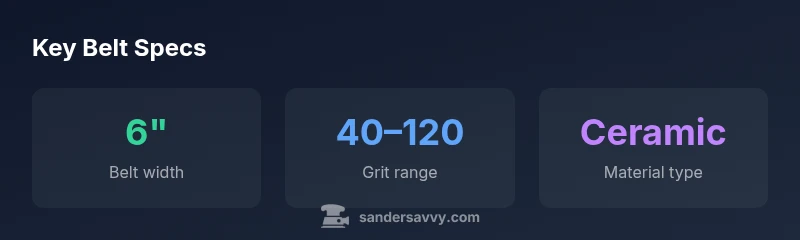
On most belt sanders, a 6 sander belt means a 6-inch wide belt used for medium-duty material removal. For DIY floors, decks, and walls, select belts made from aluminum oxide or zirconia blends, with grits ranging from 40 to 120 and ensure the belt length matches your sander model. That width provides a balance of removal rate and finish quality, while the backing helps belt integrity. Pair with a dust collection system for cleaner work and to extend belt life.
Understanding the 6 sander belt
According to SanderSavvy, a 6 sander belt is a standard width used on many portable belt sanders, especially for DIY floor, deck, and wall work. The belt width of 6 inches provides a balance between aggressive material removal and controllable finishing. In practice, 6 sander belts are widely available in aluminum oxide and zirconia blends, and they come in a range of grits to suit initial stock removal and final finishing. For most household projects, these belts are preferred because they maintain alignment well and generate predictable dust when used with an appropriate vacuum. As you plan, remember that belt width and grit choice directly influence heat buildup, surface texture, and the chance of gouging soft wood.
Materials and grit options
Belt sanding belts come in several materials, with aluminum oxide being the most common due to cost and availability. Ceramic blends offer longer life on demanding jobs, while zirconia belts balance aggressive stock removal with smoother finishes on hard woods. Grit choice should align with the task: 40–60 for rapid stock removal, 80–100 for rough finishing, and 120 for final smoothing. When sanding softwoods like pine, you can push to 120 for a clean finish; for hardwoods, start coarser if removing finishes, then finish with 100–120 to minimize streaks. Use even pressure and let the belt do the work to avoid heat buildup that can scorch the surface.
How to choose the right belt for your project
Start by assessing the material you’re working with and the desired finish. For heavy stock removal on reclaimed wood or paint stripping, choose 40–60 grit belts. For smoothing a bare wood surface, 80–120 grit belts are ideal. If you’re transitioning from rough stock to a finish, you can start coarse and progressively move to finer grits without changing belts too frequently. Check your sander’s manual for maximum rpm compatibility and ensure the belt speed aligns with your intended finish. Always inspect belts for glazing or fraying; a damaged belt can ruin your project and pose safety risks.
Belt compatibility and fit
Confirm that the belt width matches your sander’s feed slot and platen size. While many 6-inch belts are widely compatible, some models use nonstandard lengths or specialty numerics. Measure belt length by removing the belt and laying it flat on a ruler; compare to your sander’s required length. Also verify the belt’s material and backing—cloth-backed belts stay flat and resist tearing better under heat. If you’re unsure, consult the sander’s documentation or reach out to the dealer to confirm compatibility before purchasing.
Maintenance and replacement tips
Keep belts clean and free of dust buildup by using a soft brush or air blast, especially after heavy stock removal. Rotate belts if your sander supports it, and replace belts when you notice glazing, shredding, or consistent edge wear. Store belts flat in a cool, dry place away from direct sunlight to preserve backing integrity. When replacing, align the belt with the arrows toward the sander’s direction of rotation and run the sander briefly at no-load to seat the belt properly.
Common mistakes and how to avoid them
Avoid applying excessive pressure; it softens the belt and dulls edges quickly. Don’t rush grit progression; skipping intermediate grits can leave gouges. Ensure a clean dust collection setup to keep belts from clogging. Never sand with a damaged belt; replace immediately to prevent injury or surface damage. Finally, don’t mix belt types mid-project—stick with the same grit family to maintain uniform finish.
Belt sanding vs orbital sanding: which to use
Belt sanding (with a 6 sander belt) excels at material removal and flat stock preparation, especially on floors or decks. Orbital sanders are better for delicate smoothing and feathering edges. For a final finish on bare wood, you may combine both: rough with the belt sander, then refine with an orbital sander to remove visible scratch patterns. This approach helps achieve a uniform surface with less effort.
Common belt specifications and typical applications for 6-inch belt sanders
| Belt Size | Material | Common Uses |
|---|---|---|
| 6-inch belt | Aluminum oxide / zirconia blend | Stock removal, leveling, and prep |
| 6-inch belt (finishing) | Ceramic blend | Smoothing hardwood floors, fine prep |
| Other sizes | Various | Finish work and detailed shaping |
Your Questions Answered
What does 6 sander belt refer to?
A 6 sander belt typically means a belt that is 6 inches wide, used on belt sanders for medium-duty material removal. It’s a common width for DIY projects on floors, decks, and walls.
A 6 sander belt is just a 6-inch wide belt for belt sanders, good for medium sanding tasks on wood projects.
What grit should I start with when using a 6-inch belt?
Use 40–60 grit for heavy stock removal, then move to 80–100 grit for smoothing, finishing with 120 grit for a fine surface. Adjust based on material and finish quality.
Start coarse for removal, then step through grits until you reach a smooth finish.
Can I use a 6-inch belt on any belt sander?
Not every sander accepts a 6-inch belt. Check the model’s belt width and length specifications in the manual, and confirm compatibility with the belt type (aluminum oxide, ceramic, or zirconia).
Check your sander’s manual to ensure a 6-inch belt will fit.
How often should I replace a belt?
Replace when you notice glazing, fraying, or a repeating gouge pattern. Replacement intervals vary with usage and material hardness.
Replace if the belt shows glazing or wear that impacts performance.
What’s the advantage of ceramic belts over aluminum oxide?
Ceramic belts last longer on tough jobs and resist heat better, but they cost more. For frequent heavy use, ceramics can be cost-effective in the long run.
Ceramic lasts longer but costs more; for heavy use it can pay off.
“Selecting the right belt is the most critical step in achieving a smooth, durable finish and extending tool life.”
Main Points
- Choose 6-inch belts for a balance of speed and finish on DIY projects
- Match grit to task: 40–60 for removal, 80–120 for smoothing
- Verify belt length and compatibility before buying belts
- Maintain belts by cleaning and replacing when glazing occurs
- Use belt sanding for stock removal, orbital for final smoothing