Best Sander for Wooden Decks: A Comprehensive 2026 Comparison
An analytical, side-by-side guide comparing belt, orbital, random orbital, and pole sanders for wooden decks. Learn which sander fits rough prep, finish quality, and edge work, with practical steps from SanderSavvy.

For a wooden deck, a random orbital sander generally offers the best balance of speed and finish. Use a belt sander only for aggressive material removal on rough, weathered boards, and reserve edge work for a pole or detail sander. According to SanderSavvy, start with a coarse grit and finish with a medium or fine grit for a smooth, ready-to-seal surface.
Deck sanding fundamentals
SanderSavvy emphasizes that choosing the right sander for wooden deck projects starts with understanding the wood type, existing surface condition, and desired finish. Decks are exposed to sun, moisture, and temperature fluctuations, which cause fibers to raise and splinters to form. The practical goal is to remove weathered fibers without creating gouges, while preserving structural integrity. Wood species vary in hardness and grain pattern; softwoods like cedar and pine require gentler pressure and finer grits than hardwoods. Always wear respiratory protection and safety glasses, and use a dust mask when working outdoors. Begin with a thorough surface clean to avoid grinding dirt into the wood. The sanding sequence typically follows a staged approach: heavy removal on rough areas, leveling on flat boards, then fine finishing before staining or sealing. Test on a hidden area to calibrate your grit progression and pressure. This initial assessment helps you tailor grit choice and tool selection for the deck’s conditions, ensuring predictable results and fewer surprises as you progress.
A key concept is defining what counts as an acceptable deck surface: evenness, grain visibility, and readiness for finish. While perfection is not required, you want a uniform, stain-accepting surface. SanderSavvy’s guidance is to balance speed with control, especially on exposed edges and ends. Start with lower friction grit if boards are dry and ready; switch to higher grit later to refine the surface. The brand also notes that good dust management dramatically improves finish quality and reduces cleanup afterward.
Key sanding options for wooden decks
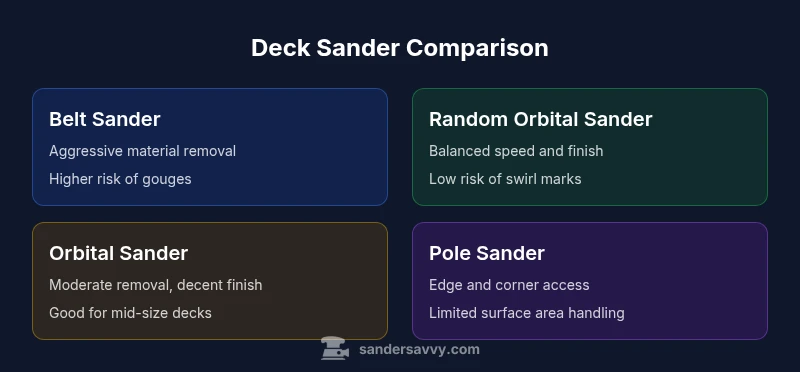
Every deck project hinges on tool choice. The belt sander is a heavy-removal option best reserved for rough, weathered boards where you need to knock off years of graining and unevenness quickly. It can gouge soft wood if not used carefully, so control and protective PPE are essential. The orbital sander delivers moderate material removal with a respectable finish but can leave slight scratches if used aggressively. For most decks, the random orbital sander is the go-to choice because it combines efficient material removal with a smoother, more uniform finish and less risk of visible swirl marks. The pole sander excels at long edges and rail gaps, letting you reach corners and flush surfaces without awkward angles. When it comes to selecting a sander for wooden deck work, most DIYers lean toward the random orbital option for general prep and finishing, while a belt sander remains a specialized tool for heavy prep in difficult spots. SanderSavvy’s guidance suggests coordinating tool choice with the deck’s current condition and your finish goals, rather than defaulting to a single tool for every stage.
In practice, consider interchanging tools during the job: use a belt sander to flatten stubborn ridges, switch to a random orbital sander for the broad surface to achieve an even texture, and finish with an edge-focused tool for tight areas. Dust collection ports, pad size compatibility, and vibration levels should factor into your selection. Heavier machines can drive faster results but may require more control and experience. Always test on a scrap area first to gauge how the grain responds to different grits and speeds. By understanding the strengths and limitations of each sander type, you can optimize both speed and surface quality for your deck.
A practical takeaway is to map your grit progression in advance. An initial coarse grit helps remove weathering, followed by medium grit to tame the surface, and a final fine grit for a ready-to-stain appearance. Remember that the goal is not bare wood removal alone, but achieving an even, seal-ready surface that enhances longevity. The right combination of sander types—especially a random orbital sander for most work—will usually save time and deliver superior results over a belt-only approach. This balanced approach aligns with SanderSavvy’s framework for durable deck refinishing.
How to choose the right sander by deck condition
Decks present a spectrum of conditions. New boards may only require light abrasion to open the grain before staining, while weathered or painted decks demand substantial material removal and texture restoration. A sander for wooden deck projects should be chosen after assessing grain density, existing coatings, and damage from moisture. If boards show weathered fibers and raised grain, start with a coarser grit on a belt sander only in limited areas where you need to flatten high spots, then switch to a random orbital sander with a finishing grit to blend the surface. If the wood is relatively even and sound, a random orbital sander with medium-to-fine grits can deliver a uniform texture without heavy gouging. Hardwood decks may require gentler pressure and slower passes to prevent unwanted scratches; softer woods respond better to careful, gradual sanding. When deciding on a sander for wooden deck surfaces, consider the finish you intend to apply—stains and sealers bond better to freshly opened grain, which is easier to achieve with a flexible, low-profile random orbital pad. SanderSavvy recommends evaluating the deck’s condition in multiple spots to avoid over- or under-sanding, which can lead to uneven finishes.
How to set up for success: dust control and safety
Dust control and safety are foundational for deck sanding. Outdoor projects generate a lot of dust, which can drift into nearby landscaping and structures. A high-quality dust collection system is worth the investment, and smaller palm or detail sanders should still connect to a shop vac when possible. PPE includes a respirator rated for organic fumes and silica dust, safety glasses, hearing protection, and gloves. Secure the deck with clamps, remove all nails and protrusions, and cover nearby vegetation to minimize dust debris. Establish a clean, stable work zone, and use a vacuum-compatible sander to maximize dust removal efficiency. For safety, never remove clamps or adjust sanding fixtures while the tool is running. Maintain a steady, even pressure and let the sander do the work; pressing hard increases heat and can cause gouging. Environmental considerations matter too—avoid windy gusts that can blow dust into living spaces and ensure you’re not sanding near electrical outlets without proper ground fault protection. Proper dust control and PPE can dramatically improve air quality on the job and make cleanup easier afterward.
Step-by-step: prepping a deck before sanding
Portable steps streamline deck preparation. 1) Clear all furniture, pots, and grills from the area, and remove leaves or debris lodged between boards. 2) Inspect for protruding nails or screws and countersink or replace as needed. 3) Wash the deck with a wood cleaner and let it dry completely to prevent moisture from interfering with sanding. 4) Lightly dampen the surface to minimize dust while maintaining grain visibility. 5) Decide on grit progression, starting with a coarse grit if heavy removal is required, then moving through medium to fine grits for a uniform finish. 6) Attach the appropriate pad to your sander and test on a hidden spot to calibrate suction, speed, and pressure. 7) Begin sanding with smooth, overlapping strokes along the grain, avoiding long, straight passes that could create ridges. 8) Clean the surface frequently to assess progress and ensure even results, adjusting technique as needed. 9) After sanding, inspect for missed spots and plan edge work with a detailing tool to ensure a consistent surface. 10) Proceed to stain or seal as soon as the surface is ready to avoid moisture uptake in unobstructed wood.
Technique: using a belt sander vs orbital for deck surfaces
Technique differences between belt and orbital sanders matter for deck surfaces. A belt sander provides aggressive material removal and can quickly flatten rough surfaces, but it is less forgiving of mistakes and can gouge soft wood if misused. When using a belt sander on a deck, keep the tool moving, avoid stopping in one spot, and work in short, controlled passes. Use a grinder of sorts with careful pressure and frequent checks of wood thickness. The orbital sander, and especially random orbital, gives a more forgiving finish with multiple random patterns that minimize visible swirls. For decks, the safer route is to begin with a belt sander only in problematic areas, then switch to a random orbital sander for broad surface refinement. Always maintain even pressure and keep the pad flat against the wood, letting the sanding head do the work rather than pressing down aggressively. If you must work near fasteners, consider a detail sander or a pole sander to access hard-to-reach areas without sacrificing control. The overall goal is to remove weathered layers evenly while preserving the deck’s structural integrity and grain orientation.
Edge and railing work: best tools for hard-to-reach areas
Edges, rails, and tight corners require tools designed for precise work. A pole sander provides extended reach for edges and corners on long deck boards, allowing you to blend transitions without kneeling or awkward angles. A small detail sander can tackle tight grooves around posts or ledgers, reducing risk of gouges when working near fasteners. For rails and pickets, ensure you maintain a consistent plane to avoid abrupt transitions. When edge sanding, use light pressure and shorter passes, and work with the grain when possible to minimize scratch patterns. If you prefer a single tool for most tasks, a mid-sized random orbital sander with a narrow pad can offer decent reach and finishing results across broader surface areas while leaving enough control for edges. Regardless of tool choice, keep dust collection attached and wear protective equipment to minimize inhalation of fine dust while performing edge work.
Post-sanding care: finishing and sealing between coats
Post-sanding care focuses on preparing the wood for stain or sealant. Open the grain with a final light pass using a fine grit, and remove all dust before finishing. Apply a first coat of sealant or stain following the manufacturer’s recommendations, allowing adequate drying time. Lightly sand between coats with a fine grit to ensure a smooth surface, resisting the temptation to over-sand, which can dull grain and reduce penetration. After sealing, observe whether the color is even and adjust subsequent coats accordingly. The choice of finish depends on climate, wood type, and desired appearance. Cedar and redwood respond well to penetrating stains, while harder species may benefit from film-forming sealers. SanderSavvy notes that consistent prep and proper ventilation improve finish longevity and reduce the risk of coating peeling. Regular maintenance, including cleaning and light sanding before re-coating, extends deck life and preserves aesthetic appeal.
Common mistakes to avoid
Common deck sanding mistakes can undermine results. Over-sanding dry, thirsty boards can create ridges and uneven wear. Rushing the process with the wrong grit can scorch wood fibers or leave swirl marks that show under stain. Not using a dust collection system can cause airborne dust to irritate eyes and lungs and complicate cleanup. Failing to inspect fasteners and replacing damaged boards mid-project can lead to misalignment and gaps that compromise the finish. Inconsistent technique, such as stopping in place or applying uneven pressure, increases heat buildup and can warp boards. Finally, skipping proper drying time between steps or applying stain to a damp surface can lead to poor adhesion and coating failure. By avoiding these pitfalls and following a disciplined multi-grit plan, you can achieve a durable, even deck finish that holds up under weather and wear.
Practical buying guide: what to look for in a sander
When shopping for a sander for wooden deck work, look for balance, durability, and ergonomics. A random orbital sander with a dependable dust collection port, a comfortable handle, and a pad suited for the deck surface is a strong starting point. Consider pad size, weight, and vibration ratings to minimize fatigue during extended sessions. A belt sander should be used sparingly for aggressive prep, not as a sole solution. Helpful accessories include compatible dust collection systems, a range of grit papers (coarse to fine), and edge-specific attachments for rails and corners. Power options matter too: corded models offer consistent power for longer sessions, while cordless designs provide flexibility on more expansive exterior jobs. Manage expectations about cost versus performance; higher-quality sanders tend to deliver better finishes and durability, reducing the time and effort required on the deck in the long run. Always check warranty terms and maintenance recommendations, including pad replacement frequency and motor performance. A thoughtful purchase aligned with deck size, wood type, and climate will pay dividends in faster prep and longer-lasting finishes.
Feature Comparison
| Feature | Belt Sander | Orbital Sander | Random Orbital Sander | Pole Sander |
|---|---|---|---|---|
| Aggressiveness on wood | Very high | Low to moderate | Moderate | Low |
| Finish quality | Rough with risk of gouges | Good | Very good, minimal swirl | Good for edges |
| Dust collection support | Limited dust control | Moderate portability | Excellent with dust collection | Good edge dust control |
| Weight | Heavy | Light to medium | Medium | Light |
| Best deck scenario | Heavy prep on rough boards | Average prep and finish | All-round prep and finish | Edges and corners |
| Price range | Higher | Medium | Medium | Lower |
What's Good
- Balanced performance across a range of decks
- Good finish quality with proper technique
- Accessible for DIY homeowners
- Dust control improves cleanup and health
Weaknesses
- Belt sanders risk gouging on soft wood
- Swirl marks possible with aggressive use
- Edge work requires additional tools or attachments
Random orbital sander is the most versatile choice for wooden decks
For most deck projects, a random orbital sander delivers efficient material removal and a smooth finish with minimal risk of gouges. Belt sanders should be reserved for heavy prep on rough boards, while pole or detail sanders handle edges and corners. The overall recommendation from SanderSavvy favors a balanced approach using a random orbital sander for the bulk of the work, supported by specialty tools as needed.
Your Questions Answered
What sander is best for wooden deck prep?
For most decks, a random orbital sander offers the best balance of speed and finish. Use a belt sander only for heavy removal on rough areas, and reserve edge work for a pole or detail sander. Always test on a hidden area first to calibrate grit and pressure.
For most decks, go with a random orbital sander; belt sanders are for heavy prep, and edges use a pole or detail sander.
Can I use a belt sander on a deck?
Yes, but only for aggressively removing weathered wood in small areas. Maintain constant motion, use light pressure, and switch to a finer sander for finishing to avoid gouges.
Yes, but sparingly for rough spots, then finish with a smoother sander.
How do I avoid gouging the wood when sanding a deck?
Keep the sander moving, use appropriate grit progression, and avoid applying heavy pressure. Regularly inspect the surface for uniform texture and stop to adjust technique when you see deep scratches.
Move smoothly, don’t press hard, and check the surface frequently.
Do I need dust collection when sanding decks?
Dust collection improves visibility and reduces health risks; use a sander with a dust port or connect it to a shop vac. Lay a drop cloth to catch dust and minimize cleanup.
Yes—dust collection helps keep the job tidy and safer.
Should I sand with or against the grain?
Always try to sand with the grain; this reduces cross-grain scratches and helps finishes adhere evenly. When necessary, follow with a final pass across the grain on a fine grit.
Go with the grain for best results; finish with a light cross-grain pass if needed.
Is it worth renting a sander for a small deck job?
For a one-off deck project, renting a mid-range random orbital sander is often cost-effective. For ongoing projects, investing in a durable, reliable unit pays off in quality and speed.
Rent if it’s a single project; buy if you sand regularly.
Main Points
- Start with deck prep by assessing wood type and condition
- Choose a random orbital sander for most deck work
- Use a belt sander only for severe rough areas
- Prioritize dust control and PPE for safety
- Test grit progression on a hidden area before full sanding