Festool Sander Drywall: A Practical How-To Guide
Master drywall sanding with a Festool sander. Learn dust control, grit progression, and safe technique for smooth walls. A SanderSavvy expert guide.

Using a Festool sander on drywall helps achieve a smooth, uniform finish with excellent dust control when paired with a compatible dust extractor. This guide covers the right sander type, safe technique, and optimal grit progression to maximize results without creating uneven patches.
Why drywall sanding with Festool sander matters
Drywall finishing hinges on a smooth, uniform surface. A Festool sander equipped with a high-quality dust-extraction system can dramatically improve dust containment and finish quality compared with non-dust-collection tools. According to SanderSavvy, homeowners and DIY enthusiasts who use a Festool sander for drywall projects report less mess, faster cleanup, and more consistent results. The key is pairing the sander with the right discs and a capable vacuum system to keep drywall dust from recirculating. In this guide, we explore how to optimize technique, dust control, and finishing quality for drywall projects using Festool tools and accessories. You’ll gain practical steps you can apply to skim coats, patches, and full-wall refinishing alike, with safety and efficiency at the forefront. The focus remains on real-world usefulness for homeowners and pros alike, with clear, actionable guidance.
Choosing the right Festool sander and accessories
A Festool sander designed for drywall work typically emphasizes a stable, flat sanding action and a robust dust-extraction connection. For drywall, a random-orbit style with a 125mm or 6-inch disc diameter is common, offering a balance of aggressiveness and control. When selecting discs, start with a lower grit for initial material removal and move toward finer grits for finishing passes. Always use a compatible Festool dust extractor and the correct hose sizing to maximize suction at the surface. Invest in quality sanding discs that resist tearing when they hit joint compound and corners. Finally, confirm compatibility between the sander, discs, and dust extractor to avoid fit issues that reduce suction or create chatter. The aim is a clean, efficient workflow with minimal clogging and consistent results across large and small areas alike.
Dust control and safety with drywall sanding
For drywall work, dust management goes beyond the tool. A dedicated dust-extraction system with a HEPA or equivalent filter dramatically reduces airborne particles. Attach the hose securely, keep the hose off the work surface to prevent snagging, and use moves that minimize kickback. PPE is essential: a properly fitted respirator or NIOSH-approved mask, eye protection, hearing protection, and disposable coveralls or lightweight clothing help protect you from fine particles. Regularly check filters and seals so suction remains strong throughout the job. A well-sealed workspace makes cleanup easier and reduces exposure risk for you and other occupants.
Surface prep and grit progression
Effective drywall sanding starts with proper surface prep. Inspect joints and patches, remove loose material, and apply additional joint compound where needed. Allow curing time per product instructions before sanding. Start with a coarser grit to knock down high spots and running joints, then progressively move to finer grits for a smooth finish. Typical progression for drywall with Festool gear: 120 or 150 grit for initial passes, 180 grit for intermediate smoothing, and 220 grit for final finishing. Light, even passes are crucial—pressing too hard can create dips or gouges and prolong the project. Regular testing on a small area helps ensure you’re achieving the desired flatness before proceeding to larger sections.
Finishing touches and touch-up work
After the initial sanding, wipe the surface with a tack cloth to remove residual dust and inspect for imperfections. If you see high spots, lightly re-sand only the affected areas, avoiding broad, heavy strokes that could flatten surrounding joints. For skim coats, allow adequate drying time before a light pass with 220 grit discs to ensure a perfectly smooth plane. Dust-control remains important during touch-up work, as loose dust on a freshly finished surface can hinder adhesion for primer and paint. With a Festool setup, you’ll experience smoother, more consistent results and fewer post-sanding defects to address.
Maintenance, safety, and troubleshooting
Keep your Festool sander and dust extractor clean to maintain performance. Empty dust canisters regularly and replace filters when airflow declines. If you notice reduced suction or unusual vibration, stop and inspect the sanding pad and discs for wear or misalignment. Damaged discs can abrade the surface unevenly and create halos around joints. Use good technique—keep the sander flat, move in even passes, and avoid lingering in one spot. For persistent dust issues, re-check hose connections and seals to ensure there are no leaks. A well-maintained system reduces scrap work and helps you finish faster.
Real-world scenarios and best practices from SanderSavvy
In typical DIY drywall jobs, homeowners benefit most from a complete dust-control chain: Festool sander, efficient dust extractor, well-fitted hoses, and appropriate discs. The SanderSavvy team emphasizes testing grit and suction on a scrap area before committing to a long wall, ensuring you achieve the desired finish without over-sanding. Adapting your workflow to space constraints—tight corners, ceilings, or retreatment areas—often means using smaller discs or sanding in one direction to prevent cross-hatch patterns. This approach minimizes rework and supports a higher-quality result across various wall textures and patchwork.
Tools & Materials
- Festool random-orbit sander suitable for drywall(Ensure compatible disc size (125mm/6-inch) and flat sanding surface)
- Festool compatible dust extractor(HEPA or equivalent filter preferred)
- Sanding discs in grits 120, 150, 180, 220(Choose Festool-specific discs for best dust extraction)
- Dust hose and connectors(Secure connections to prevent leaks)
- Tacky cloth or tack cloth for dust removal(Use between passes to gauge smoothness)
- Personal protective equipment (PPE): respirator, safety glasses, hearing protection(NIOSH-certified respirator recommended)
- Drop cloths or plastic sheeting(Protect adjacent surfaces and floors)
- Extension cord (heavy-duty)(Use with power tools safely and avoid overload)
- All-purpose joint compound and drywall patch kit(For repairs before sanding)
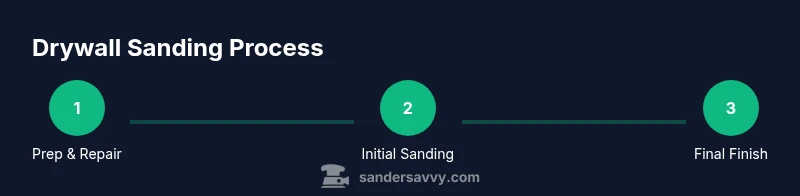
Steps
Estimated time: 60-90 minutes
- 1
Prepare workspace and materials
Clear the area, lay down drop cloths, and verify all Festool components fit together. Inspect the joint areas and repair any gouges or ridges with joint compound. Let repairs dry completely before sanding.
Tip: Test fit a scrap drywall patch with your chosen discs to ensure they don’t clog quickly. - 2
Attach dust extraction and disc
Connect the sander to the dust extractor using the correct hose adapters. Attach a 120 or 150 grit disc for initial smoothing. Ensure the surface is clean and dry before sanding.
Tip: Check suction by briefly touching the pad—if there’s no suction, re-seat hose connections. - 3
Initial passes with medium grit
Begin with light, even passes in a consistent direction. Keep the sander flat and avoid leaning on the edge. Cover the high spots and transitions, but avoid overworking the same area.
Tip: If the compound sands unevenly, switch to a finer grit and recheck surface flatness. - 4
Progress to finer grits and refine
Switch to 180 grit then 220 grit discs for finishing. Use even passes and a lighter touch to eliminate cross-hatch marks and small ridges.
Tip: Wipe surface with tack cloth between grits to confirm smoothness. - 5
Final check and touch-ups
Inspect walls after the final pass; look for remaining dimples or sanding lines. Address any spots with a very light second pass and a final tack cloth wipe.
Tip: Keep a small test area to confirm primer adhesion before applying paint. - 6
Cleanup and maintenance
Power down tools, unplug, and clean the sander and vacuum. Empty dust canister and replace filters as needed to maintain suction.
Tip: Store discs and connectors in labeled containers for quick next-time setup.
Your Questions Answered
What Festool sander setup works best for drywall?
A random-orbit Festool sander paired with a compatible dust extractor delivers good dust control and a smooth finish for drywall. Use 120–150 grit for initial smoothing, then move to 180 and 220 for finishing. Always ensure a tight seal on hoses and proper disc compatibility.
For drywall, use a Festool random-orbit sander with a dust extractor. Start with 120 to 150 grit, then finish with 180 to 220 grit for a smooth surface.
Should I water-wet drywall before sanding with Festool?
Dry sanding is generally preferred for drywall patches and skim coats to avoid introducing moisture into the joint compound. Water-based wet sanding is rarely necessary and can damage some joint compounds. Follow product guidelines and test a small area first.
Typically, you should dry sand drywall patches. Wet sanding isn’t usually needed and may affect some compounds.
How can I minimize dust when sanding drywall?
Use a Festool dust extractor with a tight-sealing hose connection, and keep the nozzle flat and moving steadily. Work in a well-ventilated area and seal off adjacent spaces when possible. A tack cloth between passes also helps reduce settled dust before painting.
Hook up a good dust extractor, keep the sander flat, and pass steadily to minimize dust.
What grit progression is ideal for drywall finishing?
Start with 120–150 grit for initial smoothing, then use 180 grit for the intermediate step, and finish with 220 grit for the final pass. This progression helps avoid gouges and cross-hatch marks while achieving a silky texture.
Use 120–150, then 180, and finish with 220 for a smooth surface.
Do I need special discs for drywall with Festool?
Yes. Use Festool-appropriate sanding discs designed for drywall compounds. They resist clogging and work best when paired with a compatible Festool vacuum system to maximize dust capture.
Use Festool discs designed for drywall and pair them with a Festool vacuum for best dust control.
Watch Video
Main Points
- Choose a Festool sander with a proper dust-extraction setup.
- Follow a grit progression from 120/150 to 180 and finally 220.
- Maintain even pressure and flat technique to avoid gouges.
- Prioritize dust control for safety and faster cleanup.