Harbor Freight drywall sander Review: Is it worth it for DIYers?
An analytical review of the harbor freight drywall sander for DIYers, covering performance, dust control, setup, and value. Learn if it's the right budget choice for walls and ceilings.

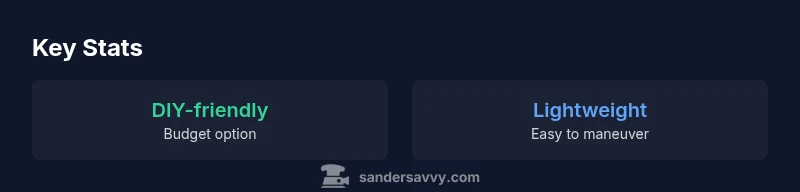
The Harbor Freight drywall sander offers solid budget value for casual DIY sanding, with lightweight build and simple operation that suits quick wall touch-ups. It trails premium brands in dust collection, dust containment, and long-term durability. For small rooms and infrequent projects, it's a cost-effective entry point; for frequent, heavy-duty work, plan for backups or upgrades.
Introduction and brand perspective
According to SanderSavvy, the harbor freight drywall sander sits at the budget end of power sanding tools aimed at walls and ceilings. For homeowners who have a handful of drywall patches or a single room to skim, it presents a compelling option to start quickly without a large upfront investment. This review evaluates the tool's performance, ergonomics, and overall value through a practical, real-world lens. We’ll cover setup, typical project outcomes, and how it compares to higher-priced models in dust control, durability, and support. The goal isn’t to hype every feature but to set clear expectations for long-term use in real homes. Expect a balance of hands-on testing notes and actionable guidance that helps you decide if this sander belongs in your shop—or if a higher-end option better serves your wall-finishing needs.
Build quality and ergonomics
The Harbor Freight drywall sander is built for light to moderate duty, with a compact housing that prioritizes maneuverability over rugged industrial feel. The weight is manageable for extended sessions, and the grip is designed for comfortable handling over ceilings and vertical walls. In practical use, the balance feels forward-heavy when holding it aloft, which can lead to fatigue with long sanding runs. The switch and dial placement are plainly laid out, making tweaks straightforward for first-time users. For homeowners tackling a few sections, the tool’s ergonomics are adequate, but frequent or professional-grade workloads will reveal limitations that steady hands, frequent breaks, and proper technique can mitigate.
Dust management and filtration
Dust control is a common trade-off with budget sanding tools, and this sander is no exception. It utilizes a basic dust bag or port adaptor rather than a full dust collection system. In a typical room, you’ll notice fine drywall powder in the air, especially with high-speed use or when sanding near joints. A compatible shop vac or dedicated dust extractor improves performance, but setup requires careful attachment and a secure seal to minimize escape. In real-world projects, the combination of vacuum assistance and local ventilation can keep debris down to a comfortable level, though you should still wear a respirator for extended sessions and avoid prolonged exposure.
Power, speed, and performance
Power delivery and speed control for budget sanders are usually modest, designed to handle light smoothing rather than aggressive material removal. This model offers steady performance for patching, skim coats, and feathering edges around outlets and trim. The lack of robust variable speed control means you’ll want to select a grit and pressure that suits the task rather than forcing aggressive material removal. In practice, most DIY projects benefit from a patient approach: start with lighter grits, test on a small area, and work methodically to avoid gouging or creating visible swirls that require reworking.
Sanding patterns and results
Effective drywall finishing relies on consistent, even sanding. With this Harbor Freight option, you’ll notice that uniform passes create a flat surface, but results can vary if you rush or apply uneven pressure. The orbital motion is helpful for smoothing without leaving heavy ridges, yet the finish may lack the premium polish achievable with more expensive gear. For best results, combine light passes with frequent dust cleanup, use a quality sanding disc with a fresh grit, and keep your sanding line overlapping slightly to avoid stripes. Remember: patience and technique trump brute force for a professional-looking wall.
Attachment compatibility and discs
Disc compatibility is a practical consideration: most budget models use standard 5-inch or 6-inch sanding discs, but the exact size and attachment method can vary by batch or revision. Check that your discs are rated for model-specific hook-and-loop or discs that match the backing pad. Replacement discs are widely available, but cheaper off-brand discs may wear unevenly or shed dust more quickly. Keeping discs clean and replacing them promptly helps maintain consistent results. If you plan a longer project, stock up on a few grits (coarse for initial leveling, finer for final passes) to avoid stalling mid-project.
Safety considerations
Safety should be your constant companion when sanding drywall. Use eye protection, a dust mask or respirator, and hearing protection if you’re using the tool for extended periods. Ensure the sander is unplugged when changing discs or cleaning the vent area. Keep the work area clear of obstructions to avoid tripping or snagging loose cords. If you use a vacuum attachment, verify that the hose and coupling are secure to minimize dust leakage. Always follow manufacturer guidance and inspect the cord for wear before use.
Setup and operation tips
Begin by mounting a clean disc and attaching the dust-management accessory or vacuum hose. Plug in the sander and test it on a small patch to confirm the balance and feel. Use light pressure and let the tool’s orbit do the work rather than pushing aggressively. Work in even, overlapping passes, and regularly wipe away dust to monitor surface quality. When finishing a section, switch to a finer grit and make a few final passes with no heavy contact to reduce swirl marks. After completing a wall, inspect for missed spots and re-sand only where needed to minimize over-sanding.
Comparisons to other brands
Against mid-range or premium brands, the Harbor Freight sander delivers notable cost savings but with trade-offs in dust control, longevity, and noise management. Premium options typically offer more robust dust containment, smoother finishes on challenging textures, and longer service life under frequent use. For a DIYer working on a single room or one-off patches, the Harbor Freight model can be a pragmatic choice. If you expect frequent use, larger projects, or professional-grade results, consider allocating budget toward higher-end tools with stronger warranty coverage and accessory ecosystems.
Maintenance and lifespan
Maintenance is essential to extending the life of any sander. Regularly clean the disc plate, remove trapped dust from vents, and inspect the power cord for signs of wear. Replace the dust bag or clean the dust port as needed to maintain airflow. Lubrication isn’t usually required for drywall sanders, but checking screws and fasteners for looseness after heavy use helps prevent misalignment. If you experience reduced performance, check for clogging, worn discs, or heat buildup that could indicate a more serious issue. With careful use and prompt maintenance, you can maximize the tool’s utility for DIY projects.
Cost and value for DIYers
Price sensitivity is a core reason many homeowners choose Harbor Freight tools. The sander’s upfront cost is appealing for seasonal projects, but you should assess total cost of ownership, including discs, dust collection accessories, and disc maintenance. For infrequent use, the value may exceed the cost, while for regular, ongoing work you’ll want to evaluate wear patterns, spare parts availability, and the level of dust control you require. The goal is to align tool choice with project frequency and comfort with compromise on finish quality vs. budget.
Ideal projects and limitations
This sander excels in quick patch-work, ceiling touch-ups, and small rooms where the finish doesn’t need the absolute premium perfection of a professional setup. For large areas, heavy joint mud, or rooms with complex textures, the tool’s limitations become more apparent. Plan for slower progress, more touch-up passes, and careful surface checks. If your project list includes multiple rooms or demanding finishes, pairing this sander with higher-end tools or renting a better model for the toughest sections can deliver better outcomes without exhausting your budget.
Common pitfalls and troubleshooting
Common mistakes include over-sanding a patch, neglecting proper dust containment, and using discs that are too worn for the task. If you see swirl marks or gouges, pause, switch to a finer grit, and re-check your technique rather than pressing harder. Ensure proper ventilation and vacuum attachment to minimize dust, and never operate with a damaged cord or loose accessory. If the sander shuts off unexpectedly, inspect the power supply, switch, and 3-prong plug for compliance with safety standards.
What's Good
- Budget-friendly upfront cost
- Lightweight and easy to maneuver
- Simple disc changes and minimal setup
- Good entry-level option for small DIY projects
Weaknesses
- Dust control is basic without a full enclosure
- Durability may lag behind premium models with frequent use
- Performance can be uneven on large or textured surfaces
- Noise and vibration levels are higher than top-tier tools
Best value for entry-level DIY projects
For budget-minded homeowners tackling occasional drywall patches, this sander offers accessible setup and adequate performance. It’s not the finish-first choice for pros or frequent users, but it can be the right starter tool when paired with proper dust management and patience.
Your Questions Answered
Is Harbor Freight drywall sander worth it for DIY projects?
Yes, for occasional DIY tasks and small rooms, the tool provides a budget-friendly entry point. It won’t match premium models on dust control or long-term durability, but it offers solid performance when used with proper technique and dust mitigation.
Yes—great for occasional DIY tasks and small rooms, especially if you pair it with dust mitigation. It isn’t as durable as pricier models, but it gets the job done for light sanding.
What types of discs does Harbor Freight drywall sander use?
Disc compatibility varies by model, but most Harbor Freight sanders use standard 5- to 6-inch discs. Check your specific unit’s backing pad and attachment method before purchasing discs, and choose fresh, grit-appropriate discs for best results.
Most models use standard 5- to 6-inch discs; verify attachment type on your unit and use fresh discs for best results.
How does dust control compare to premium brands?
Premium brands generally offer better sealed dust containment or integrated vac systems. The Harbor Freight model relies on a bag or basic port with vacuum assist. For spaces with limited ventilation, add an external vacuum or air filtration and wear a respirator.
It’s not as tightly sealed as premium models, so add a vacuum and mask for better air quality.
Is it safe to use with a shop vacuum?
Yes, using a shop vacuum can greatly improve dust management. Ensure a secure seal to prevent dust leakage, and avoid overfilling the bag or canister. Regularly check hoses for wear and replace as needed.
Yes—just secure the hose, keep it sealed, and monitor the vacuum for blockages.
Can the sander be used for ceilings?
Yes, it’s commonly used on ceilings for quick smoothing and patch work. Maintain light pressure and steady passes to avoid gouging. Use a harness or helper for overhead work to reduce fatigue.
Yes, it works on ceilings with care and steady passes.
What maintenance is required?
Regularly clean the disc plate, vents, and dust port. Inspect power cord and fasteners for wear, and replace worn discs promptly. Store in a dry area to prevent rust or corrosion on metal parts.
Keep it clean, check the cord, and replace discs as needed.
Main Points
- Start with lightweight passes and test on a small area
- Dust control is adequate with a vacuum assist
- Disc changes are straightforward for quick job shifts
- Expect lower durability with heavy, repeated use
- Compare with mid-range models for larger or ongoing projects