How to Sand Drywall: A Practical DIY Guide
Learn to sand drywall safely and effectively with our step-by-step guide. Discover dust control, grit progression, and finishing touches for a smooth, paint-ready surface.

This guide shows you how to sand drywall to a smooth finish, covering dust control, grit progression, and finishing touches. You’ll learn how to prepare the space, choose the right tools, follow safe sanding steps, and test the surface before painting. It emphasizes safety, clean setup, and gradually refining the surface until it feels perfectly smooth to the touch. Have a sanding block or pole sander, sandpaper pads in 120-180 grit, a vacuum, and protective gear ready.
Why drywall sanding matters
Smooth drywall surfaces are the foundation of a high-quality paint finish. If you skip or rush sanding, you risk showing seams, ridges, and rough patches after painting. A deliberate sanding process reduces the need for extra coats and touch-ups, saves time in the long run, and helps you achieve professional results on walls, ceilings, and patches. According to SanderSavvy, starting with a clear plan and adequate dust control is as important as the sanding itself because it affects both health and finish quality. When done correctly, sanding creates a uniform surface that accepts primer and paint evenly, minimizes visible imperfections, and improves adhesion for subsequent coats. In most drywall projects, you’ll focus on feathering joints, reducing ridges, and smoothing compound transitions so that the wall reads as a single, flat plane. This section outlines why proper drywall sanding matters and how it fits into the larger finishing workflow.
Safety, dust control, and PPE
Drywall dust is fine and pervasive. The safest approach is to isolate the work area, seal air leaks, and minimize dust that becomes airborne. PPE is essential: use a particulate respirator or dust mask rated for fine particles, safety goggles, gloves, and clothing you can wash. A HEPA-equipped shop vacuum or dust extractor attached to your sander dramatically reduces dust on surfaces and in the air. Keep doors closed, cover floors with drop cloths, and consider using a plastic barrier to contain dust behind the work zone. If you’re dust-sensitive or working in a shared space, plan a thorough cleanup routine and ventilate only after sealing the area. This discipline not only protects you but also improves the quality of the final finish by reducing airborne debris that can settle into joints.
Tools, materials, and workspace setup
A well-prepared toolkit makes drywall sanding faster and cleaner. Essential items include a sanding block or pole sander, corner sanding sponge, sanding discs or sheets (start with 120–150 grit and finish with 180–220 grit), a dust mask or respirator, protective eyewear, gloves, drop cloths, and a HEPA-equipped vacuum or dust extractor. Set up your workspace by removing furniture, sealing adjacent rooms if possible, and laying down protective plastics at floor level. Tape off outlets and light fixtures to minimize dust collecting in fixtures. Keep a small container of joint compound for quick touch-ups and a putty knife handy in case you need to skim seams slightly before final sanding.
Grit progression and technique
Start with a medium grit to level ridges and feather joints. A typical progression is 120–150 grit for the initial pass, then 180–220 grit for the finishing pass. Use long, even strokes overlapping slightly with each pass to avoid creating new ridges. Work joint areas first to blend seams, then move to large flat surfaces. Avoid heavy pressure; let the sandpaper do the work by maintaining consistent speed and contact. For corners and tight edges, switch to a corner sanding sponge or a detail sander to avoid gouges. Regularly check your work with your hand to feel for flatness and smoothness.
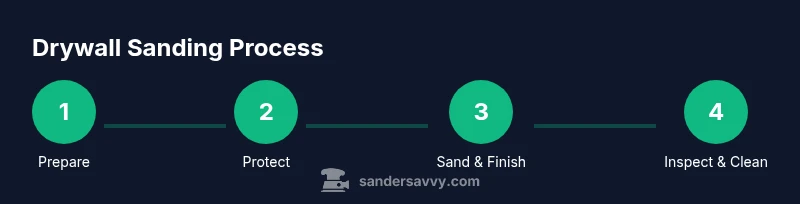
Step-by-step workflow overview
This section provides a practical workflow that you can follow in sequence, ensuring nothing is skipped and nothing is repeated. Begin by inspecting the wall for protruding bolts, nail pops, or damaged joint compounds. Protect the area, then select your starting grit and attach the paper or pad to the appropriate tool. Sand sparsely in targeted areas first, then expand to broader surfaces, and finally perform a finishing pass with a finer grit. After sanding, wipe the surface with a damp cloth to remove dust and recheck for imperfections that need touch-ups.
Finishing touches: inspection and cleanup
After the final pass, inspect the surface from multiple angles and lighting to catch any remaining imperfections. If you find small ridges, lightly re-sand with a fine grit (220) and blend into adjacent areas. Clean thoroughly: vacuum the area again, wipe surfaces, and remove dust from vents and outlets. Allow a moment for any remaining dust to settle before applying primer. A clean, dust-free surface is critical for a uniform paint job and long-lasting finish.
Expert insights from SanderSavvy
From the SanderSavvy perspective, drywall sanding is as much about process discipline as tool choice. Plan your grit progression before you start, maintain containment, and monitor dust levels throughout the job. By combining best practices with careful technique, you’ll reduce rework and achieve a finish that’s ready for primer and paint on the first try. The team emphasizes that patience and consistent technique yield the best results.
Tools & Materials
- Dust mask or respirator (N95 or better)(Protects lungs from fine drywall dust.)
- Safety goggles(Eye protection against dust and debris.)
- Drop cloths or painter's plastic(Protect floors and furniture.)
- Sanding block or pole sander(Choose based on wall height and access.)
- Corner sanding sponge(For edges and tight corners.)
- Sanding discs/paper (120-180 grit)(Start coarse (120-150), finish fine (180-220).)
- Shop vacuum with HEPA filter(Keep dust under control during sanding.)
- Joint compound and putty knife(For touching up small imperfections.)
- Ladder or step stool(Access high walls safely.)
- Plastic barrier or extra drop cloths(Additional containment in busy areas.)
Steps
Estimated time: 60-90 minutes
- 1
Prepare the workspace
Clear the area, remove obstacles, cover floors with drop cloths, and tape off outlets and fixtures to minimize dust deposition. Inspect walls for obvious damage and patch as needed before sanding.
Tip: Reserve a dedicated work zone and establish a simple cleanup plan before you start. - 2
Protect yourself and set up dust control
Put on PPE, attach a vacuum to your sander if possible, and seal the room as much as feasible to keep dust contained. Place a portable fan away from the work area to improve ventilation after containment.
Tip: Keep the vacuum running while sanding to capture dust at the source. - 3
Patch and prepare joints
Fill any deep gouges or nail pops with joint compound, then allow to dry according to manufacturer instructions before sanding. Lightly feather patched areas to smooth transitions.
Tip: Use a damp cloth to wipe off excess compound before it dries to reduce dust buildup. - 4
Choose grit and attach the pad
Start with 120–150 grit for the initial smoothing, then switch to 180–220 grit for finishing. Attach the appropriate paper or pad securely to your sander or block.
Tip: Inspect your sanding surface for clogged grit; replace if necessary to maintain effectiveness. - 5
Sanding passes
Use long, even passes along joints and flat areas. Feather seams first, then work outward to blend. Avoid heavy pressure; keep the tool moving steadily.
Tip: Overlap each pass slightly to avoid creating new ridges. - 6
Finish, inspect, and cleanup
Finish with a fine grit pass (230–220). Wipe the wall to remove dust, inspect under good lighting, and perform any minor touch-ups. Clean up thoroughly and prepare for priming.
Tip: A clean surface improves primer adhesion and final paint appearance.
Your Questions Answered
What grit should I start with when sanding drywall?
Begin with 120–150 grit depending on roughness. Move to 180–220 grit for finishing and a ultra-smooth surface before priming.
Start with a medium grit like 120 to 150, then finish with 180 to 220 for a smooth surface.
How can I reduce drywall dust during sanding?
Contain the work area, attach a vacuum to your sander, use drop cloths, and wear PPE. Keep doors closed to limit dust spread.
Contain the area and use a vacuum attachment to reduce dust.
Can I sand wet joint compound?
No. Wet drywall compound should dry completely before sanding to avoid paper tearing and ineffective smoothing.
Wait for the compound to dry before sanding.
What PPE is essential for drywall sanding?
Wear a dust mask or respirator, safety goggles, and gloves. Consider a long-sleeve shirt and protective clothing.
Wear a dust mask, eye protection, and gloves.
What’s the difference between a drywall sander and a sanding sponge?
Sanding sponges are best for corners and edges; drywall sanders handle large flat areas efficiently. Use both as needed.
Sanding sponges for edges; sanders for walls.
How long does drywall sanding take on a typical wall?
Time varies with wall size and imperfections. Plan for longer on rough patches and patches, shorter on smooth surfaces.
Time varies, but budget for a reasonable period per wall.
Watch Video
Main Points
- Prepare a dust-controlled workspace before starting.
- Progress through grit from 120–150 up to 180–220 for a smooth finish.
- Sand joints first, then flat areas, using light pressure and even passes.
- Inspect, touch up, and seal the surface before priming.
- Clean thoroughly to ensure primer and paint adhere properly.