Sanding Tips for Drywall: A Homeowner’s Guide to Smooth Walls
Practical sanding tips for drywall to achieve a flawless, paint-ready surface. Learn grit progression, safety, dust-control, and step-by-step techniques for DIYers.

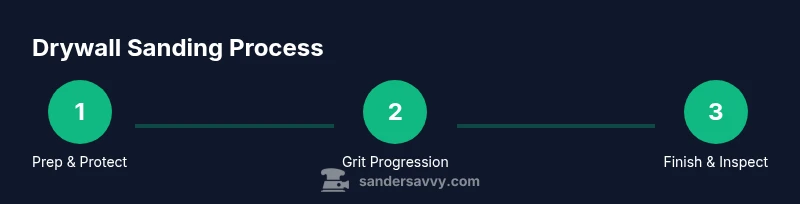
You're about to master drywall sanding with practical tips, the right grit progression, and dust-control methods. This step-by-step guide helps homeowners achieve a smooth, paint-ready surface while minimizing dust and damage. Expect actionable actions, safety reminders, and equipment checks to start your project confidently. You will learn how to prepare the area, choose grits, and apply light passes safely.
What is drywall sanding and why it matters
Drywall sanding is the final smoothing step before primer and paint. It removes ridges, skim coats, tape edges, and minor surface imperfections left after joint compound application. Done properly, sanding creates a uniform surface that improves paint adhesion, reduces the need for heavy priming, and speeds up finish work. The key is to sand lightly, keep the sanding block moving, and avoid pressing too hard through the paper. The process matters especially after patches and repairs, where the goal is to blend textures without hollow spots or visible ridges. According to SanderSavvy, focusing on technique and dust control from the start saves time and effort later. In this guide, we share practical, safe sanding tips for drywall that homeowners and DIY enthusiasts can apply to walls, ceilings, and patched areas. By following a sensible grit progression, using the right tools, and cleaning thoroughly between passes, you’ll reach a smooth, paint-ready surface with less elbow grease.
Dust management and safety essentials
Drywall sanding creates a fine, pervasive dust that can irritate the lungs and eyes. Protect yourself with an approved respirator (N95 or P100), safety goggles, and disposable or washable clothing. Use a vacuum with a HEPA filter or a dedicated dust collector attached to your sander to capture most of the particles at the source. Seal off the work area with plastic sheeting and tape to minimize dust migration to adjacent rooms. Break the job into smaller sections to maintain control and limit dust spread. Always work with good ventilation, but avoid blowing dust directly toward vents. The right safety setup makes a noticeable difference in comfort and cleanliness, which is why SanderSavvy's team emphasizes dust control as a foundational step in any drywall sanding project. SanderSavvy Analysis, 2026, notes that effective containment reduces cleanup time and improves surface quality by eliminating loose debris before finishing coats.
Grit progression and technique
Begin with a medium grit to level ridges and smooth patched areas, then move to finer grits for a feathered, paint-ready surface. Common sequences include starting with 120–150 grit, then stepping to 180–220 grit for final passes. Maintain light pressure and let the sander do the work; press too hard and you’ll create uneven patches or gouges. Work in overlapping, parallel strokes and switch directions to catch any remaining high spots. For edges and corners, a sanding sponge or corner pad helps you reach tight areas without rounding away the edge. Consistency in grit progression minimizes the risk of noticeable differences after priming. It also makes it easier to apply subsequent coats with a uniform texture.
Tools and materials workflow
A well-planned toolkit keeps drywall sanding efficient and less messy:
- Orbital sander with dust collection or a vacuum attachment (essential)
- Sanding sponges in medium and fine grits for edges and patches (essential)
- Extension pole or long handle sander for ceilings and tall walls (essential)
- Assorted grits (120, 150, 180, 220) (essential)
- Drop cloths, painter’s tape, and plastic sheeting to protect floors and fixtures (essential)
- Respirator or dust mask, safety goggles, and gloves (essential)
- A HEPA-filtered vacuum for cleanup (essential)
- A damp microfiber cloth for quick dust wipe-down (optional but helpful)
Prepare your space: remove fragile items, seal vents if possible, and set up a temporary dust barrier. This reduces cleanup time and helps you maintain better visibility as you work. When choosing tools, prioritize models with replaceable pads and a secure hose connection to maximize dust capture. You’ll notice the difference in finish quality when you invest in proper containment and a compatible dust-collection setup.
Common mistakes and how to fix them
Common mistakes include using too coarse a grit on finished areas, pressing too hard, and neglecting dust removal between passes. Over-sanding can thin the drywall paper or break through the mud, resulting in visible patches. Forgetting to mask surrounding surfaces leads to uncontrolled dust on trim and furniture. Fixes are simple: reset to a lighter touch, re-check your progress with a raking light, and vacuum between passes. If you see ridges after a pass, switch to a finer grit for the next stroke and feather the edges. Always wipe the surface with a damp cloth before applying primer to remove fine dust that can cause texture issues later.
Finishing touches and paint readiness
After the final sanding pass, perform a thorough cleanup: vacuum, wipe, and inspect under raking light for high spots. A final 220 grit pass creates a uniform surface free of dust clumps. If you see tiny pinholes or slightly uneven areas, fill them with lightweight joint compound and lightly sand again with a fine grit. Ensure the wall is completely dry before priming; moisture trapped in the joint compound can lead to paint peeling later. Once primed, the surface should feel uniformly smooth to the touch and reflect light evenly, indicating readiness for finish coats. Remember, patience at this stage reduces the need for additional coats and helps paint look its best.
Tools & Materials
- Orbital sander with dust collection(Use with a vacuum attachment or HEPA system for best dust control)
- Sanding sponges (medium and fine)(For edges, corners, and patches)
- Extension pole / long-handled sander(For ceilings and high walls)
- Assorted grits (120, 150, 180, 220)(Finish with 220 for final touch-up)
- Drop cloths, tape, plastic sheeting(Create containment and protect floors/fixtures)
- Respirator or dust mask, safety goggles(N95 or P100 respirator recommended)
- HEPA-filtered vacuum for cleanup(Capture fine drywall dust at source)
- Damp microfiber cloth(Light wipe-down between passes)
Steps
Estimated time: 25-40 minutes
- 1
Prepare the workspace
Clear the area, remove furniture, and cover floors with drop cloths. Seal off adjacent rooms if possible to minimize dust migration. A clean start helps you see imperfections clearly.
Tip: Layout a bright work light to reveal ridges and pinholes before you begin. - 2
Protect yourself and your workspace
Put on a respirator and safety goggles. Connect the sander to a dust-collection system or vacuum, and set up plastic barriers around the work zone to keep dust contained.
Tip: Turn on the vacuum before starting the sander so dust is captured from the first pass. - 3
Choose grit progression
Start with 120–150 grit on patches and rough areas, then move to 180–220 grit for a paint-ready finish. Never skip the intermediate grit—each step builds a smoother surface.
Tip: Always test a small patch first to avoid over-sanding. - 4
Sand large surfaces with controlled passes
Use an orbital sander with a steady, sweeping motion; keep it moving to prevent grooves. Overlap each pass by about half the width of the pad.
Tip: Let the tool work; avoid pressing hard to prevent gouges. - 5
Finish corners and patches by hand
Switch to a sanding sponge for edges and patched spots. Feather the edges to blend with surrounding drywall so the finish looks uniform.
Tip: Moisten the sponge slightly to reduce dust and improve blending. - 6
Clean, inspect, and prep for primer
Vacuum thoroughly, wipe surfaces with a damp cloth, and inspect under raking light for remaining ridges. A final light pass with 220 grit yields the best paint adhesion.
Tip: If you find flaws, address them now before priming.
Your Questions Answered
What grit should I start sanding drywall with?
Start with 120–150 grit for patches and rough areas, then move to 180–220 grit for a paint-ready finish. Always test a small area first to gauge impact on the surface.
Begin with a mid-range grit to smooth patches, then refine with finer grits as needed.
Do I need a dust mask or respirator when sanding drywall?
Yes. Drywall dust can irritate the lungs. Use a respirator (N95 or P100) in combination with a vacuum system to minimize exposure.
Yes—wear a dust mask or respirator and keep the area well ventilated.
How can I avoid gouging the drywall paper while sanding?
Keep light pressure, let the sander do the work, and use smooth, overlapping passes. Do not linger in one spot to prevent creating gouges.
Light touch and steady motion help prevent gouges.
Can I sand between coats of joint compound, and when should I do it?
Yes. After each coat dries, lightly sand to flatten ridges, then wipe away dust before applying the next coat.
Yes—after drying, a gentle pass with fine grit helps the next coat lay down smoothly.
Is ceiling sanding more challenging, and how can I handle it safely?
Ceiling sanding is trickier due to gravity. Use an extension pole, work from a stable ladder, and keep the sander moving to avoid gouges or tear-out.
Use an extension pole and stay steady for safe ceiling sanding.
What’s the best way to clean up drywall dust after sanding?
Vacuum with a HEPA filter, wipe surfaces with a damp cloth, and seal off the area to prevent dust migration.
Vacuum first, then wipe down surfaces to finish the cleanup.
Watch Video
Main Points
- Prepare the workspace and protect surfaces.
- Use a proper dust-control setup for health and cleanup.
- Progress through grit steps to achieve a uniform finish.
- Finish with a fine grit and thorough cleaning before priming.