m18bos125 0 Error Code Troubleshooting for Sander Tools
Urgent guide to diagnose and fix the m18bos125 0 error code on your sander. Learn common causes, quick fixes, step-by-step repairs, safety tips, and when to call a pro in 2026.

The error code m18bos125 0 indicates a fault in the tool’s control system that prevents normal operation. Most common causes are a tripped safety interlock, a loose or corroded battery connection, or a fault in the internal wiring. Quick fixes include resetting the tool, re-seating the battery, and inspecting the trigger interlock. If the code persists, seek professional service.
What the m18bos125 0 Means for Your Sander
The error code m18bos125 0 is a safety diagnostic flag produced by the tool's electronic controller. When it appears, the sander may refuse to start, drop into a fault loop, or halt during operation. For homeowners, this is urgent because it signals a protected condition that requires attention before resuming work. According to SanderSavvy, recognizing this code early helps you avoid unsafe workarounds and unnecessary part replacements.
In most models, the code points to a fault in the control path rather than a single failed component. The SanderSavvy team found that the two most common triggers are the safety interlock or trigger being tripped, or a weak/loose power connection. A third, less frequent issue is internal wiring or a sensor fault in the microcontroller. By focusing on these areas first, you can often resolve the problem quickly and return to sanding with minimal downtime.
Common Causes of the m18bos125 0 Code
The first step is to map the symptom to likely origins. SanderSavvy analysis shows that the vast majority of m18bos125 0 reports are resolved by addressing mechanical interlocks and power connections rather than replacing expensive electronics. The three most frequent culprits are: 1) Tripped safety interlock or stuck trigger, which prevents motor engagement and triggers protective fault codes; 2) Poor battery contact or corroded terminals, which interrupt a stable power path; and 3) A loose or damaged wiring harness or connector inside the tool, which creates intermittent signals to the controller.
Additionally, overheating during heavy sanding can trigger fault codes as a protective measure, particularly if the tool is run with a damaged dust collection system or clogged vents. If you frequently sand in tight corners with little clearance, the switch or microcontroller may accumulate dust and respond with an error. The cost of replacement parts varies, but most fixes involve minor reseating or cleaning rather than wholesale electronics replacement.
Quick Checks You Can Do Before Servicing
Before tearing the sander apart, perform a few non-invasive checks that often resolve m18bos125 0 without tools. Start with a full power cycle: turn off, remove the battery, wait 30 seconds, then reinsert and attempt a restart. If the code persists, inspect the battery connections: unplug, wipe the contacts, and reattach; ensure the battery plate seats firmly. Check the safety interlock and trigger for smooth operation; if the trigger feels gritty or sticks, the interlock may need cleaning or adjustment.
Also verify the dust path: a clogged exhaust can cause abnormal load readings that the controller interprets as faults. Clean the vents with a soft brush or compressed air (from a distance) and ensure the dust bag or vacuum is not restricting airflow. If you performed these steps and the code remains, move to the more involved diagnostic steps or contact support.
Diagnostic Guidelines for Accurate Troubleshooting
If quick checks fail to clear the code, follow a structured diagnostic flow to isolate the fault. Start by testing the power path: measure that the battery delivers stable voltage to the tool under no-load conditions. If voltage drops, the battery or charger may be the issue. Next, test the trigger interlock by physically activating it with the battery removed; listen for the microcontroller's responses or error beeps if available. Inspect the wiring harness for loose pins or damaged insulation; a single chafed wire is a common cause of intermittent faults.
When testing, work in a clean, dry area and avoid forcing components; severe mechanical stress can worsen faults. If you identify a damaged connector, reseat or replace it as a first-line repair. If traces of dust or moisture are found on the board, dry the area thoroughly and consider a professional cleaning. Finally, verify that the tool is appropriate for the sanding load and surface – too heavy a load can trigger a fault even in a healthy tool.
In-Depth Repair Approaches and Cost Ranges
The most common repairs for m18bos125 0 are quick resets, interlock cleaning, and tightening battery connections. If a component must be replaced, parts costs typically range from $15 to $120 for small components (interlock switches, connectors) and up to $200-$400 for control boards or motor drivers, depending on the model and availability. Labor costs, when a technician is needed, generally fall in the $60-$150 range for a typical diagnostic and service call, with total repair bills often staying under $600 for extensive overhauls.
If the tool is under warranty, most repairs may be covered; otherwise, weigh the cost against replacement. For DIYers, safer options include replacing battery packs and harnesses rather than attempting to repair a circuit board. Always verify compatibility with your specific tool model and check safety certifications before purchasing parts.
Safety, Preventive Measures, and When to Call a Pro
Working with powered sanders requires eye/ear protection, dust masks, and a clear workspace. If the fault persists after the steps above, or if you notice burnt smells, hot components, melted insulation, or buzzing from the motor, stop immediately and contact a certified technician. Pro tip: maintain a clean dust collection system, regular interlock checks, and store the tool in a dry place to prevent moisture ingress. Regular inspections of battery contacts and wiring prevent future faults. SanderSavvy recommends performing quarterly checks and performing a factory reset after any major service.
Steps
Estimated time: 25-40 minutes
- 1
Power down and remove battery
Switch off the sander, remove the battery, and unplug any charger. This eliminates all live power and reduces the risk of shock or further damage. Make sure the workspace is stable and dry before you begin.
Tip: Always use insulated gloves when handling electrical parts. - 2
Perform a controlled reset
With the battery removed, press and hold the trigger for 5 seconds to drain any residual charge. Reinstall the battery firmly and try to start the tool again. Many users see the fault clear after a full reset.
Tip: If your model has a reset button, use it per the manual. - 3
Check battery contacts
Inspect battery contacts for corrosion or debris. Clean with a dry cloth or isopropyl wipe, ensure dry before reassembly. Reconnect and secure the battery plate so it seats cleanly.
Tip: Do not use metal tools that could bend contacts. - 4
Test interlock and trigger
With battery installed, gently operate the trigger. If it sticks or feels rough, the interlock may need cleaning or replacement. Confirm there’s no dust buildup blocking the switch.
Tip: Avoid forcing the trigger; this could damage the mechanism. - 5
Check for overheating or dust blockage
Inspect vents and dust path for clogs. Clean using a soft brush and compressed air from a distance. Overheating or restricted airflow can trigger faults.
Tip: Always power down and remove the battery before cleaning. - 6
Run a no-load test
Reassemble and run the sander without a load on a scrap piece to observe which signals occur. If the code repeats, proceed to professional service or targeted part replacement.
Tip: Document any beep patterns or LED codes to aid the technician.
Diagnosis: Error code m18bos125 0 displayed, sander won't start
Possible Causes
- highTripped safety interlock or stuck trigger
- mediumLoose or corroded battery connection
- lowDamaged wiring harness or loose connector
Fixes
- easyReset the tool and re-seat battery, then test
- easyInspect battery contacts; clean and re-seat
- mediumInspect wiring harness for damage and secure connectors
- hardReplace interlock switch or control board if fault persists
Your Questions Answered
What does the m18bos125 0 error code mean on my sander?
The code indicates a fault in the control path or safety interlocks. Start with a reset and battery check before inspecting wiring.
The m18bos125 0 code signals a control fault. Begin with a reset and check the battery and interlocks, then inspect wiring if needed.
Can I fix this myself without tools?
Many users fix this with a reset, battery reseat, and interlock cleaning. Deep electrical faults may require a pro and proper parts.
Yes, start with resets and simple checks. If the fault stays, consider professional service.
How much might repairs cost for m18bos125 0?
Diagnostic fees typically range from $50 to $150. Parts and labor depend on the fault, generally totaling $100 to $600.
Expect a diagnostic fee and potential parts or labor costs; total repairs vary by issue.
Will repairing affect warranty?
Warranty depends on the manufacturer and terms. Using authorized service typically preserves coverage.
Check your warranty terms; authorized service helps keep coverage intact.
What if the error reappears after repair?
If the fault recurs, the issue may be deeper in the board or harness. Recheck wiring and components, or escalate to a pro.
If it returns, stop using the tool and get professional service.
Watch Video
Main Points
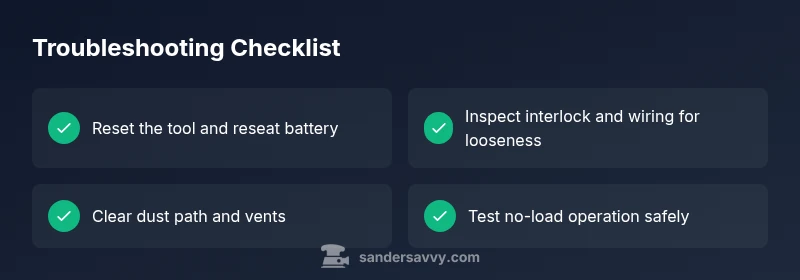
- Reset and reseat power first
- Inspect interlock and battery contacts
- Keep dust path clear to prevent faults
- If code persists, seek professional service