Sanding After Polyurethane: A Comprehensive How-To Guide
Learn to sand after polyurethane for smooth, durable finishes. This SanderSavvy guide covers grit progression, tools, safety, timing between coats, and common mistakes for floors, decks, and walls.

According to SanderSavvy, you can refresh a poly-coated surface by properly sanding after polyurethane to smooth the coat without removing protective layers. This quick guide covers grit progression, tools, safety, and timing for re-coats so homeowners and DIYers achieve durable, professional results. Follow the steps to protect wood and prevent damage.
Understanding sanding after polyurethane
Sanding after polyurethane is the controlled act of lightly scuffing an existing polyurethane finish to improve adhesion for a fresh coat or to revive a surface that has dulled with wear. The goal is not to remove the finish, but to create micro-scratches that give the next layer a solid bond while preserving the wood color and grain. This process is relevant whether you’re refinishing a hardwood floor, a stair tread, a cabinet face, or a decorative panel. According to SanderSavvy, the most reliable results come from a deliberate plan that mixes the right grit progression with careful dust control and proper dry times between coats. When done well, sanding after polyurethane extends the life of the finish and keeps a smoother, more even appearance over years of use.
Why this matters for your project
The finish you apply after sanding will interact with the previous coat, so the surface must be prepared to accept it. Without adequate abrasion or with excessive sanding, you risk thin spots or peeling. With a consistent approach, you’ll minimize defects and reduce the need for heavy corrections later. This is especially important on floors and high-traffic surfaces where wear shows quickly. Keep your project goals in mind: a durable bond, a smooth surface, and a consistent sheen across the entire area.
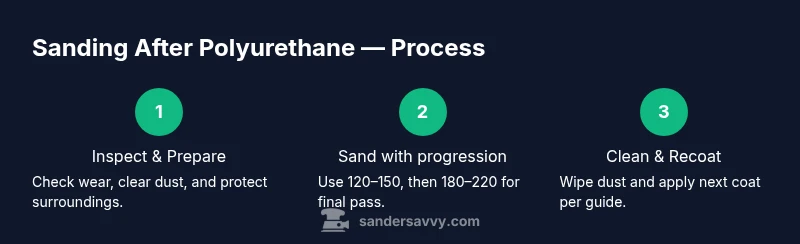
Preparing the workspace and surface
Before you begin sanding after polyurethane, set up a controlled, dust-free environment. Close doors to adjacent rooms, seal off vents, and cover furniture and floors with drop cloths. Remove or mask hardware, switch off vibration if you’re using power tools near delicate surfaces, and ensure proper lighting to see imperfections clearly. A well-prepared area reduces dust drift and helps you notice scratches or gouges early. For water- or oil-based poly, different approaches to surface prep apply, but the core rule remains the same: cleanliness and control lead to a better bond and finish. At this stage, wear a respirator or mask, eye protection, and hearing protection as needed. This is also an ideal moment to review recoat timing from the polyurethane manufacturer and plan your grit sequence accordingly.
Key checks to perform
- Look for peel, grain raising, or cloudy patches that indicate moisture or contamination.
- Test the finish in a small, inconspicuous area to confirm adhesion before committing to the whole surface.
- Ensure the area is completely dry and free of dust before moving to the sanding phase.
Grit progression and timing
The core of sanding after polyurethane lies in grit progression and dry-time management. Start with a coarser grit to remove gloss and create a
Tools & Materials
- Orbital sander (5-6 inch)(Use with a dust-collection system)
- Finish sanding blocks or detail sander(Essential for edges and corners)
- Assorted sandpaper/discs (grits 120, 150, 180, 220)(Choose moisture-resistant paper for water-based poly)
- Vacuum with HEPA filter(Keep dust levels down)
- Tack cloths(For removing fine dust before recoating)
- Dust mask / respirator (NIOSH-approved)(Protect lungs from fine dust)
- Safety goggles(Eye protection from dust)
- Drop cloths / plastic sheeting(Protect surrounding areas)
- Mineral spirits or wood cleaner(For cleaning sticky coats or residues)
- Painter's tape(Mask off areas not to sand)
Steps
Estimated time: 4-8 hours (plus drying times between coats)
- 1
Inspect the existing finish
Begin by evaluating the current polyurethane layer. Look for peeling, dull spots, and high-traffic wear. This helps you decide whether you need a light touch-up or a more thorough scuffing. Always start with a patch test to avoid surprises.
Tip: Use a raking light at a low angle to reveal fine scratches and uneven sheen. - 2
Prep the workspace and remove obstacles
Clear the area, shield adjacent surfaces, and remove hardware where feasible. Vacuum or sweep thoroughly to minimize dust before you start sanding. Proper prep reduces cleanup later and helps you maintain consistent results.
Tip: Seal off adjacent rooms with drop cloths to prevent dust migration. - 3
Choose grit progression
A typical progression is 120–150 for the initial scuff, followed by 180–220 for the finishing pass. Use finer grits for water-based poly to avoid fuzzy edges. The exact sequence depends on the current coating and the desired level of bite for adhesion.
Tip: Avoid skipping grits; the step between 150 and 180 matters for bonding. - 4
Set up sander and test patch
Mount the appropriate grit on your sander and run a test patch on a hidden area or scrap wood. Check for even abrasion without creating gouges. If you see swirl marks or pinkish haze from the sanding dust, adjust pressure and speed.
Tip: Test first to avoid surprises on your main surface. - 5
Sand with long, even strokes
Move the sander in straight, overlapping passes along the grain. Do not press hard; let the sander do the work. Check edges and corners with a sanding block to maintain uniform texture.
Tip: Keep the pad flat and keep the sander moving to avoid creating dips. - 6
Clean and inspect after sanding
Vacuum all dust, wipe with a tack cloth, and inspect for scratches or dull spots. If imperfections remain, consider a light second pass with the next grit. Proper cleaning ensures a smooth base for the next coat.
Tip: Dust-free surfaces improve adhesion dramatically. - 7
Recoat with proper dry time and method
Apply the next polyurethane coat following manufacturer guidance. Allow adequate dry time before handling, and wipe the surface if the finish requires dust-free conditions. Recoat windows vary by product and climate, so plan accordingly.
Tip: Lightly scuff the surface again before the final coat if required by the product.
Your Questions Answered
Is it safe to sand polyurethane between coats?
Yes, dry sanding between coats is standard. Use a dust-collection sander, wear a respirator, and work in a well-ventilated area. Avoid wet sanding unless the product guide allows it. Always follow the finish manufacturer's recommendations.
Dry sanding between coats is safe when you wear a mask and work with good ventilation. Check the finish instructions for any water-based limitations.
What grit should I start with when sanding after polyurethane?
Start with a medium grit like 120 or 150 to break the surface, then move up to 180–220 for a smooth final pass. The exact grit depends on the current gloss and how aggressively you want to abrade the surface.
Begin with 120 to 150, then finish with 180 to 220 grit for a smooth, even surface.
Can I skip sanding between coats?
Skipping sanding between coats can reduce adhesion and lead to an uneven sheen. If the finish is too smooth, you may lightly scuff it to help the next layer bond.
Generally, you should not skip the light scuff; it helps adhesion between coats.
How long should I wait between coats?
Dry times depend on the product and ambient conditions. Check the label, but plan for at least several hours to overnight for heavy coats in cool or humid environments.
Let each coat dry fully per manufacturer instructions, usually several hours to overnight.
What if I see scratches after sanding?
Lightly re-sand with a finer grit (e.g., 180–220) and clean the surface before applying the next coat. For deeper scratches, repeat with a slightly coarser grit before reapplying the finish.
If scratches appear, re-sand with 180–220 grit and recoat after cleaning.
Is sanding after polyurethane safe on all wood types?
Most woods tolerate light sanding after polyurethane, but some softwood surfaces may scar easily. Always test in a hidden area and adjust your pressure accordingly.
Test a small area first, and adjust pressure if the wood gouges easily.
Watch Video
Main Points
- Plan your grit progression and stick to it
- Use dust control for clean, safe sanding
- Always test a patch before full work
- Clean thoroughly between passes to ensure bond
- Follow manufacturer drying times for best results