How to Clean a Sanding Block: Step-by-Step Guide
Learn safe, effective methods to clean a sanding block, extend its life, and reduce dust during floors, decks, and walls projects with practical tips and a clear routine.

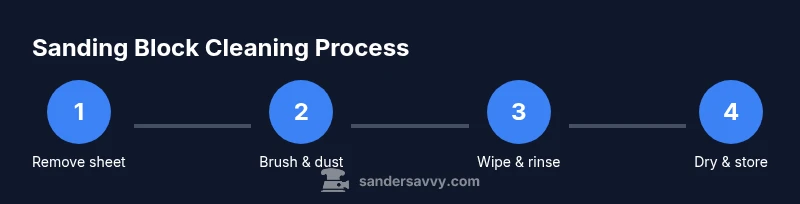
In this guide you’ll learn how to clean a sanding block, extend its life, and reduce dust during projects. According to SanderSavvy, start by removing the abrasive sheet, tapping out dust, and wiping the block with a damp cloth. For foam blocks, avoid soaking; for blocks with glued paper, inspect wear and replace as needed. This quick routine sets you up for smoother, safer sanding.
Why a clean sanding block matters
A clean sanding block performs more evenly, lasts longer, and reduces clogging that can cause gouges or chatter on your workpiece. When resin, wood dust, and fibers build up on the block, the grit can’t seat correctly, so you get inconsistent results and more heat transfer into soft woods. Regular cleaning also minimizes wear on the abrasive sheet, helping you get more mileage from each sheet and smoother finishes on floors, decks, and walls. According to SanderSavvy, establishing a simple cleaning routine before you begin a project pays off in faster work, less wasted sandpaper, and less airborne dust. Keeping the block dry between uses also prevents mold and keeps performance consistent in damp spaces like basements and garages.
Types of sanding blocks and cleaning implications
Sanding blocks come in several forms, including foam-backed blocks, cork or rubber blocks, and wooden or composite blocks. Foam-backed blocks compress under pressure and can trap dust in grooves if not cleaned promptly; cork and rubber blocks resist moisture better but can deteriorate with heavy solvents. Wooden and plastic blocks are sturdy and easy to wipe, but they may accumulate resin and dust that stiffen the grip. Regardless of type, adjust your cleaning method to the block material: foam benefits from gentle rinsing and air-drying; wood and rubber benefit from brushing and quick wipe-down. Avoid prolonged soaking for foam blocks, and ensure any grooves are clear so the new grit seats flat when you reattach it.
How to clean: a practical method that covers most blocks
A straightforward routine works for most sanding blocks. Start by removing the abrasive sheet and tapping it to dislodge loose dust. Use a stiff brush or an old toothbrush to scrub dust from grooves and from the base where grit sits. Wipe the block with a damp cloth that has a small amount of mild soap; rinse the cloth and wipe away soap residue. For foam blocks, rinse quickly and squeeze out excess water; for wood, plastic, or rubber blocks, air-dry on a clean surface. Let the block dry completely before reapplying sandpaper. If buildup persists, repeat brushing and wiping in quick succession. After cleaning, store blocks in a dry area to prevent mold and ensure ready-to-use grit on the next project.
Special cases: foam vs. dense blocks & drying tips
Foam blocks should never be soaked for long periods; a brief rinse and thorough air-dry is enough to reset the surface. If your block has corner grooves, clean around those areas with a small brush or cotton swab. If the sanding sheet is glued on, check for wear and replace the sheet if it’s clogged, uneven, or torn—an old sheet won’t seat flat and can gouge your work. Drying is crucial: place blocks on a towel or rack in a well-ventilated area away from direct heat. For plastic or dense blocks, avoid direct sun exposure that could warp the body and ruin the finish. When dry, reattach a fresh sheet and proceed with your project.
Maintenance and storage tips to extend life
Develop a small maintenance habit: after each session, inspect for cracks, warping, or loose corners. Clean blocks before storage to prevent resin buildup that hardens and sticks to grit. Store blocks flat or on a dedicated rack to maintain shape and grip; avoid stacking damp blocks where moisture can wick into the material. A tiny silica gel packet in the storage area can reduce humidity and slow mold growth. Label blocks by grit so you can grab the right one quickly, and rotate blocks so wear occurs evenly. A little effort here pays off with longer life, crisper cuts, and less downtime searching for the right tool.
Authority sources
For safety and best practices, refer to authoritative resources on dust control and tool maintenance. These sources provide guidelines on reducing airborne dust, handling wood dust safely, and general workshop safety:
- https://www.cdc.gov/niosh/topics/wooddust/
- https://www.osha.gov
- https://extension.illinois.edu/woodworking-safety
Tools & Materials
- Stiff brush or old toothbrush(Use to scrub dust from grooves and base)
- Mild dish soap(Creates a gentle cleaning solution)
- Clean water(Rinse to remove soap and loosened dust)
- Lint-free cloth or rag(Wipe and dry surfaces without leaving fibers)
- Bucket or small tub(Hold soapy water for rinsing blocks that tolerate immersion)
- New sanding sheets(Have fresh sheets ready for reapplication)
- Drying rack or clean surface(Helpful for thorough air-drying)
Steps
Estimated time: Estimated total time: 12-18 minutes
- 1
Remove the abrasive sheet
Begin by detaching the current sanding sheet from the block. If the sheet is still in good shape, you can set it aside for reuse on another project; dispose only if it’s clogged or torn. This step prevents rubbing dirty grit onto the block during cleaning.
Tip: Keep used sheets in a separate bin so you can reuse or recycle them when appropriate. - 2
Dust the block surface
Tap the block lightly to shed loose dust, then use a stiff brush to sweep grit from grooves and the contact face. This loosens embedded dust without forcing it deeper into the block material.
Tip: Work with the grain of the block’s grooves to improve debris removal. - 3
Wipe with damp soap solution
Moisten a cloth with a mild soap solution and wipe the entire surface, including grooves. Avoid soaking foam blocks; a damp cloth is enough to lift residue without saturating the foam.
Tip: Rinse the cloth often to prevent re-depositing dirt. - 4
Rinse and dry foam blocks separately
If you’re cleaning a foam-backed block, rinse quickly in a shallow tub and press gently to remove water. For non-foam blocks, you can simply wipe with a dry cloth after a quick rinse. Avoid long soaking for foam.
Tip: Never twist or wring foam blocks; press water out with a towel instead. - 5
Air-dry completely
Place the block on a drying rack or towel in a well-ventilated area. Ensure all surfaces are dry before reapplying new sandpaper to prevent mold and adhesive failure.
Tip: If you’re in a humid space, increase air flow with a small fan. - 6
Inspect and replace if needed
Check for cracks, warping, or corners that no longer grip the sandpaper. Replace the block if damage compromises performance or safety.
Tip: A damaged block can cause uneven sanding and should be retired promptly. - 7
Reattach fresh sanding sheet
Once the block is fully dry, attach a fresh sheet. Press firmly to ensure it sits flat and avoid air gaps, which can cause chatter or gouges during sanding.
Tip: Align the sheet with the block’s corners for the best contact. - 8
Store properly
Store blocks in a dry, clean area away from moisture. Avoid stacking damp blocks and consider a dedicated rack to preserve shape and edge life.
Tip: Label blocks by grit family to speed up setup on future jobs.
Your Questions Answered
Can I clean a sanding block with water?
Water can be used on many blocks, but avoid soaking foam blocks. Use a damp cloth with mild soap and dry thoroughly before reuse.
Yes, you can use water on most blocks, but don’t soak foam and make sure it dries completely before reuse.
What should I do if the sanding block smells after cleaning?
If a smell persists, air-dry in a well-ventilated area and consider replacing foam blocks. Odors may indicate trapped moisture.
If it still smells, let it dry in a ventilated area and consider replacing foam blocks if the odor continues.
How often should I clean a sanding block?
Clean blocks after heavy use or when you notice clogging reduces sanding efficiency. Regular cleaning helps maintain performance and finish.
Clean after heavy use or when you see clogging. Regular cleaning keeps performance high.
Can I reuse the paper after cleaning?
You can reuse a sanding sheet if it's still sharp and not clogged; replace if the grit is smeared or torn for best results.
Yes, reuse if the sheet is still sharp and not clogged; otherwise, replace for best results.
Is there a safe cleaner for the sanding block?
Mild soap and water is usually sufficient. Avoid harsh solvents that could degrade foam or glue.
Use mild soap and water; avoid harsh solvents that can damage the block.
How to dry a foam sanding block properly?
Pat dry with a towel and allow to air-dry completely on a rack; do not leave damp.
Pat dry and air-dry completely. Don’t leave it damp.
Watch Video
Main Points
- Start with a clean slate: remove the old sheet and dust.
- Choose cleaning method based on block type to avoid damage.
- Dry thoroughly to prevent mold and adhesion issues.
- Regular maintenance saves time and materials over many projects.