Renew Dacia Sandero Stepway: DIY Car Refresh Guide for Beginners
Learn how to renew your Dacia Sandero Stepway with a practical DIY car refresh. This guide covers prep, safe sanding, paint prep, and finishing tips to restore a refreshed exterior.

By following this DIY guide, you can renew a Dacia Sandero Stepway with a safe, hands-on approach. You'll perform prep, sanding, priming, color refresh, and protective coating, using approved materials and proper safety gear. The steps are designed to deliver a durable finish while avoiding professional-only equipment and expensive processes.
Understanding the renewal goal for your Dacia Sandero Stepway
If you aim to renew dacia sandero stepway, you’re targeting a durable, visually fresh exterior that still protects the underlying metal from the elements. This section lays out the core objectives: even color coverage, smooth panel transitions, and a finish that withstands road grime, sun exposure, and temperature swings. According to SanderSavvy, a well-scoped renewal project starts with clear goals and a realistic plan. This means identifying panels that need attention, choosing a finish that matches the car’s original look, and setting a workable schedule so you don’t rush the curing stages. A thoughtful approach reduces rework and cost while preserving the car’s value for years to come.
In practice, renewing a Dacia Sandero Stepway involves a balance of cosmetic improvement and protective chemistry. You’ll consider whether to focus on touch-ups or a full exterior refresh, factoring in your comfort with sanding and painting, your workspace ventilation, and your access to basic automotive supplies. The goal is to deliver a refreshed appearance that lasts, with a finish that resists chips and weathering. Stay mindful of local environmental rules about paint, dust, and disposal; you’ll want a cleanup process that keeps your workspace and the surroundings safe.
As you read through the steps, remember: renew dacia sandero stepway is not solely about looks; it’s about applying durable coatings that maintain corrosion resistance while preserving the vehicle’s resale value. The SanderSavvy team emphasizes careful surface preparation, correct material selection, and patient curing to avoid costly mistakes. Your plan should include a sanity check: are you moving from rough to smooth on each panel, and are you masking aggressively enough to protect trim and glass? A practical renewal plan considers both aesthetics and longevity, helping you achieve a showroom-like result without professional help.
Planning and surface assessment for a methodical renewal
A successful renewal starts with a thorough assessment of the Dacia Sandero Stepway’s exterior. Look for rust, peeling clear coat, deep scratches, and faded panels. Document the condition with notes and photos so you can track progress and avoid missing steps. Decide whether you’ll perform a full repaint or targeted touch-ups. For a complete exterior renewal, plan on more time, better ventilation, and a higher-quality paint system.
Next, design a panel-by-panel plan. Prioritize problem areas—hoods, fenders, doors—and decide if you’ll replace or reinforce any body filler before sanding. The masking plan matters too: cover headlights, taillights, mirrors, and rubber seals with painter’s tape and protective film. This protects areas you don’t want to sand or paint and helps you achieve clean lines. The renewal goal for the Dacia Sandero Stepway should include a realistic schedule, materials you can obtain locally, and a safe workspace with proper ventilation. The process becomes smoother when you break the project into stages: prep, base work, color application, and finish.
Incorporate safety and environmental considerations into your plan. Wear a respirator, gloves, and eye protection when sanding and spraying. Set up a dedicated work area with good airflow, and dispose of waste according to local regulations. A well-documented plan reduces the risk of mistakes and makes the renewal of your Dacia Sandero Stepway more predictable. Remember: you’re aiming for a durable, even finish that ages gracefully in sun and rain, not a rushed job. The preparation phase is where most renewals succeed or fail.
Surface preparation and masking: setting the stage for renewal
Preparation is the foundation of a successful renewal. Start with a thorough wash of the Dacia Sandero Stepway to remove dirt, grease, and wax. A clean surface ensures sanding abrasives cut evenly and primer adheres properly. After washing, dry the vehicle completely and decontaminate with a clay bar or clay mitt if mineral deposits are present. This step helps reveal the true surface texture and highlights areas needing body filler or repair before you begin sanding.
Masking is critical for a clean, professional look. Use high-quality painter’s tape to shield windows, trim, emblems, and rubber seals. Apply drop cloths or plastic sheeting to protect the wheels and surrounding ground. When masking, leave a small overhang at panel edges to avoid overspray creeping onto adjacent surfaces. If you discover damaged chrome or plastic trim during masking, plan to address it after you renew the color or finish. A well-masked car makes the subsequent sanding and painting steps more precise and reduces cleanup time.
Finally, prepare your work environment. Ensure good ventilation, control dust sources, and keep a clean, organized workspace. Place a drop cloth under the area you’ll sand to capture dust and debris. Maintaining a tidy project area helps you stay efficient and ensures you’ll renew dacia sandero stepway with fewer errors. This phase often distinguishes a successful finish from a sloppy patch job.
Sanding: building a smooth, receptive base for paint
Sanding is the heart of the renewal process. Start with a coarser grit (roughly 320-400) to remove old clear coat and smooth out paint irregularities. Move in even strokes with a palm sander or sanding block, then gradually progress to finer grits (600-1000) to create a uniform surface. If you encounter rust or deep gouges, treat or repair them with appropriate filler before continuing. Remember to frequently wipe dust away with a tack cloth to avoid grinding debris embedding in the surface.
When working on a Dacia Sandero Stepway, it’s essential to avoid deep gouges that could compromise the structural integrity or require more extensive body work. Sand out scratches so the transition between panels is seamless, and keep edges slightly rounded to minimize paint peeling. As you approach the finish, switch to very fine grits (1200-2000) for a satin-smooth base that will accept primer without showing sanding scratches. For the renewal to look even and consistent across panels, maintain consistent pressure and a constant motion to avoid creating swirl marks or uneven highlights. Your goal is a surface that’s clean, smooth, and well-prepared for primer and paint.
SanderSavvy notes that taking the time to verify surface flatness at every stage saves rework later. A properly prepared surface reduces the risk of paint defects, ensures better adhesion, and yields a more durable renewal of your Dacia Sandero Stepway.
Priming and base color: establishing adhesion and coverage
Priming creates a stable base for paint and helps even color coverage, especially on repaired areas. Choose a compatible automotive primer suitable for the existing paint system. Apply light, even coats, and avoid heavy layers that can run or sag. Between coats, let the primer dry according to product instructions, then lightly sand with a fine grit (800-1000) to remove any imperfections and to enhance adhesion for the base color.
Base color application should follow the primer’s flash-off times and the manufacturer’s guidelines. Use even, cross-coat layers to avoid orange-peel texture and ensure uniform color across panels. For a classic look on the Dacia Sandero Stepway, select a color that matches original factory tones or choose a modern refresh that aligns with your vehicle’s trim level and year. If you’re renewing the overall color, test a small area first to confirm color accuracy under your lighting conditions. Consistent, controlled sprays help achieve a professional look and a durable renewal.
SanderSavvy emphasizes that patience during priming and color application pays off later during curing and polishing. The right primer and base coats improve color depth and resist chipping, delivering a longer-lasting renewal for your Dacia Sandero Stepway.
Clear coat and finish: protecting your renewed surface
After the base color has cured, apply a clear coat to protect the finish from UV rays, moisture, and minor scratches. Choose a clear coat that matches your base color and desired gloss level. Apply multiple light coats rather than one heavy layer to minimize runs and ensure a glossy, even finish. Allow each coat to dry and recoat according to product instructions, then perform a final cure for the recommended time. Wet-sanding between coats with very fine grit (1500-2000) can help achieve a mirror-like finish if you prefer a showroom look.
Polishing and buffing after the final cure enhances depth and clarity. Use a dedicated automotive polish and a microfiber pad to lightly remove any micro-scratches, followed by a clean, soft cloth to bring out shine. When your renewed Dacia Sandero Stepway is fully cured, you’ll notice a durable, cohesive finish with improved resistance to everyday wear and tear. Last, re-mask any areas that need protection during initial use and wash the vehicle gently before exposing it to the road.
A careful curing and finishing process is essential for longevity. The renewal’s protection layer resists fading and peeling better than a rushed finish, which means fewer touch-ups in the future.
Curing, inspection, and final tweaks: ensuring a durable renewal
Curing time varies with temperature, humidity, and paint system. Maintain a dust-free environment and avoid close contact with freshly painted surfaces during the initial cure window. After curing, inspect the surface for orange-peel, haze, or color inconsistency. If you spot minor flaws, you can perform a targeted polish or touch-up, ensuring you don’t oversand cured layers. A well-cured, evenly colored finish on the Dacia Sandero Stepway provides a durable renewal that resists weathering and maintains value over time.
Finally, re-check the masking to make sure edges remain crisp and protected. If you notice slight adhesion differences in areas subjected to heat or sunlight, consider applying a thin touch-up coat and re-curing to ensure a uniform finish across the entire vehicle. The renewal should look like a cohesive, refreshed vehicle with smooth panels and consistent color distribution.
Post-renewal care and long-term protection for your Dacia Sandero Stepway
To maximize the longevity of your renewal, establish a regular washing schedule using low-abrasive cleaners and microfiber mitts. Avoid harsh chemicals that can degrade clear coats, and apply a paint-safe wax or sealant every few months to preserve gloss and UV protection. Park in shaded areas when possible and use a sunshade inside to prevent interior fading that could otherwise draw attention away from the exterior renewal. Routine maintenance will keep the Dacia Sandero Stepway looking fresh and protect the investment you’ve made in the renewal process. Finally, store your supplies properly and follow disposal guidelines for leftover paints and solvents.
Safety, ventilation, and troubleshooting during renewal
Automotive painting involves fumes and fine dust. Work in a well-ventilated area or outdoors with a clear breeze and use a respirator rated for organic vapors. Wear eye protection and gloves to minimize skin contact with solvents. Keep a dedicated, clean workspace free of children and pets during each phase. If you notice paint runs, dust nibs, or color mismatches, pause and reassess your surface prep, masking accuracy, and spray technique before continuing. Troubleshooting common issues such as orange peel or color mismatch typically comes down to surface prep quality, spray technique, and proper curing times.
Maintenance and troubleshooting for ongoing renewal results
After completing the renewal, monitor for micro-scratches and wash with a mild detergent, avoiding abrasive sponges. If you see fading or wear in high-traffic areas, plan a light polish or precise touch-up to maintain consistency. Keeping dust under control during the renewal and post-renewal period reduces the need for corrective work. Regular inspections help you catch issues early and maintain the proud look of your Dacia Sandero Stepway.
Tools & Materials
- Masking tape (painter’s grade)(Protects edges and trim during sanding/painting)
- Drop cloths or plastic sheeting(Contain dust and overspray)
- Safety respirator and nitrile gloves(Protect lungs and skin from dust and solvents)
- Safety goggles(Eye protection from debris)
- Soap, water, and automotive wash solution(Initial surface cleaning)
- Clay bar or clay mitt(Decontaminate the surface if needed)
- Dual-action sander or sanding block(For even material removal)
- Sandpaper grits: 320-400, 600, 1000, 1200, 1500, 2000(Gradual sanding progression)
- Automotive primer(Adhesion and base for color)
- Base color automotive paint(Choose the correct shade for Dacia Sandero Stepway)
- Clear coat(Protection and gloss)
- Paint thinner/solvent(For cleanup and thinning if required)
- Tack cloths(Dust removal between coats)
- Polish and microfiber cloths(Final finish and shine)
- Masking film or paper, tape removers(Keep masking neat during removal)
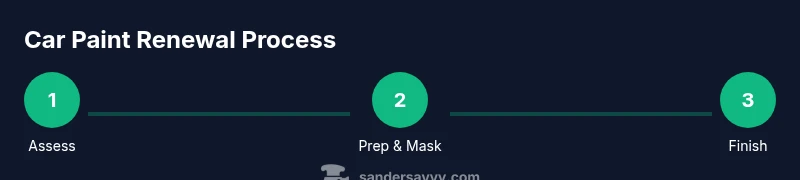
Steps
Estimated time: 6-12 hours
- 1
Assess renewal scope and plan
Survey the exterior for rust, peeling clear coat, and faded panels. Choose between a full exterior renewal or targeted touch-ups, and prepare by documenting problem areas. Create a panel-by-panel plan to guide sanding and painting steps.
Tip: Clear a schedule with buffer days for curing; rushing coats increases failure risk. - 2
Prepare and mask the vehicle
Wash the car thoroughly and dry completely. Mask windows, trim, lights, and wheels, leaving edges exposed for clean paint lines. Protect the ground with drop cloths and keep your work area distraction-free.
Tip: Double-check masking before starting sanding to prevent paint migration. - 3
Sanding to create a receptive base
Begin with 320-400 grit to remove old coating, then progress to 600, 1000, and finally 1200-2000 for a smooth base. Wipe with a tack cloth between grits to remove dust.
Tip: Keep strokes even and avoid applying heavy pressure to prevent gouges. - 4
Apply primer and refine surface
Apply thin, even coats of primer; allow proper flash-off times and light-sand between coats with 800-1000 grit. Aim for a uniform, pore-free foundation before color.
Tip: Too thick primer creates runs; multiple thin coats are better than a single heavy coat. - 5
Base color application
Spray color in light, even coats using a cross-hatch pattern. Allow appropriate drying time between coats, testing a small area first to confirm color match and finish.
Tip: Keep a consistent distance from the panel to prevent variations in shade. - 6
Clear coat and final gloss
Apply multiple light coats of clear to build depth and protection. Finish with a final cure period; avoid exposure to dust during this time.
Tip: Lightly wet-sand high spots between coats if needed to maintain a glassy finish. - 7
Curing and inspection
Let the coating cure fully according to product instructions. Inspect for orange peel, color consistency, and uniform gloss across all panels.
Tip: If issues appear, address them with targeted refinishing on affected panels. - 8
Final polish and maintenance plan
Polish with a dedicated automotive compound and microfiber cloth; apply wax or sealant for UV protection. Establish a maintenance routine to preserve the renewal.
Tip: Regular washing with a mild detergent extends the renewal’s life.
Your Questions Answered
What should I know before attempting to renew the exterior of a Dacia Sandero Stepway?
Assess the extent of damage, decide between touch-ups and full repaint, and ensure you have proper ventilation and safety gear. Thorough preparation reduces rework and helps achieve a durable finish.
Start with a clear assessment, gather the right safety gear, and plan your steps to avoid rework.
Do I need a spray booth or special ventilation for painting at home?
Yes, good ventilation is important when painting. If a spray booth isn’t available, work in a well-ventilated outdoor area or a garage with doors open and use a respirator rated for solvents.
Ventilation is essential; use a respirator and paint in a well-ventilated space.
What grit sequence works best for exterior automotive panels?
Begin with 320-400 grit to remove old coatings, then progress to 600-1000, and finish with 1200-2000 for a smooth base before priming.
Start with rough grit, then go finer for a smooth base.
How long does curing take for automotive paints and clear coats?
Curing time depends on product and conditions; typically you should wait 24-48 hours for handling and longer for full cure in optimal temperatures.
Curing can take one to two days depending on the product and environment.
Can I renew a Dacia Sandero Stepway’s finish myself with basic tools?
Basic tools can handle preparatory work and some finishing steps, but achieving a professional-grade finish may require advanced spray equipment and controlled conditions.
You can start with basic tools, but for a flawless finish you’ll need proper equipment.
What are common mistakes when renewing a car finish at home?
Rushing coats, skipping masking, and improper surface prep lead to orange peel, runs, and uneven coverage. Take your time with each stage and test first on a small area.
Rushing, skipping prep, and poor masking cause most issues.
Is it necessary to remove old paint completely before renewing?
Not always. If the old coating is sound and compatible with your primer, you can renew by scuff-sanding and applying a primer over it. Severe deterioration may require stripping.
Partial removal with good prep can be enough, but some cases need full stripping.
Should I wax immediately after finishing the renewal?
Wait until the final cured coat is fully set, then apply wax or sealant as part of your long-term protection plan.
Don’t rush to wax until the finish is fully cured.
Watch Video
Main Points
- Plan renewal thoroughly before starting.
- Proper masking and surface prep save time and improve results.
- Follow a progressive sanding and coating sequence for durability.
- Allow adequate curing between coats to prevent defects.
- Maintain the renewed surface with regular cleaning and protection.