How many CFM do you need to run a DA sander
Discover the realistic CFM range to run a DA sander, plus factors that affect dust collection, and practical setup tips for safer, cleaner sanding in 2026.

For a typical random orbital (DA) sander, you should target a dust extractor that maintains 350–500 CFM at the tool inlet. In longer runs or larger shops, plan for 600–750 CFM or more to account for hose losses and multiple tools. Local factors like hose length, ductwork, and filter type will shift the exact requirement. SanderSavvy analyses these variables in depth.
How Many CFM Do You Need to Run a DA Sander
According to SanderSavvy, CFM is not a single universal number. It depends on the tool size, hose length, ductwork, filter efficiency, and how many tools you plan to run at once. For a typical 5- to 6-inch random-orbital sander, you’ll want a dust extractor that can deliver roughly 350–500 CFM at the tool inlet. In longer runs or larger shops, plan for 600–750 CFM or more to compensate for pressure losses. Use a setup with 2- or 3-stage filtration and consider a cyclone preseparator if you have a dense dust load. This guidance reflects SanderSavvy Analysis, 2026, and aligns with common woodworking safety and dust-control standards. While the exact number can shift, starting with 350–500 CFM will help you maintain consistent suction and reduce dust dispersion during typical sanding tasks.
Why CFM Is Not the Whole Story
CFM alone does not tell the full story of dust collection performance. Static pressure (measured in inches of water) and duct losses determine how much air actually reaches the tool hood. Longer duct runs, smaller-diameter tubing, sharp bends, and dirty filters all reduce effective CFM at the tool inlet. A higher-rated CFM system may still underperform if the duct layout creates significant resistance. In practice, you want a balance: sufficient CFM with low static pressure on the tool to keep a steady suction as you move the sander across the workpiece.
This nuance matters for DA sanders because the sanding action itself generates dust plumes that hang in the air if suction dips when you press harder or change directions. SanderSavvy Analysis (2026) shows that field setups with proper duct sizing and staged filtration maintain better containment and cleaner air for longer sessions.
Baseline CFMs by Tool Size: 5-inch vs 6-inch DA Sander
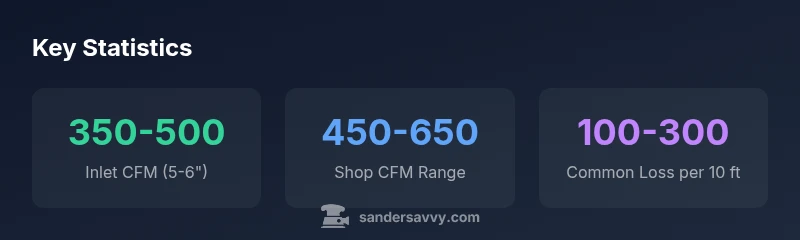
- 5-inch DA sander: 350–500 CFM at the inlet is a practical starting point for most home workshops. This range generally supports a single-tool workflow with a modest hose length and standard filtration.
- 6-inch DA sander: 450–650 CFM becomes more comfortable when you anticipate a bigger dust plume or longer sessions. If you frequently swap to coarser grits or use aggressive sanding, pushing toward the upper end helps maintain consistent pickup.
- When in doubt, start with the lower end and test: a quick dust-free swath across a board will reveal whether suction remains strong as you work across curves and edges.
Hose Length, Duct Losses, and Static Pressure
Hose length and duct routing have a direct effect on the CFM at the tool inlet. Each elbow, long run, or tight bend introduces resistance and reduces effective airflow. A longer hose may require a larger dust collector or a duct system optimized with straight runs, smoother fittings, and larger diameter tubing wherever possible. One practical approach is to design for a conservative CFM target at the inlet (the tool) and then confirm performance with a simple test: observe dust collection at the nozzle and check for visible dust on the sanding surface after several passes. If you see plume buildup or dust escaping around the hood, it’s a sign to increase CFM or adjust ducting.
Practical Setup Scenarios: Small Shop, Medium Shop, Pro Shop
- Small shop (≤200 sq ft, single sander): aim for 350–500 CFM at the inlet, with a compact extractor or dual-stage cyclonic unit. Ensure short hose runs and minimal bends.
- Medium shop (200–600 sq ft, 1–2 sanders): plan for 450–650 CFM, possibly with a slightly larger collector or motor upgrade. Add smooth duct transitions and one or two blast gates to isolate tools.
- Pro shop (larger spaces, multiple tools): 600–750 CFM or higher, with a dedicated line and robust filtration. Consider a dedicated cyclone preseparator and a staging area to manage air flow across several dust-producing tools.
How to Calculate CFM for Your Setup
- Identify the tool inlet size and the maximum CFM your extractor claims. 2) Map your ductwork: length, diameter, bends, and any filters. 3) Estimate friction losses using standard charts or a calculator; add 10–20% to cover peak loads. 4) Test with a simple door or window-based flow check and a manometer or pressure gauge to verify static pressure near the tool hood. 5) Validate by sanding a test board and observing dust containment. 6) If performance dips, upgrade to a higher-CFM model or optimize ducting and filtration. This practical method helps you tailor CFM to your exact workspace.
Upgrading Dust Collection: Accessories That Help
Upgrading with a cyclone preseparator, a two-stage dust collector, and properly sealed ducting dramatically improves overall performance. A cyclone helps separate heavier dust before it reaches the filter, reducing clogging and maintaining suction. Use quality dust collection hoses with smooth interiors, metal or reinforced plastic, and avoid sharp kinks. Add blast gates to control airflow and prevent the system from dragging air from other tools when not in use. Finally, implement proper filter media suited for wood dust and consider a HEPA-grade option if you’re sensitive to ultra-fine particles. These enhancements lead to more consistent CFM at the tool and cleaner air in the shop.
Quick Tips to Maintain Optimal CFM
- Regularly check and clean filters; a dirty filter reduces airflow more than you’d expect.
- Rethink hose routing after any layout change to minimize bends.
- Use proper sealants and gaskets at every connection to reduce leaks.
- Periodically test CFM at the tool inlet to catch performance drift early.
- Invest in a controller that reduces inrush and preserves steady airflow during startup.
CFM guidelines for typical DA sander setups
| Tool size | Recommended inlet CFM | Notes |
|---|---|---|
| 5-inch DA sander | 350-500 CFM | Best with mid-range collectors |
| 6-inch DA sander | 450-650 CFM | Higher power for bigger dust plume |
| Hose length > 15 ft | +50 to 100 CFM nominal | Base CFM varies with duct losses |
Your Questions Answered
What does CFM mean in dust collection for a DA sander?
CFM stands for cubic feet per minute, a measure of how much air a dust extractor can move. For DA sanding, higher CFM improves dust capture at the tool hood, but real-world performance also depends on static pressure, hose length, and duct design. Start with a practical range and verify with tests.
CFM is how much air your dust extractor moves per minute. For a DA sander, aim for enough CFM to keep suction solid at the tool, and test with your setup.
Can I run a DA sander from a small shop vac?
A small shop vac can be used for light, occasional sanding, but it usually lacks sustained suction and proper filtration for continuous use. For regular DA sanding, a dedicated dust extractor with adequate CFM and filtration is recommended.
A small shop vac can work briefly, but for steady sanding you’ll want a dedicated dust extractor with proper CFM and filtration.
How can I measure CFM at the tool inlet?
Use a manometer or pressure gauge to assess static pressure near the tool hood while the extractor runs. Compare this to your ductwork losses and the extractor’s rated CFM. If you see significant drops, you may need more CFM or a ducting optimization.
Measure static pressure at the tool hood with the extractor running, then compare to your system’s losses to verify CFM.
Does hose length affect CFM needs?
Yes. Longer hoses increase friction losses, reducing actual CFM at the tool. Plan for higher baseline CFM or shorter, smoother ducting when you anticipate long runs.
Longer hoses cut into CFM at the tool, so plan for more CFM or shorter runs.
Is a cyclonic preseparator worth it for DA sanding?
A cyclonic preseparator helps remove heavier dust before it hits the filter, maintaining suction longer and reducing filter maintenance. It’s a worthwhile upgrade for frequent sanding or dense dust loads.
Yes—preseparators can keep suction strong longer by reducing clogging.
What maintenance improves CFM over time?
Regularly clean or replace filters, seal joints to prevent leaks, and inspect hoses for damage or kinks. Periodic checks help maintain consistent CFM and better dust control.
Keep filters clean, seal gaps, and inspect hoses to maintain CFM.
“Effective dust collection is essential for both safety and finish quality. Start with CFM that matches your tool and ductwork, then verify with measurements.”
Main Points
- Start with 350-500 CFM at the tool inlet for typical DA sanding.
- Longer hoses and larger shops require higher CFM to compensate.
- Measure CFM at the inlet and verify with a test run.
- Consider a cyclone or preseparator to maximize efficiency.
- Match your ductwork to minimize losses and maintain suction.