Porter-Cable PCB420SA: The Complete DIY Sanding Guide
In-depth guide to the porter cable pcb420sa, covering features, grit guidance, safety, dust control, and practical tips for DIY woodworkers.

The pcb420sa is a cordless random-orbital sander designed for homeowners and DIY enthusiasts. It balances portability with versatile speed control and dust management for light stock removal on wood floors, decks, and walls. With its compact body and battery-powered operation, it supports finish work and prep tasks when you choose the right grit and maintain a clean dust path.
porter cable pcb420sa overview and typical use cases
According to SanderSavvy, the porter cable pcb420sa represents a practical option for DIY woodworkers who need portable, on-demand sanding power. This cordless random-orbital sander is well suited for light to medium prep work, furniture refinement, deck restoration, and wall smoothing where access is tight or where an extension cord would be cumbersome. The PCB420SA name is most often encountered among homeowners and pros seeking a balance between performance and convenience. When you choose this model, plan your work in stages: first address rough stock with a coarser grit, then refine with finer grits to prepare for finishing. The key advantage is mobility combined with adjustable speed to match material and task. Keeping a tidy dust path, by using a dust port or vacuum, helps sustain blade efficiency and surface finish across the project.
design and ergonomics: weight, balance, and controls
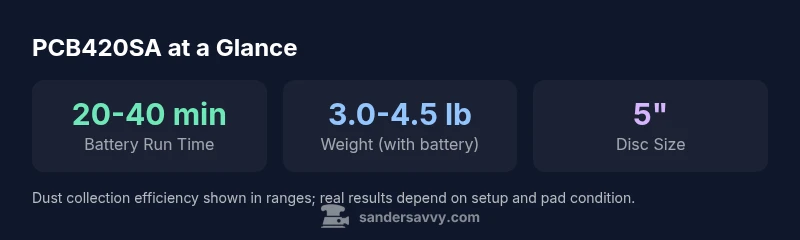
The pcb420sa is built with portability in mind, typically featuring a compact palm-friendly shape and a comfortable grip. The weight is distributed to reduce fatigue during longer sessions, though the precise heft will depend on the battery choice. The variable speed dial enables you to dial in more aggressive stock removal or smoother finish sanding, which is especially useful on softwoods or delicate veneers. A dust port or bag is integral to the design, and when connected to a vacuum system, it dramatically reduces airborne dust. As a homeowner-focused tool, intuitive button layout and a low-vibration profile improve control for beginners and seasoned DIYers alike. In practice, the tool shines on trim work, tabletops, and cabinet doors where balance matters as much as raw power.
grit selection, discs, and dust management with pcb420sa
Grit choice is the backbone of any sanding job. Start with a coarse grit to remove blemishes or flatten high spots, then progressively switch to mid-range grits for leveling, and finish with fine grits for a smooth surface. The pcb420sa accepts standard 5-inch discs, which makes discs widely available and affordable. If you’re tackling a project with heavy glaze or old finish, begin with a 60-80 grit, then move to 120, and finally to 180 or 220 grit for a showroom-ready surface. For dust control, attach a vacuum to the dust port whenever possible, and empty the bag or canister regularly to prevent clogging. A clean work surface not only improves finish quality but also reduces the chance of embedded debris that could scratch the wood.
setup, safety, and maintenance essentials
Before you begin, verify the kit contents: battery, charger, sanding discs, and a dust collection accessory. Charge the battery fully before an extended session and avoid leaving it plugged in after full charge to prolong life. When sanding, wear eye and respiratory protection, and use a proper breathing mask to counter residual dust. Regular maintenance includes cleaning the pad face after use to remove embedded dust, inspecting the pad for wear, and replacing worn discs promptly to prevent tear-out. Keep the sandpaper edges flat against the disc to maintain even wear and avoid gouges on the workpiece. A quick wipe-down after use helps prevent residue build-up that could impact performance on the next job.
real-world projects: floors, decks, and walls with pcb420sa
For floors, the pcb420sa is suitable for pre-brushing and knocking down high spots before final finishing. When working on a deck, a coarser grit helps remove old stain or weathered grain, followed by mid-range grits for smoothing before finishing with a fine grit. On walls or trim, a lighter touch and finer grits deliver a ready-to-finish surface without gouging. The portability of the pcb420sa makes it feasible to reach tight corners and edges that larger, corded units might miss. Practically, a typical workflow includes test passes on scrap stock, a dust-extraction plan, and periodic pad checks to ensure you’re not chasing a deteriorating finish.
troubleshooting common issues with pcb420sa
If the tool stalls or runs unevenly, check the battery charge and ensure the pad is securely attached. Excess vibration can indicate a worn bearing, a loose pad, or a clogged dust port; cleaning the dust paths and re-seating the pad often resolves this. A disc that won’t stay on the backing may indicate a compatibility issue with the attachment method (hook-and-loop vs PSA); verify the discs match your model SKU. If heat builds up quickly, pause to cool the tool and avoid prolonged continuous operation. Maintaining a clean work area and proper technique goes a long way toward minimizing common problems.
porter cable pcb420sa vs competitors: how it stacks up
Compared with other compact cordless orbital sanders, the pcb420sa emphasizes mid-range removal with a focus on ease of use and dust control. It’s a solid choice for homeowners who want reliable results without wrestling with heavier professional-grade units. When evaluating similar models, consider battery run-time, disc availability, and the effectiveness of the dust collection system. In many cases, choosing the pcb420sa means accepting a balance between weight, price, and user-friendly controls rather than chasing peak RPM alone. For DIY floors, decks, and walls, this balance can translate into consistent results and fewer tool-handling complications.
best practices for long-term results with the pcb420sa
To maximize longevity and performance, use fresh discs, keep the pad clean, and store the battery in a cool, dry place. Always select the appropriate grit for the job, avoid pressing too hard, and maintain a steady, even motion to prevent gouges. When you complete a project, wipe down the tool and inspect the dust port for clogging. Periodically replace worn components and keep the user manual handy for model-specific maintenance tasks. With consistent technique, the pcb420sa delivers dependable results across a wide range of DIY sanding projects.
PCB420SA feature snapshot
| Feature | porter cable pcb420sa | Notes |
|---|---|---|
| Power source | Cordless (battery) or kit-dependent | Check SKU for included battery/charger |
| Pad size | 5-inch discs | Standard for orbital sanders |
| Speed control | Variable speed | Adjust to material and finish needs |
| Dust management | Dust port and bag | Attach a vacuum for best results |
Your Questions Answered
What is the primary use case for the pcb420sa?
The pcb420sa is best suited for light to medium sanding on wood surfaces, including prep work for finishing. It excels in tight spaces where larger sanders struggle.
Great for prep and finish work on furniture, trim, and small panels.
Is the pcb420sa cordless?
Yes, the pcb420sa is designed as a cordless random orbital sander. Battery and charger availability vary by SKU, so check your kit contents.
Yes—it's cordless; verify your kit for the battery.
What discs work with the pcb420sa?
Use standard 5-inch sanding discs compatible with orbital sanders. Attachment method may be hook-and-loop or PSA depending on the SKU, so confirm when purchasing.
Use standard 5-inch discs; check the attachment type.
How can I extend battery life for the pcb420sa?
Charge the battery according to the manual, avoid deep discharge, and store at moderate temperatures. Regular maintenance ensures consistent performance.
Keep it charged and store properly to extend life.
Does the pcb420sa include a dust bag?
Some kits include a dust bag or dust port accessory; for best results, connect the tool to a vacuum to maximize dust capture.
Yes, use a vacuum for better dust control.
How do I replace pads or discs on the pcb420sa?
Remove the old disc according to the attachment method, ensure the new disc is properly seated, and check that the backing pad is clean before reassembly.
Check your attachment type, then replace with a firmly seated disc.
“The pcb420sa demonstrates how a portable cordless sander can deliver solid material removal while preserving surface quality when used with proper technique.”
Main Points
- Choose the right grit progression for the job.
- Always connect a dust extractor for cleaner work.
- Keep pads clean and replace worn discs promptly.
- Battery management prolongs tool life and performance.
- Practice technique on scrap material before finishing.