Drywall Sander Rental at Home Depot: A DIY Guide for DIYers
Learn how to rent a drywall sander from Home Depot, pick the right model, set up dust control, and sand walls safely. Includes checklists, step-by-step usage, and practical tips for homeowners tackling drywall projects.

You can rent a drywall sander from Home Depot to finish textured walls and ceilings with dust-control gear. This quick answer outlines selecting the right sander, reserving it, and using it safely on drywall patches. Expect to meet common rental options (daily/weekly), pickup requirements, and return policies, plus how to prep your space for sanding.
Understanding drywall sanding and rental basics
For homeowners tackling wall repairs or renovation, renting a drywall sander from Home Depot can simplify the process, reduce dust exposure, and give you a pro-grade finish without buying expensive equipment. According to SanderSavvy, rental tools let you match the job scope to the tool size and power, minimizing effort on small patches while avoiding tools you won’t use again. The SanderSavvy team found that most DIYers start with an orbital or belt-sander option designed for wall surfaces, then swap to a detailing sander for edges and corners. This flexibility makes rental an attractive option for project scope that varies from patching small dents to refinishing large wall sections.
Why rental makes sense for DIY projects
Renting a drywall sander can be a smart choice for homeowners who want a quality finish without the long-term investment. Rental fees typically align with project duration, often offering daily, weekend, or weekly rates that can be more economical than buying a tool you’ll rarely use. Key benefits include access to newer, well-maintained machines, on-site support from some stores, and the option to try different models before committing. For most home projects, renting reduces storage needs and maintenance responsibilities, while still delivering professional-like results when used correctly.
What to know about surface prep before sanding
Preparation is the quiet hero of drywall sanding. Begin by removing loose material, protecting floors with drop cloths, and sealing off adjacent rooms to contain dust. A thorough cleanup plan will save you time later and prevent debris from spreading to furniture or electronics. In practice, you’ll want to repair any deep dents with joint compound, let it dry fully, and then sand flush to blend seams. This ensures a smoother final finish and reduces rework after the sanding phase. Remember that good prep is the most cost-effective step in achieving a flawless surface.
What types of drywall sanders you can rent
Home Depot typically stocks several drywall sanding options. Random-orbit sanders provide balanced dust control and are versatile for flat walls and ceilings, while belt sanders offer aggressive material removal on thicker joint compound patches. Pole-mounted sanders extend reach for ceilings and high walls, and detailing or corner sanders help address tight edges. When choosing, consider dust collection compatibility, disc grit options (coarse to fine), and whether you’ll need interchangeable heads for different surfaces. Renting allows you to sample each type during the project.
Dust control and air quality basics
Drywall sanding generates a lot of fine dust, and good dust-control practices protect your family and indoor air. Use a powered dust extraction system or attach a compatible vacuum hose to the sander to minimize visible dust. Wear an NIOSH-approved respirator or a high-quality particulate mask, safety glasses, and hearing protection. Work in short bursts with breaks to monitor dust levels and ventilate the space. If possible, seal off the work area with plastic sheeting and use a negative-pressure setup to keep dust contained.
Availability, reservations, and pickup at Home Depot
Store pickup policies vary by location, but most Home Depot locations allow same-day reservations or online hold for pickup. To secure a drywall sander, you’ll typically need a valid ID and a credit card for a temporary hold or deposit. Some stores require a brief rental agreement and proof of local address. Before you go, check the store’s online inventory and reserve the unit for your target date. If your project timeline shifts, most locations will honor changes with minimal fees.
Tools, accessories, and safety gear you’ll want
A smooth rental experience often hinges on having the right accessories. Essential items include sanding discs in ready-to-use grits (coarse through fine), a compatible dust hose or bag, an extension cord, protective equipment (dust mask, safety glasses, hearing protection, gloves), drop cloths, painter’s tape, and a small step ladder for ceiling areas. If your sander lacks an integrated vacuum, plan for a portable shop vacuum as the dust management solution. Asking staff for recommended add-ons can prevent mid-project surprises.
On-site setup and workspace layout
Create a clean, well-lit, and dust-controlled workspace. Remove or cover furniture, turn off HVAC in the immediate area if possible, and seal doorways with plastic. Position the sander to avoid overhead obstructions and keep cords clear of traffic. Establish a simple workflow: sand, vacuum, wipe, and inspect before re-sanding. A well-planned layout reduces cleanup time and helps you maintain momentum.
Sanding technique basics for a smooth finish
Light, even pressure is the key to a consistent surface. Glide the sander with steady, overlapping passes to prevent gouges. Start with a coarser grit to flatten ridges, then progressively move to finer grits for a smooth finish. Frequently vacuum the dust and wipe the surface between grits for better adhesion of joint compound. For ceilings, maintain a comfortable angle and avoid pressing into joints, which can cause uneven textures. If you notice rounding or dimples, switch to a finer grit and rework the area gently.
Cleaning up and returning the rental
After sanding, clean the sander and hoses, empty dust bags, and wipe down exposed surfaces. Return the tool with all accessories and documentation, and confirm your rental period is closed in the system. Leave a note about any issues or wear you observed so staff can address them for the next user. Proper return and cleaning reduce late fees and ensure you start your next project on time.
Real-world tips from DIYers and what to expect
DIYers often report that starting early in the day minimizes dust accumulation and helps maintain energy. A well-ventilated space makes the process more comfortable, and breaking tasks into two sessions can help maintain steady progress without fatigue. Remember that rental stores may offer brief demonstrations or tips on disk changes and attachments—don’t hesitate to ask for a quick tutorial before you begin.
AUTHORITY SOURCES
- OSHA: Workplace dust and respirator safety guidelines accessible at https://www.osha.gov
- CDC: Indoor air quality and exposure guidance at https://www.cdc.gov
- National Academies Press: Drywall finishing and dust management insights at https://nap.edu
Tools & Materials
- Drywall sander (rental model)(Select based on project size; check dust-collection compatibility)
- Dust extraction hose or vacuum attachment(Essential to control dust at source)
- Extension cord(Heavy-gauge for tool power; avoid cord tangles)
- Sanding discs (grits 60-120-180)(Coarse for flattening, fine for finishing)
- Drop cloths and plastic sheeting(Protect floors and nearby surfaces)
- Safety mask/respirator (NIOSH-approved)(Protect from fine dust)
- Safety goggles(Shield eyes from dust and debris)
- Hearing protection(Reduce noise exposure)
- Painter's tape(For masking off adjacent areas)
- Ladder or scaffold(Ceiling work or high walls)
- Shop rag or tack cloth(Wipe surfaces between grit changes)
Steps
Estimated time: 1-2 hours (plus time for drying joint compound as needed)
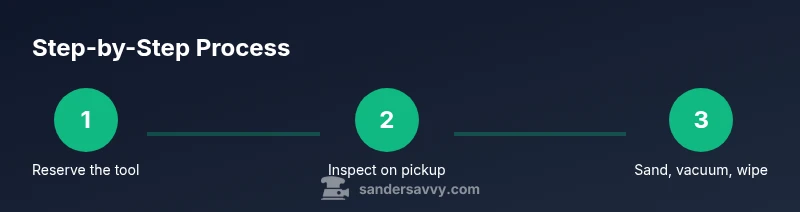
- 1
Check availability and reserve
Search your local Home Depot online inventory, select the drywall sander model that fits your project, and reserve for your start date. If you plan multiple days, extend the reservation accordingly to avoid in-store rush.
Tip: Reserve early for busy weekends or holidays to secure the best option. - 2
Inspect the tool at pickup
Carefully inspect the sander, power cord, dust hose, and attachments. Report any damage or missing parts before leaving the desk.
Tip: Take a quick photo of the tool before you leave, in case of disputes. - 3
Prepare your workspace
Lay down drop cloths, seal off the area with plastic, and remove furniture. Ensure access to outlets and a clear path for the power cord.
Tip: Ventilate the room if possible to reduce dust buildup. - 4
Attach dust collection and discs
Connect the dust hose properly and choose the coarsest grit needed to flatten ridges before moving to finer grits for finishing.
Tip: Secure hoses and avoid kinks that reduce suction. - 5
Start sanding with even strokes
Use light, steady pressure and overlapping passes. Move slowly to minimize gouges; keep the sander perpendicular to the surface when possible.
Tip: Pause and vacuum frequently to monitor progress. - 6
Progress to finer grits
After initial flattening, switch to a finer grit and repeat sanding until the surface is uniform and smooth.
Tip: Wipe with a tack cloth between grit changes for best adhesion. - 7
Clean up dust
Vacuum the whole area, then wipe down walls. Collect debris in a bag or container to prevent spread while re-sanding.
Tip: Use a HEPA-filter vacuum for best results. - 8
Return the tool
Return the sander with all attachments, inform the associate of any issues, and complete the checkout process per store policy.
Tip: Keep receipts or confirmation numbers for your records.
Your Questions Answered
Can I rent a drywall sander from Home Depot for a weekend project?
Yes, many Home Depot locations offer daily or weekend rental options. Availability varies by store, so check online and reserve for your specific dates. Be prepared for a hold or deposit at pickup.
Yes, you can usually rent for a weekend; check your store's options online and bring ID to pickup.
What sanding grit should I start with on drywall?
Begin with a coarser grit to flatten ridges, then move to medium and fine grits for a smooth finish. Always wipe between grit changes to remove dust and assess the surface.
Start with a coarse grit, then go finer, and wipe between grits.
Do I need special safety gear beyond a dust mask?
Wear a respirator or high-quality dust mask, safety goggles, and hearing protection. Drywall dust can be hazardous when inhaled, especially for prolonged periods.
Yes—respirator, goggles, and ear protection are recommended.
Will Home Depot provide guidance on the right model for my wall size?
Store associates can help you choose among models based on surface area, height, and dust-control needs. They may suggest a pole sander for ceilings or a random-orbit sander for flat walls.
Staff can help you pick the best model for your space.
What should I do with drywall dust after sanding?
Vacuum thoroughly, wipe surfaces, and dispose of bags according to local regulations. Use a HEPA-filter vacuum for best results and avoid blowing dust into HVAC vents.
Vacuum, wipe down, and dispose of dust safely.
Can I rent a sander for ceiling work?
Yes, many rentals include pole-mounted or extended-reach sanders suitable for ceilings. Ensure you have a stable ladder and consider ceiling-dust precautions.
Yes—choose a model with reach for ceilings and set up safety measures.
Watch Video
Main Points
- Rent the right sander for your project scale
- Prioritize dust control and PPE from day one
- Prep space and mask off areas to minimize cleanup
- Inspect gear at pickup and return all parts