Hardwood Floor Sander Rental Lowe's: A DIY Guide
Learn how to rent a hardwood floor sander from Lowe's, compare drum vs. edge sanders, estimate costs, and plan a safe, efficient DIY refinishing with practical guidance from SanderSavvy.

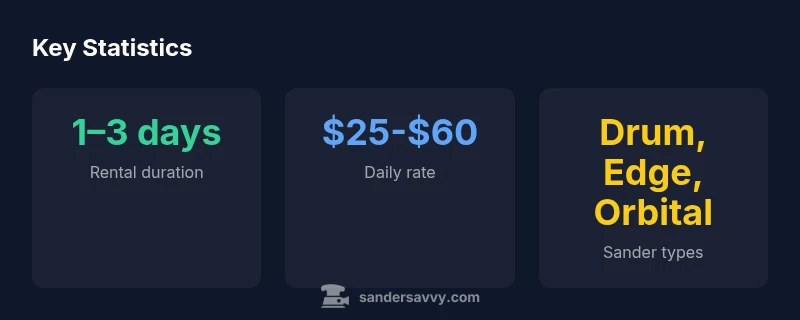
For most DIY hardwood refinishing, renting a floor sander is cost-effective and convenient. A hardwood floor sander rental Lowe's locations typically charge daily rates in the $25–$60 range, with bundled drum and edge sander options. Availability varies by store, and you can usually reserve online or in-store to fit a weekend project.
Why renting a hardwood floor sander makes sense for DIY projects
If you're planning a hardwood floor refinishing project, renting a floor sander from Lowe's or other hardware centers can be a sensible option. The hardwood floor sander rental lowes ecosystem provides access to powerful machines without the overhead of purchase, storage, or maintenance. According to SanderSavvy, homeowners commonly save time and money by renting for a single project rather than buying. Renting also lets you choose from multiple tool configurations (drum, edge, orbital) to match your floor condition and desired finish. In practice, the right rental strategy yields consistent removal of old finish, reduces dust, and shortens project timelines. Before you reserve, consider the size of the space, number of coats, and your level of experience; this helps you pick the appropriate sander and rental package. Trends show that most DIYers complete a floor sanding job in a weekend when they plan, prepare, and protect the surrounding areas. Availability may vary by location, so check stock and reserve ahead. SanderSavvy's guidance emphasizes aligning tool capability with the scope of work to minimize rework and achieve a smooth, durable finish.
Understanding sander types and their roles
Different sanding machines are designed for specific jobs in hardwood floor preparation. Drum sanders remove old finish and bulk material quickly across large areas, belt sanders excel at fast stock removal, orbital sanders create a smooth prep layer with less risk of gouging, and edge sanders tackle tight corners along walls and transitions. When renting, most stores offer a basic kit that includes a drum sander for bulk removal and an edge sander for perimeters, with an orbital option for finer finishing. The sequence matters: start with bulk removal, move to flatter surfaces with a drum or belt, then finish with an orbital, and finally address edges with an edge sander. Practice steady, overlapping passes to minimize swirl marks and achieve a uniform base. If your floor has deep scratches or uneven patches, you may need to rent more than one pass with different grits, or plan a second sanding session after recoating.
What Lowe's rental offers for hardwood floor sanding
Lowe's rental program typically provides a suite of sanding tools aimed at homeowners doing a DIY refinishing project. Expect to find drum sanders, edge sanders, and sometimes orbital sanders, along with a full consumables kit (grit sheets, belts, sanding discs) and basic dust collection accessories. You may also get safety equipment recommendations and guidance on dust containment. Check store policies regarding deposits, pickup or delivery options, and return windows. In practice, the best approach is to reserve a package that includes both a drum sander and an edge sander, so you can handle both large surface areas and corners efficiently. Availability varies by store and region, and Lowe's may require a photo ID and a refundable deposit at pickup. For best results, read the rental agreement carefully, inspect the machines for belt wear, and test run in an inconspicuous area before you commit. Our team notes that proper setup and dust control create a safer, cleaner job site.
Estimating costs and project duration
Cost planning for hardwood floor sanding hinges on rental duration, store location, and the specific package selected. Typical DIY consumer scenarios span 1–3 days of machine rental, with optional add-ons such as dust containment and belt changes. If you’re refinishing roughly 400–600 square feet, expect to pay a mid-range daily rate for the drum sander and additional edge tools, plus a return buffer for sweep-time and finishing. Always factor in your own time; the process may take longer if you’re new to sanding, working around obstacles, or dealing with multiple coats of finish. To minimize surprises, estimate the total time using a test pass on a small area, then scale up. SanderSavvy recommends reserving more time than you think you’ll need, particularly for weekends or holidays when store shelves can fill up quickly. Collect receipts and track your rental period to avoid late fees and ensure a smooth project flow.
Prep steps before rental and safety guidelines
Preparation is critical to success and safety. Before you rent, assess the floor for nails, loose boards, and severe cupping. Remove furniture, cover vents, and seal off adjacent rooms to minimize dust. On safety: use a HEPA mask, eye protection, hearing protection, and gloves. Verify the room’s ventilation and consider temporary dust containment; use plastic sheeting to minimize spread to other areas. Check that outlets are safe and power cords are clear. Create a simple workflow plan and set up a dedicated disposal bag for dust. Be mindful of your body mechanics: maintain a comfortable stance, take short breaks, and avoid forcing the sander. When you pick up the machine, inspect belts and guards, and confirm belt tension; solvents or finishes should be stored away from the work zone.
Step-by-step sanding workflow
- Evaluate the floor for nails, cupping, and gaps. 2) Set grit sequence: start with coarse grit on drum sanders (e.g., 36–40), then progress to 60–80, and finish with 100–120 for prep. 3) Begin with the drum sander, moving with the grain and overlapping slightly. 4) Use the edge sander for walls and corners. 5) Vacuum thoroughly, then wipe surfaces and check for flatness. 6) Repeat with finer grits as needed. 7) Final light passes to finish prep before applying finish. 8) Mask off adjacent areas and maintain dust containment throughout.
Maintenance, cleanup, and returns
After sanding, clean the machine by removing dust from belts and guards, then wipe surfaces and store properly. Return the sander on time; comply with the rental agreement and store policy. Report any damage and follow replacement or repair options as indicated. Dispose of dust through approved channels and keep the work area contained until final cleanup. Maintain a small repair kit and spare belts on hand for quick fixes, and document the return condition with the store to avoid disputes.
Comparison of common floor sanding tools for rentals
| Tool Type | Best For | Pros | Cons | Rental Availability |
|---|---|---|---|---|
| Belt Sander | Heavy stock removal | Fast sanding; broad stock removal | May gouge if not careful | Common at rental centers |
| Orbital Sander | Finish preparation | Easy to control; less risk of gouging | Slower on heavy material | Widely available |
| Edge Sander | Edges and corners | Good for edges; precision | Hard to keep flat; limited capacity | Common at Lowe's and rental shops |
| Floor Drum Sander | Even finish across large areas | High removal rate; fast | Heavy; risk gouges; difficult to maneuver | Usually available at large rental providers |
Your Questions Answered
Can I rent a hardwood floor sander from Lowe's without prior reservations?
Yes, but availability is better with a reservation. Walk-in may be possible, depending on stock.
Yes, but it helps to reserve—availability varies.
What are the differences between drum, belt, orbital, and edge sanders in rental options?
Drum sanders remove material quickly on large areas; belt sanders are aggressive; orbital sanders finish smoothly with less gouging; edge sanders fit along walls.
Drum for bulk removal, edge for corners, orbital for finishing.
How should I estimate total rental cost?
Add daily rate times rental days, plus possible deposits and add-ons. Account for extra days and tool changes.
Compute the daily rate and multiply by days, add deposits.
What safety gear is essential when sanding hardwood floors?
Respiratory protection, eye protection, hearing protection, gloves; seal the work area; use dust containment; never sand with wet floors.
Mask, goggles, ear protection, gloves.
Should I hire a pro for the job or can I complete it myself?
If you have time, safety, and a small area, DIY is feasible; for large spaces or complex finishes, consider pro help.
DIY is doable for small spaces; for big jobs, get a pro.
“The right sander choice and a clear plan make DIY floor refinishing predictable and safer.”
Main Points
- Rent the right kit for the job
- Plan weekend scheduling and reserve ahead
- Watch for dust collection
- Inspect the equipment before use
- Return on time to avoid fees