Popcorn Ceiling Sander with Vacuum Rental: A DIY Guide
Master popcorn ceiling removal safely using a vacuum-assisted sander rental. Prep, containment, step-by-step sanding, cleanup, and asbestos safety for a smooth, dust-controlled finish.

You will learn how to remove popcorn ceilings safely using a vacuum-equipped sander rental, minimizing dust and debris. This quick guide covers choosing the right sander, prep with plastic barriers, PPE requirements, technique to avoid gouging, and how to dispose of debris and finish the ceiling. Also, we outline when to test for asbestos and how to handle repairs afterward.
Safety and Prep for Popcorn Ceiling Removal
Removing popcorn ceilings can create a lot of dust and potential hazards, especially in older homes. Before you begin, evaluate whether the ceiling might contain asbestos or other hazardous materials. If your home was built before 1980, treat the material as potentially asbestos-containing and plan for testing or professional guidance. Set expectations with family members and pets, and ensure good ventilation while controlling dust. Equip yourself with appropriate PPE: a well-fitted respirator (NIOSH-rated), eye protection, and hearing protection. Create a dust-free zone by sealing doors with plastic, laying down drop cloths, and using plastic sheeting to isolate the work area. Pro tip: keep a spare respirator cartridge and filter on hand, and change it if you notice breathing difficulty during work. These precautions reduce exposure and protect your air quality during removal.
Understanding Vacuum-Polished Sanding: Why It Helps
A vacuum-assisted sander is a cornerstone of a clean popcorn ceiling removal. The built-in dust collection system, often with HEPA filtration, captures most of the fine particles as you work, dramatically reducing airborne dust. This setup not only makes the job safer but also speeds cleanup afterward. When selecting equipment, look for a unit with a robust dust port, efficient suction, and a filter that is easy to access and replace. Regularly inspecting and cleaning the filter during use prevents loss of suction and prolongs the life of the tool. Pairing this with plastic containment dramatically lowers cleanup time and minimizes the risk of dust migrating to adjacent rooms.
Renting the Right Vacuum Sander: What to Look For
Not all vacuums are created equal for ceiling work. Seek a sander designed for drywall or plaster with a dedicated dust collection system and HEPA filtration. Ensure the model supports a detachable dust bag or canister and compatible sanding discs (120-150 grit is common for initial smoothing). Check the power requirements and cord length so you can work without tripping breakers. If renting, confirm availability for your entire project window and whether you’ll need an extension pole or adapters for your sander head. A bright rental option includes a pre-assembled kit with plastic containment, which minimizes setup time and dust spread. Always inspect the unit for damage and test suction before starting to ensure you’ll achieve consistency across the ceiling.
Setting Up Your Dust-Control Plan
A robust dust-control plan starts with containment. Erect plastic sheeting to cover walls, furniture, and flooring, and seal doorways with painter’s tape and extra plastic. Use zip walls or temporary plastic barriers to create a negative-pressure zone around the work area. Turn off HVAC or set it to recirculate outside air only if feasible, and keep the work area depressurized to prevent dust from escaping. Place a drop cloth beneath the work area to catch falling debris, and position the vacuum intake near the sanding action to maximize suction. Clear the workspace of unnecessary items to avoid obstruction and make cleanup faster. Finally, keep a dedicated waste bag or bin close at hand to store used sanding discs and dust-soaked materials.
Surface Prep and Ceiling Inspection
Begin with a visual inspection of the ceiling surface and surrounding fixtures. Remove or protect light fixtures and vent covers, and cover electrical outlets with painter’s tape and plastic if they’re flush with the ceiling. Look for cracks, water damage, or bulges that indicate structural issues; address these before sanding to avoid worsening defects. Lightly vacuum the ceiling first to remove loose dust, then perform a patch repair or skim coat on any damaged areas using joint compound. For stubborn paint or texture, test a small area with your sander to gauge how easily the popcorn layer comes off without scratching the underlying drywall. Label any problem spots for targeted touch-ups after sanding.
Step-by-Step Sanding Technique with Vacuum Attachment
- Power up the vacuum and sander, ensuring a secure connection and proper suction. 2) Stand to the side of your work area and hold the sander flat against the ceiling to maintain an even finish. 3) Begin in a corner and work in 2–4 ft wide sections, moving in a consistent, overlapping pattern to avoid lines. 4) Keep the sander moving slowly to prevent gouging or tearing the paper on the drywall. 5) Periodically pause to check suction and clean any clogged vents. 6) When you reach textures near edges or corners, use lighter passes and straight-line strokes. 7) Continuously vacuum the dust stream by keeping the unit on, or pause briefly to clear the filter. 8) After completing each large area, inspect for uniform texture and re-sand if needed. 9) Power down safely and store the equipment after the final pass. Tip: Keep a damp microfiber cloth handy to wipe a small area if dust remains. Avoid soaking the ceiling materials. 10) Do a final pass along the ceiling edge to ensure a smooth, even surface before finishing. This approach minimizes gouges and ensures a more consistent result.
Cleaning and Debris Disposal After Sanding
Once sanding is complete, remove protective coverings carefully to prevent dust from settling on clean surfaces. Vacuum the entire floor and any nearby furniture, and wipe walls with a damp microfiber cloth to pick up residual dust. Seal and dispose of used sanding discs and dust bags in accordance with local regulations, especially if asbestos testing has been performed. Take down plastic sheeting starting from the top and work downward to avoid dropping dust onto clean areas. Finally, inspect the ceiling for any remaining texture irregularities and perform light touch-up sanding if necessary before applying primer and paint. Proper disposal and thorough cleanup are essential to prevent recontamination of living spaces.
Finishing Options: Texture, Paint, and Repairs
With the popcorn texture removed, you face finishing choices. You can skim coat the entire ceiling to create a perfectly smooth surface, or apply a new texture that matches adjoining areas. After smoothing, apply a high-quality primer designed for plaster or drywall, then paint with the preferred sheen. If you notice small dents or nail pops after sanding, fill them with lightweight joint compound and sand flush once dry. For a durable finish, consider a stain-blocking primer in areas prone to moisture. If you plan to install new lighting or ceiling fixtures, ensure the new hardware is securely anchored and that any wiring work meets electrical codes. This stage defines the final appearance and longevity of your ceiling.
Safety Considerations: Asbestos, Lead, and Dust
Even with a vacuum system, popcorn ceilings can contain asbestos or lead-based paint depending on age and prior renovations. If your home predates 1980, or if you notice insulation-like fibers, stop sanding and arrange professional testing before continuing. Avoid creating dust clouds in occupied spaces; use close containment and wear proper PPE during any disturbance. When asbestos is suspected, contact licensed abatement professionals and follow local regulations for disposal. For lead-based paint, implement lead-safe work practices to minimize exposure, including cleaning with a damp cloth and using HEPA-filter vacuums. Always monitor air quality and ventilate the space appropriately to safeguard residents and pets.
Troubleshooting Common Issues and Maintenance
If suction drops or dust escapes, check the vacuum hose, filter, and bag for clogs, and replace the filter if needed. Uneven texture can occur from inconsistent pressure or fast movements; slow down and maintain consistent strokes. If edges start to chip, reduce contact with the edge and overlap more. Maintain the sander by cleaning the dust port after each session and storing discs in a dry place to prevent moisture damage. If you encounter moisture problems or water stains after sanding, address underlying leaks before proceeding with finishings. Regular maintenance of the vacuum system ensures your tool lasts longer and maintains strong suction during future jobs.
Authority Sources
Sourcing reliable, safety-centered guidance is essential for popcorn ceiling work. For asbestos testing and exposure guidance, see EPA's asbestos information and OSHA's safety standards, as well as CDC/NIOSH resources for worker protection. These sources provide foundational safety practices and regulatory context to help homeowners make informed decisions while reducing risk during popcorn ceiling removal. Always verify local regulations and consult professionals if any hazard is suspected.
Authority Sources Detailed
EPA: https://www.epa.gov/asbestos OSHA: https://www.osha.gov/asbestos CDC/NIOSH: https://www.cdc.gov/niosh/topics/asbestos/print.html
Tools & Materials
- Vacuum sander with HEPA filter(Rent a unit with onboard dust collection and HEPA filtration)
- Extension pole(For reaching ceilings without excessive climbing)
- Plastic sheeting and drop cloths(Dust barriers; 6-mil or heavier)
- Painter's tape(Seal edges and protect fixtures)
- Respirator (N95 or P100)(Protect lungs from fine dust)
- Safety goggles(Eye protection during sanding and cleanup)
- Hearing protection(Reduce noise exposure during sanding)
- Ladder or scaffold(Access the ceiling safely)
- Sanding discs/screens(Match sander type; typically 120–150 grit)
- Gloves(Optional for added hand protection)
- Zip walls or extra containment(Optional for enhanced containment)
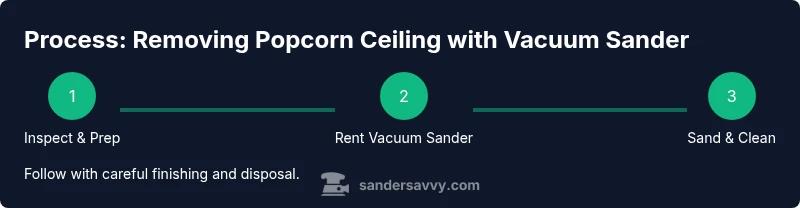
Steps
Estimated time: 4-8 hours
- 1
Assess hazards and prep
Survey the ceiling for obvious damage and potential asbestos risk. If in doubt, arrange testing or professional guidance before any sanding begins. Clear the room and set up containment with plastic sheeting to reduce dust spread.
Tip: Test the area first; a small patch can reveal how the texture will respond to sanding. - 2
Rent the right vacuum sander
Choose a vacuum sander with built-in dust collection and HEPA filtration. Verify compatibility with your ceiling texture and ensure the rental includes essential accessories like extension poles and dust barriers.
Tip: Inspect the unit for damage and test suction before starting. - 3
Set up dust containment
Seal doors and vents with plastic, create a negative-pressure zone if possible, and protect floors with drop cloths. Keep the HVAC system off to limit indoor dust circulation.
Tip: Keep a cleanup plan handy and place a dedicated waste bag within reach. - 4
Prep the ceiling edge
Cover light fixtures and outlets with plastic or tape, and remove or secure hardware near the ceiling. Patch any large cracks with joint compound to avoid capturing debris inside defects.
Tip: Remove as much loose popcorn as possible by gentle brushing before sanding. - 5
Begin sanding gracefully
Start from a corner and work in even, overlapping strokes. Keep the sander flat and avoid pressing hard to prevent gouges. Maintain continuous motion to achieve a uniform texture.
Tip: Let suction do the work; excessive pressure increases surface damage. - 6
Edge and corner care
Use a smaller attachment or bare hand-supported pass for edges and corners to avoid skipping or digging near fixtures.
Tip: Slow down on edges and corners to maintain a clean boundary. - 7
Check progress
Periodically stop to inspect the ceiling texture. Re-sand any uneven spots and recheck suction. Clear the filter if you notice a drop in performance.
Tip: Mark areas that need another pass for easier finishing. - 8
Cleanup and final prep
Shut down equipment, remove containment, and vacuum the room thoroughly. Wipe walls and hard surfaces with a damp cloth to capture residual dust before priming.
Tip: Dispose of dust bags according to local regulations especially if asbestos testing was performed. - 9
Finish with primer and paint
Apply a high-quality primer designed for drywall, then your chosen ceiling paint. Allow seams and repairs to dry fully before painting.
Tip: Use a roller with a long nap for smooth, even coverage.
Your Questions Answered
Is popcorn ceiling removal safe?
Popcorn ceiling removal can be safe with proper containment, PPE, and asbestos testing. If asbestos is suspected, consult licensed professionals before sanding.
With the right precautions and testing, popcorn ceiling removal can be safe. If asbestos is suspected, seek professional guidance.
Do I need a vacuum sander for this project?
A vacuum sander significantly reduces dust and makes cleanup easier compared to dry sanding. It’s strongly recommended for residential popcorn ceiling removal.
Yes. A vacuum sander helps keep dust under control and speeds cleanup.
What if my ceiling is pre-1980?
Ceilings built before 1980 may contain asbestos. Do not sand; arrange asbestos testing and follow regulatory guidance. If confirmed, hire a licensed abatement contractor.
Older ceilings might have asbestos. Don’t sand—test and get professional help if needed.
Can I DIY the entire project?
DIY is possible for intact ceilings with proper dust control, PPE, and safe handling of tools. If there’s any hazard or structural concern, consult a professional.
DIY is possible with precautions, but call a pro if hazards arise.
How should I dispose of debris?
Debris disposal should follow local regulations, especially if asbestos testing was done. Use sealed bags and avoid composting or regular trash for hazardous waste.
Seal and dispose of debris per local rules, especially if hazardous.
Do I need to repaint after smoothing?
Yes. After smoothing and drying, apply aPrimer compatible with drywall or plaster, then paint with your chosen finish.
You’ll likely repaint after priming.
What if I notice cracking after sanding?
Address cracks with joint compound, re-sand lightly, and re-prime before repainting. For larger cracks, consult a professional.
Repair cracks with joint compound and re-prime before repainting.
Watch Video
Main Points
- Rent a vacuum sander with HEPA filtration
- Contain dust with plastic barriers and low-traffic areas
- Sanding should be slow and controlled for consistency
- Test for hazards before sanding and follow safety guidance
- Plan thorough cleanup and proper disposal afterward