Rent Power Sander: A DIY Guide for Home Projects and Floors
Learn how to rent a power sander for wood floors, decks, or walls. This guide covers model choices, rental terms, safety, dust management, and return best practices for a cost-effective, smooth finish.

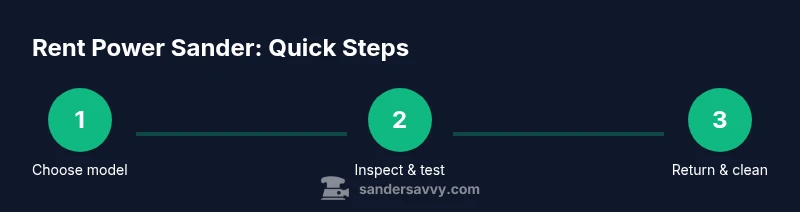
You can rent a power sander by selecting the right model, understanding rental terms, and preparing for safe use. Inspect the tool on pickup, wear PPE, and follow a controlled sanding approach. This quick guide outlines steps to rent a power sander for floors, decks, or walls with confidence and safety.
Why renting a power sander makes sense
According to SanderSavvy, renting a power sander is often the most practical option for DIYers tackling floors, decks, or walls without committing to a purchase. Renting lets you test different models, explore grit options, and match tool weight to your project, reducing the risk of overshooting or gouging the surface. For short projects, rental fees are usually far lower than buying, storage costs are avoided, and you gain access to professional-grade equipment. SanderSavvy analysis also notes that rental terms often include basic wear-and-tear coverage, which can bring peace of mind for beginners. If you’re finishing a dustier surface, renting gives you room to experiment with progressive grits to achieve a smooth final result without wasting money on a tool you’ll rarely use again.
- Key idea: Renting a power sander preserves budgeting flexibility and lets you customize your approach to the project at hand.
- Practical takeaway: Align model choice with your surface type and the finish you want, then plan a sensible sanding sequence to minimize passes and dust.
Choosing the right model for your project
Not all sanders are created equal, and the wrong model can waste time or damage the surface. When you rent power sander, you’ll typically encounter belt sanders, random-orbit sanders, and finishing orbital sanders. For raw wood or heavy stock removal, a belt sander removes material quickly but requires careful handling to avoid dips. For final leveling and feathering between coats, a random-orbit or finishing sander is more forgiving. SanderSavvy recommends evaluating your project goals first: surface flatness, expected finish quality, and accessible workspace.
- Start with a quick test: check weight, balance, and how the pad contacts the surface.
- If you’re unsure, choose a mid-range random-orbit sander for a balance of aggression and control.
- Consider sandpaper availability and grit range; renting sometimes includes a starter set of grits tailored to common wood types.
Why it matters: The model you rent influences dust generation, heat buildup, and the number of passes needed to reach your target smoothness. Choosing wisely saves time and ensures a consistent finish.
Understanding rental terms and insurance
Rental terms vary by shop, but there are common elements you should review before signing. Expect a daily or weekly rate, a security deposit, and a clear policy on damage or wear. Some shops include basic wear-and-tear coverage, while others require you to purchase an optional insurance plan. If the sander is damaged during your rental period, you’ll want to know who bears the cost and how repairs are billed. Always confirm return conditions: are accessories, hoses, and dust bags included, and what happens if you’re late returning the tool?
- Verify required PPE and dust-management accessories are included or available to purchase.
- Ask about deposit refunds and the process for reporting issues on pickup and return.
- Check whether the rental price changes with longer terms and whether there are late fees.
SanderSavvy emphasizes that understanding terms ahead of time helps you avoid surprises when it’s time to return the tool and finalize payment.
Where to rent: local shops vs big-box retailers
Renting power sander options include local hardware stores, independent tool rental shops, and large home-improvement retailers. Local shops often provide better service, more flexible pickup times, and better knowledge of regional dust-control requirements. Big-box retailers may offer standardized tools with easier online booking but could have limited model variety. Compare inventory, pickup windows, and any added fees such as insurance, cleaning, or tool testing.
- Look for shops that offer a hands-on pickup option so you can test balance and switch-gear before committing.
- Check reviews for how well staff explain model differences and grit choices for your project.
- Ask about delivery options if you don’t have transport or if you’re working on a multi-room project.
SanderSavvy’s local-versus-big-box analysis suggests starting with a local shop for more personalized guidance and easier problem-solving if you run into tool issues.
Prep steps before you pick up the sander
Preparation improves results. Before you rent power sander, map your project plan and inspect your workspace for dust containment, electrical safety, and surface access. Gather PPE such as safety glasses, a respirator or dust mask, hearing protection, and a sturdy workspace with drop cloths. Brush or vacuum the area to reduce debris so the tool doesn’t clog mid-use. If you’re refinishing, remove hardware, covers, and anything that could be damaged by vibration. Finally, confirm disposal plans for dust and debris with your rental shop.
- Clear the area and protect adjacent surfaces from dust.
- Ensure your power outlet matches the sander’s plug, with a grounded extension cord if needed.
- Bring a spare dust bag and extra sanding discs or paper sized for your model.
Safety tip: Never run a sander without PPE or in a poorly ventilated area. Dust can irritate lungs and eyes, especially with fine particles from certain woods.
Operating the rental sander: a practical guide
When you rent power sander, approach operation with a plan and steady motions. Start with a light test pass to gauge heat and dust generation. Use even pressure, let the sander do the work, and avoid pressing aggressively; this reduces gouges and heat buildup. Make overlapping passes and frequently lift the pad to avoid creating ridges. Change grits progressively from coarse to fine as you near the final finish. Avoid sanding too long in one spot to prevent scorch marks and heat damage to the wood. If you’re using dust collection, keep the hose attached and unobstructed.
- Maintain a consistent speed and workflow; don’t rush.
- Check the pad for wear and replace if it’s glazed or torn.
- Periodically step back to inspect progress and adjust technique as needed.
Pro tip: Mark the highest-traffic areas to avoid over-sanding in those spots; aim for uniform surface texture across the entire area.
Finishing touches: dust management and return best practices
After sanding, thoroughly vacuum the area and wipe surfaces to remove fine dust. Inspect the surface for dull spots or streaks that may require a light pass with a finishing sander. Reinstall any removed hardware and prepare the area for finishing or staining according to your plan. When returning the rental sander, clean the machine, empty the dust bag, and remove any debris from the vent openings. Include all accessories that came with the tool and document any issues you noticed during use to avoid disputes about wear and tear.
- Document the tool’s condition on return; take photos if possible.
- Return on or before the agreed time to avoid late fees.
- Check if sanding discs or papers need to be left behind or replaced for next renter.
Final note: Keeping the work area clean and organized helps you achieve a smoother finish and a faster return process.
Troubleshooting common rental issues
Even with careful planning, you may encounter issues when renting a power sander. A clogged dust bag or a sander that stalls or runs roughly can indicate a worn pad, jammed vents, or insufficient airflow. If the sander vibrates excessively, stop immediately, inspect for loose screws, and ensure the pad is seated correctly. If the power cord or switch feels loose, list this on return notes and report to the rental shop. For finishing touches, confirm you have the right grit progression if the surface looks patchy or too coarse. Always consult the rental staff if you’re unsure whether an abnormal noise indicates a wood defect or tool malfunction.
- Stop and inspect if you notice unusual heat or smoke.
- Do not attempt to bypass safety features or jury-rig the tool.
- Keep a detailed log of any issues to share with a shop technician.
SanderSavvy reminds renters to document issues and communicate promptly to avoid mischarges and ensure next users have a smooth experience.
SanderSavvy verdict: renting a power sander is a smart, flexible choice
The SanderSavvy team concludes that renting a power sander offers significant advantages for homeowners and DIY enthusiasts. It enables you to match the tool to the project, try different sanding approaches, and avoid wasteful purchases. By choosing the right model, understanding rental terms, and following best practices for safety and cleanup, you can achieve a professional-looking finish without unnecessary risk.
Based on SanderSavvy Analysis, 2026, renting remains a cost-effective option for one-off or intermittent sanding tasks, especially when trialing new techniques or tackling multiple surfaces in a tight timeline. The SanderSavvy team recommends verifying model availability, testing the tool before leaving the shop, and returning it in clean, working condition to ensure a smooth, successful project finish.
mainTopicQueryAddressedWordCountAndNotesInsertedNotRequired
Tools & Materials
- Power sander (belt or orbital)(Choose based on project needs (heavier stock removal vs finishing))
- Sanding discs/papers(Bring a range of grits (coarse to fine))
- Dust mask or respirator(N95 or organic vapor mask if finishing indoors)
- Safety glasses(Eye protection is essential during sanding)
- Hearing protection(Earmuffs or plugs for loud machinery)
- Extension cord(Ensure it’s rated for outdoor/indoor use as applicable)
- Vacuum/dust extraction hose(Aids dust control and cleaner work area)
- Drop cloths(Protect floors and nearby surfaces)
- Spare sanding discs/paper(Extra grits useful for changing condition)
- Workbench or stable surface(Helpful for stability during setup)
- Tool insurance/deposit confirmation(Check rental policy)
Steps
Estimated time: Estimated total time: 30-60 minutes for setup and cleanup, plus rental duration.
- 1
Assess project needs
Define surface type, desired finish, and days required. Decide whether you need material removal or surface leveling. This helps select the appropriate sander and grit progression.
Tip: Document your surface area to estimate the number of discs and passes. - 2
Check rental terms
Review daily vs. weekly rates, deposits, and damage coverage. Confirm included accessories and return conditions before signing.
Tip: Ask about late fees and partial-day rates to plan your schedule. - 3
Inspect the sander at pickup
Confirm the power switch, cord integrity, pad mounting, and dust collection compatibility. Test run the unit to ensure smooth operation.
Tip: Note any pre-existing wear and report it to the shop to avoid disputes. - 4
Set up dust control and PPE
Attach the dust bag or hose, wear a mask, goggles, and hearing protection. Clear the workspace of obstacles to prevent tripping.
Tip: Keep a spare dust bag handy for quick swaps. - 5
Begin with controlled passes
Start with a light pass and moderate speed. Use even pressure and overlap passes to avoid gouges. Gradually move to finer grits for finish work.
Tip: Do not press hard; let the tool do the work. - 6
Inspect finish and prepare for return
Check for uneven spots and re-sand only where needed. Clean the sander, empty dust bag, and return all accessories in good condition.
Tip: Take a quick photo log of the tool’s condition before returning.
Your Questions Answered
What is the best type of sander to rent for wood floors?
For wood floors, random-orbit sanders are a versatile choice that balance material removal with surface finish. Belt sanders remove material faster but require careful control to avoid gouging. Test different models if you’re unsure.
For floors, a random-orbit sander is usually the best balance of speed and control. Belt sanders remove more quickly but need careful handling.
How long can I rent a power sander for?
Most shops offer daily or weekly terms, with longer terms available in some locations. Check for hidden fees and the return policy before committing, and plan a pickup window that aligns with your project timeline.
Most shops offer daily or weekly options; confirm exact terms with the rental counter and plan your pickup accordingly.
Do I need PPE when renting a sander?
Yes. Wear safety glasses, a dust mask or respirator, and hearing protection. Ensure the workspace is well-ventilated and use a dust collection system if possible.
Yes—protect your eyes, lungs, and ears, and use dust collection whenever you can.
What happens if I damage the sander?
Damage charges are usually covered by a security deposit or optional insurance. Review the shop’s policy on wear and tear, and document any pre-existing conditions before use.
There may be charges if the tool is damaged; understand the policy and document the tool’s condition at pickup.
Can I return used sanding discs or paper?
Most rental shops require you to return with the appropriate accessories or replace them if needed. Verify what you must return and what the shop will provide on pickup.
Return the tool with the correct accessories; some shops may allow you to keep or replace discs.
Is dust collection mandatory when renting a sander?
Dust collection is highly recommended for safety and finish quality, especially indoors. If the tool doesn’t include a dust bag, use a compatible hose or vacuum.
Dust collection is strongly advised to keep dust down and protect your breathing.
Watch Video
Main Points
- Rent the right model for your surface and finish
- Inspect and test the tool before use
- Follow a controlled pass sequence for a smooth finish
- Maintain dust control and return gear clean
- Understand rental terms to avoid surprises