Rent a Sander Near Me: A Practical DIY Guide
Learn how to locate, compare, and rent a sander near you for floors, decks, and walls. Practical steps, safety tips, and rental strategies to help DIYers finish projects efficiently.

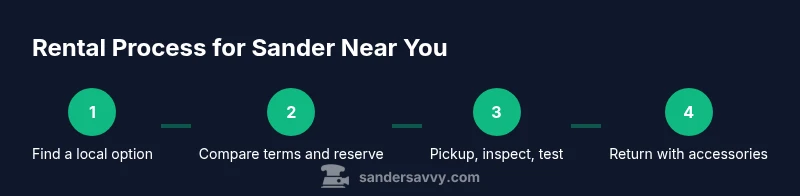
Renting a sander near you is typically the fastest, least-committal way to finish floors, decks, or walls. Start by checking local hardware stores, tool libraries, and rental houses, then compare sander types (orbital, belt, detail) and included accessories. Reserve ahead, inspect the tool on pickup, and follow safe sanding practices. Keep your project in mind when choosing grit and dust control.
Why renting a sander near me often makes sense
According to SanderSavvy, renting locally often makes the most sense for short- to mid-length projects. It avoids upfront ownership costs, storage needs, and maintenance hassles. Renting also lets you test different models on your actual project, which helps you pick the right tool for floors, decks, or walls. In 2026, with tighter timelines and evolving tool inventories, rental options can be a practical, flexible choice. If you're unsure whether renting is the best route, start with a local shop and a small area to test the waters and gauge finish quality before committing.
Types of sanders you can rent
Rentable sanders cover a range of tasks from fast material removal to fine finishing. The common options include orbital sanders (gentle, finish-friendly), belt sanders (rapid stock removal but with risk of gouging), and detail or palm sanders for edges and corners. A random-orbital sander blends speed with a smoother finish, often ideal for renovations on floors and walls. When choosing, consider the surface material, desired finish, and access to dust collection. Always check what grit range is compatible with the model you rent and whether the rental includes dust-collection accessories.
How to search for local rental options
Start with a simple search for rent sander near me, sander near me, or sander rental in your area. Check multiple sources: local hardware stores, tool rental shops, and public tool libraries. Read customer reviews focused on tool condition and customer service, then call ahead to confirm availability for your project type (floors, decks, or walls). If you can, visit in person to inspect the sander’s condition and the included accessories. Keep a list of three to five nearby options to compare terms side by side.
How to compare rental terms and rates
Rental terms vary by shop, duration, and model. Compare daily versus weekly rates, required deposits, and whether dust-extraction attachments are included or available as add-ons. Ask about insurance requirements, late return policies, and what happens if the tool arrives damaged or you notice an issue on pickup. Clarify whether you must return the tool with the same pads and a tested finish, and whether cleaning fees apply. Avoid surprise costs by getting everything in writing before pickup.
What to inspect before picking up the sander
Before you leave the shop, inspect the power cord for wear, the plug, and the dust bag or vacuum connection. Check the sanding pad or discs, ensure the baseplate is flat, and confirm that the dust collection system functions. If possible, do a quick test run on scrap material to listen for unusual noises, ensure smooth operation, and confirm that there are no visible cracks or loose parts. Document any issues with photos and inform staff immediately to avoid disputes later.
How to use sanders safely and effectively
Wear appropriate PPE: a respirator or dust mask, safety glasses, and hearing protection. Set up dust collection and use a drop cloth to protect floors and nearby surfaces. Start with a coarser grit for initial material removal, then progress to finer grits for finish. Move the sander evenly, keeping it flat on the surface and avoiding heavy pressure that can gouge the material. Always unplug and power down before changing pads or inspecting the tool.
Returning the tool and avoiding fees
When you’re done, clean the tool and return any accessories, cords, and dust-collection fittings where you found them. Get a receipt or digital confirmation and verify there are no additional charges for cleaning, damage, or late returns. If you notice issues after returning the tool, contact the rental shop promptly with photos and a description of the problem to avoid disputes.
Quick prep tips for smoother renting
Before you head out, bring a photo ID, a valid payment method, and a note of your project scope. If you’re unsure about grit choices, ask staff for a recommended starter set (e.g., 60, 80, 120) and whether you can swap discs during the rental period. Having a plan for dust control and workspace protection will save time and reduce cleanup later.
Tools & Materials
- Valid photo ID(Needed to rent; bring government-issued ID.)
- Credit card or payment method on file(Used for deposit and rental charges.)
- Device with internet access(To check local options and reserve online.)
- PPE: respirator, safety glasses, hearing protection(Protect your lungs, eyes, and ears during dust-generating work.)
- Drop cloths or plastic sheeting(Protect floors and nearby surfaces from dust and debris.)
- Vacuum or dust extractor (or shop vac with proper filter)(Best for controlling particulates during sanding.)
- Sanding discs/pads and grit guidance(Bring common grits (e.g., 60, 80, 120) or confirm what's included.)
- Inspection checklist for pickup(Use a printed or digital list to verify condition.)
Steps
Estimated time: 1-2 hours
- 1
Define project scope
Identify which surfaces you’ll sand (floors, decks, walls) and the final finish you want. This helps you pick the right sander type and grit progression.
Tip: Note surface material and any old finishes to tailor grit choices. - 2
Search for local rental options
Use online searches and call nearby stores or tool libraries to check availability for the model you want. Consider accessibility and pickup windows.
Tip: Ask about bundled accessories and dust-control options before deciding. - 3
Compare terms and reserve
Review daily vs weekly rates, deposits, and included accessories. Reserve the best-fitting model for your project.
Tip: Get terms in writing and confirm pickup location and time. - 4
Pickup and initial inspection
Inspect the tool’s condition, cords, and dust collection before you leave. Do a short test run on scrap material if possible.
Tip: Document any issues with photos and report them before leaving. - 5
Prepare workspace and PPE
Set up drop cloths, dust extraction, proper lighting, and PPE before you start sanding.
Tip: Clear the area of pets and kids to avoid accidents. - 6
Sanding technique and grit progression
Begin with a coarser grit and work in even passes, gradually moving to finer grits as you approach final finish.
Tip: Keep the sander flat and avoid pushing hard; let the tool do the work. - 7
Return and confirm charges
Return the tool on time with all accessories; ask for final charges to ensure no surprises.
Tip: Keep the receipt until you’re sure there are no post-return fees.
Your Questions Answered
What do I need to rent a sander?
Most shops require a valid photo ID and a payment method. Some locations may place a small security deposit on file. Be ready to describe your project so staff can suggest the right sander and grit options.
Bring a valid photo ID and a payment method; you may also need a small security deposit. Tell staff about your project to get the best rental match.
How long can I rent a sander?
Rentals are typically available in daily or weekly terms. You can usually extend if equipment is available, but confirm extension policies at pickup.
Most shops offer daily or weekly rentals, with possible extensions if the tool is available.
Do rental sanders come with dust collection?
Many rentals include a dust bag or a connection to a vacuum, but this varies by model and shop. Confirm dust-collection options before choosing.
Dust collection is common but not guaranteed; check what’s included when you pick up the sander.
Should I bring my own grit or does the shop provide?
Shops often provide starter grits, but you may want to bring common grits like 60, 80, and 120. Check what’s included and plan to swap as you progress.
Staff may provide starter grits; bringing 60, 80, and 120 helps you cover typical progression.
What is the best way to return the tool?
Return the tool on time with all parts and accessories in place. Get a receipt and confirm there are no additional charges for cleaning or damage.
Return on time with everything included, and keep the receipt in case there are later questions.
Watch Video
Main Points
- Rent locally to save time and storage space.
- Choose the right sander type for your project.
- Inspect and test the tool before leaving the shop.
- Return on time to avoid extra fees.