Sander with Vacuum Rental: Dust-Smart Sanding Guide
Discover how renting a sander with vacuum enhances dust control, finish quality, and safety. This SanderSavvy guide covers rental options, setup tips, and cost-saving practices for DIY projects.

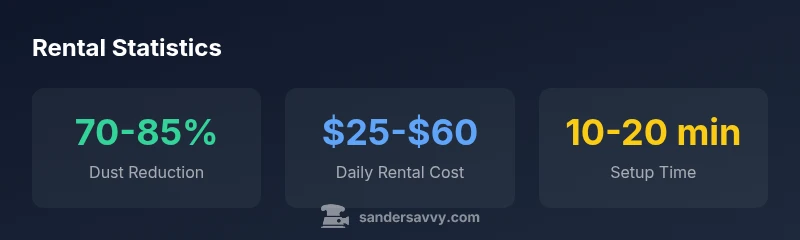
Renting a sander with vacuum is the dust-smart choice for floors and decks. A random-orbital or drum sander with a compatible vacuum or built-in dust extraction dramatically reduces airborne dust, improves finish quality, and simplifies cleanup. For most DIY projects, a 2–3 day rental covers small rooms, with longer sessions needed for large areas.
Why Renting a Sander with Vacuum Makes Sense
In projects involving wood floors, decks, or walls, reducing dust is not just a nicety—it’s a safety and finish-quality issue. According to SanderSavvy, renting a sander with a vacuum attachment or built-in extraction dramatically lowers airborne particulate, reduces cleanup time, and minimizes health risks for DIY homeowners. The sander with vacuum rental approach streamlines workflows by combining material removal with containment; you’ll spend less time sweeping and more time shaping the surface. For a homeowner tackling a mid-sized living room, renting a vacuum-equipped sander typically yields a noticeably cleaner job site and a more even scratch pattern, because fine dust is captured at the source rather than redistributed. This means fewer dust tracks on baseboards, less mess in HVAC intakes, and a reduced need for respirator use during intermediate steps. The combination of a capable sander and a compatible vacuum also helps you maintain a stable finish by preventing dust from interfering with the abrasive contact. When you compare a vacuum-equipped rental to a stand-alone sander, the difference in dust management and cleanup becomes a practical, measurable savings over the course of the project.
Sander Types Compatible with Vacuum Systems
Vacuum-compatible sanding equipment spans several common tool types. In most rental shops you’ll encounter:
- Random orbital sanders: Great balance of aggression and finish quality; most models offer a dust port that can pair with a shop vacuum or dust extractor.
- Drum sanders: Powerful material removal for floors; look for models with a robust dust extraction port or a recommended vacuum adapter.
- Detail/edge sanders: Smaller vac ports are common and effective for tight corners and trim work.
- Belt sanders: Heavier stock removal; you’ll want a strong dust collection setup and a compatible adapter to connect a vacuum hose.
Before renting, verify that the model supports your preferred vacuum connection and that the hose diameter matches your vacuum’s intake. If you’re unsure, ask the rental shop for a tested dust-collection configuration. This ensures you can keep dust under control right from the first pass and reduces cleanup time later in the project.
Dust Control, Safety, and Ventilation Considerations
Dust control isn’t just about cleaner floors; it’s about safer air and better finishing results. Vacuum-assisted sanding reduces inhalable dust, which benefits sensitive household members and hobbyists who sand indoors. When using a sander with vacuum rental, follow these practices:
- Attach and test the vacuum system before starting the project to confirm suction and airflow are adequate.
- Use lower grit abrasives for the initial stock removal, then switch to finer grits for finishing to minimize dust generation per pass.
- Keep doors and windows vented to surrounding rooms while isolating the work area with temporary barriers to limit dust migration.
- Wear a properly rated respirator for the prep work and aftercare, especially when sanding older finishes that may contain lead or other contaminants.
Effective dust control also helps your vacuum last longer: ensure your filter is clean and the canister is emptied regularly to maintain peak suction. A well-sealed dust path from tool to vacuum reduces airborne particles and makes cleanup far easier after the project.
In short, the right vacuum hookup enhances both safety and finish quality when you’re performing sander work with dust management in mind.
Rental Strategies: Planning, Inspection, and Setup
A thoughtful rental plan saves time and prevents on-site surprises. Start with a project breakdown: measure area, list the grit sequence, and estimate number of passes per surface. Then align rental length with your work plan, adding a buffer for refinishing and touch-ups. When inspecting potential rental units, check for a secure dust port, a secure power cord, and an ergonomic handle that reduces fatigue on longer sessions. Ask about included accessories: extra sandpaper, dust hoses, clamps, and any required vacuum adapters. If you’re unsure about compatibility, request a demonstration or a test run to confirm the vacuum hose fits your planned vacuum system.
Before you begin, stock a small toolbox with PPE, a utility knife, and a clean rag for quick wipe-downs. You’ll also want a plan for dust containment: seal the room, cover vents with dampened cloths, and arrange for a quick cleanup between passes. A well-coordinated rental plan lowers the risk of rework and helps you stay on schedule.
Cost Considerations and Hidden Fees
Rental costs can vary by shop, region, and equipment type. The most common charges include daily rental rates, deposits, and a late-return fee if you extend beyond the agreed window. Some shops offer bundled packages that include the sander, vacuum adapter, and a limited set of sanding discs at a discounted daily rate. Always confirm what’s included before you sign the rental agreement and ask about hidden fees such as cleaning charges for dirty tools, replacement parts, or fuel surcharges if you’re renting a motorized vacuum. For budget-conscious DIY projects, consider renting for a shorter window if you’re confident you can complete the work in fewer days, and negotiate a fixed daily rate to avoid surprise price shifts.
Finally, factor in the cost of dust-control supplies: disposable filters, extra hose lengths, and protective gear. While these add-ons may seem minor, they can add up over several days of sanding. A clear estimate that includes all potential charges helps you compare shops effectively and prevents sticker shock when you return the tools.
Best Practices for Decks, Floors, and Walls
Dial in a practical workflow tailored to the surface you’re refinishing. For floors, start with belt or drum stock removal to flatten high spots, then move to a random orbital sander for finish leveling. Always ensure your vacuum is actively pulling dust through the dust port during passes to maximize efficiency and reduce airborne particles. On decks, consider moisture content and wood type before choosing grit; you’ll typically begin with a coarser grit to remove old coatings, then work toward a finer grit for a smooth finish. When walls or ceilings are involved, a detail sander with a narrow vacuum port can help control dust in corners and along crown molding. Practice good technique: avoid pressing too hard, maintain a consistent pace, and overlap passes to achieve uniform removal.
As you progress, periodically vacuum the area to keep the worksite calm and safe. The vacuum’s dust collection capabilities aren’t just about cleanliness; they also prevent dust buildup from affecting abrasive contact, which can create uneven scratches or burnished patches. With a vacuum-assisted approach, you’ll see consistent results across different surfaces and finishes.
Maintenance, Cleaning, and Return Tips
After each sanding session, disconnect the vacuum and tool, and carefully clear any dust from the vacuum’s filter and hose. Replace or wash filters according to the manufacturer’s guidelines, and inspect the dust port for wear or blockages. Keep spare sanding discs and grit sequences organized so you can resume work quickly after breaks. When returning rental equipment, ensure all pieces are accounted for, clean, and free of excessive debris. If there are any signs of damage, report them promptly and document with photos to avoid disputes about the deposit.
Prolonged dust exposure can degrade vacuum performance, so it’s worth performing regular maintenance checks between rental periods. A clean, well-maintained vacuum helps you achieve better suction and prolongs equipment life, which is particularly important if you’re planning multiple projects over the same season.
Sander types and vacuum compatibility for rental scenarios
| Sander Type | Typical Rental Cost/Day | Vacuum Compatibility | Best Use Case |
|---|---|---|---|
| Random Orbital Sander | $20-$50 | Compatible with most canister vacuums via dust port | General floor prep and finishing |
| Belt Sander | $25-$60 | Requires robust dust extraction with adapter | Heavy stock removal on floors |
| Detail/Edge Sander | $15-$40 | Common vacuum attachments | Edges and tight corners |
| Drum Sander | $60-$120 | Requires strong dust collection | Wide-area floor sanding |
Your Questions Answered
What does a vacuum-compatible rental include?
Most rental packages include the sander, dust hose, and a basic vacuum adapter. Some shops offer integrated dust extraction attachments. Always verify what’s included and whether you need to bring your own vacuum or adapter.
Most kits include the sander and basic vacuum hose; verify attachments and adapters before you rent.
Is a vacuum-equipped sander suitable for hardwood floors?
Yes. Vacuum-equipped sanders work well on hardwood floors when paired with appropriate grit progression and proper technique. Start coarse to flatten, then move to finer grits for a smooth finish, keeping dust under control with the vacuum.
Yes—just match grit and technique, and let the vacuum handle the dust.
Do I need a dedicated vacuum or can I use a shop vac?
A dedicated shop vac with a proper dust port works well for most rentals if it’s powerful enough (look for a large canister and strong airflow). Ensure hose diameter matches the tool’s port and that filters are clean to maintain suction.
A good shop vac can work—just check the port size and power.
How do I attach a vacuum to a belt sander?
Most belt sanders have a dust port designed for vacuum hoses. If your model lacks a port, you may need a universal adapter or an external dust collector. Always secure hoses to prevent accidental disconnections during passes.
Use the dust port or a universal adapter to connect the vacuum.
How should I plan rental length for a room?
Estimate space, surface type, and finish requirements, then add a buffer for waste removal and touch-ups. For a small room, 1–2 days may suffice; larger rooms or complex finishes may require 2–4 days. Always confirm with the rental shop.
Plan around room size and finish; add a buffer.
“Using a sander with vacuum rental can dramatically curb dust exposure and improve finish consistency, especially on mid-to-large projects.”
Main Points
- Rent a vacuum-equipped sander for cleaner dust control
- Check vacuum compatibility before booking
- Plan rental duration based on project size
- Budget for dust-control accessories and safety gear
- Isolate work area to minimize dust spread