Big Sander for Walls: A Practical Guide
Learn to safely use a big sander for walls. This guide covers tool selection, prep, dust control, and finishing for smooth, professional interior walls in 2026.

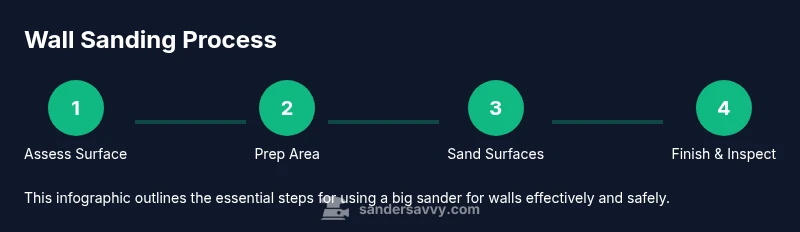
With a big sander for walls, you can quickly achieve smooth, even surfaces on interior walls. This quick answer highlights the essential steps: choose the right sander, set up a dust-controlled workspace, start with the correct grit, and finish with a fine grit before priming. Follow the detailed steps below for a safe, professional result.
What a big sander for walls can do
A big sander for walls is a powerful tool designed to cover large, flat surfaces with consistent abrasion. When used correctly, it speeds up wall prep, reduces physical strain, and yields a uniform base for paint or wallpaper. According to SanderSavvy, the biggest gains come when you balance tool weight, pad size, speed control, and dust management. This means selecting the right pad diameter—typically 5 to 8 inches for most interior walls—paired with a variable-speed motor that lets you dial down for delicate finishes and up for rough patches. The goal is to remove surface imperfections without creating new scratches or gouges. If you’re tackling plaster, drywall, or skim-coated walls, a big sander for walls can flatten ridges and even out texture, making subsequent coatings easier and more durable. In 2026, many homeowners find this approach cuts prep time significantly while preserving wall integrity for long-lasting results.
A well-chosen big sander for walls also minimizes fatigue. When you’re standing on a ladder or moving across a room, weight distribution and grip matter just as much as the grit you choose. The balance of leverage and control reduces wrist strain and helps you maintain a steady, uniform pass. In practice, you’ll use broad, overlapping strokes rather than long, erratic sweeps to avoid creating uneven patches. By combining the right sander with good technique, you’ll speed up the job without sacrificing surface quality. This section sets the stage for the practical steps that follow, focusing on tool selection, setup, and safe operation so you can approach wall sanding with confidence.
The SanderSavvy team emphasizes that preparation and control are the keys to success with a big sander for walls. 2026 brings better dust collection and ergonomics, making large-wall sanding safer and more predictable for DIYers.
Tools & Materials
- Big sander for walls (variable speed)(Aim for 5–8 inch pad diameter; ensure comfortable grip and built-in dust collection if possible.)
- Abrasive discs/pads (coarse to fine)(Grits commonly start around 60–120 for roughing and finish at 180–220 for a paint-ready surface.)
- Vacuum or dust extractor with appropriate hose(Prefers a HEPA-filtered unit; attach securely to the sander for best dust control.)
- Respirator or dust mask (NIOSH-rated)(Use an elastomeric respirator for extended sessions; replace filters as recommended.)
- Safety goggles(Shield eyes from fine particles and flying debris.)
- Hearing protection(PPE to protect from tool noise during long sanding sessions.)
- Drop cloths/plastic sheeting(Protect floors and furniture; seal off doorways as needed.)
- Ladder or stable step stool(Ensure secure footing when sanding high sections of walls.)
- Extension cord rated for power tool use(Keep cords from becoming a trip hazard; avoid daisy chaining too many cords.)
- Tack cloth or damp microfiber cloth(Used for final wipe-down to remove fine dust before finish.)
- Painter’s tape and masking film(Seal edges and trim to keep dust off adjacent areas.)
Steps
Estimated time: 60-90 minutes
- 1
Prep the area and protect surfaces
Clear furniture and cover floors with drop cloths. Remove switch covers and nail plates; seal off doorways with painter’s tape to minimize dust spread. Wipe walls to remove loose dust and debris so the big sander operates on a clean surface. A clean base helps you see texture and surface flaws clearly, guiding your passes with the big sander for walls.
Tip: Keep a tidy workspace; clutter increases the risk of accidental contact with edges and trims. - 2
Inspect walls for flaws and hazards
Scan for loose plaster, peeling paint, or deep cracks. Patch and cure any repairs before sanding to prevent scenarios where you sand through weak areas. Mark high spots and ridges with a light pencil so you know where to spend more passes.
Tip: Address structural issues first; sanding won’t fix major defects and may worsen them. - 3
Mount the right abrasive and set the sander
Attach a compatible abrasive pad in the mid-grit range (60–120) for initial leveling. If your sander has variable speed, set it on a moderate speed to begin. Test on a small section to confirm cutting action and surface response.
Tip: A test patch saves material and time by preventing over-sanding on visible areas. - 4
Begin sanding with broad, overlapping passes
Start with large, sweeping motions that cover entire wall sections. Maintain light-to-moderate pressure and keep the sander moving to avoid gouging. Move in a crisscross pattern to even out texture and flatten ridges.
Tip: Let the tool do the work; grinding too aggressively invites gouges and swirl marks. - 5
Transition to edges and corners
Use a smaller edge sander or hand sanding for tight corners and around trim. The big sander for walls excels on flat surface areas, but edges need a different approach to avoid rounding or uneven edges.
Tip: Always test the edge areas on scrap patches to refine control. - 6
Progress to finer grits to refine the surface
Once the surface is even, switch to a mid-to-fine grit (180–220). Light passes with the finer grit will remove scratches left by the coarser pad and prepare walls for primer.
Tip: Work gradually through grits; skipping straight to a fine grit can leave visible cross-hatch marks. - 7
Dust control during sanding
Keep the vacuum running and maintain a tight seal on the dust collection system. This reduces airborne particles and keeps the work area cleaner. Periodically stop to inspect the surface and wipe with a tack cloth as needed.
Tip: Dust containment is as important as the sanding itself for a healthy indoor environment. - 8
Final check and surface prep for finish
Do a final pass with the finest grit you used, then inspect for uniform texture and flatness. Wipe the surface with a tack cloth, and ensure it’s completely clean before priming or painting.
Tip: A clean surface improves paint adhesion and finish quality.
Your Questions Answered
Is a big sander for walls suitable for all wall types?
A big sander for walls works well on drywall and plaster surfaces, especially for large flat areas. It can be less ideal on highly delicate finishes or very tight corners, where edge sanding or manual work may be needed. Always test small areas first to gauge surface compatibility.
A big sander for walls is great for drywall and plaster, but test a small area first on delicate finishes.
What grit should I start with on rough walls?
Begin with a coarse grit in the 60–120 range to level rough textures. Move to mid grits (180–220) for finishing. Always verify the surface response with a test patch before broadening usage.
Start with 60 to 120 grit, then move to 180–220 grit as you refine the surface.
How do I prevent dust when using a big sander for walls?
Use a high-quality dust extractor connected to the sander, seal the room with barriers, wear a respirator or dust mask, and keep doors closed. A HEPA air purifier can help, too, and a final wipe with tack cloth removes remaining dust.
Connect a dust extractor, seal the room, wear a respirator, and keep a purifier running.
Can I sand around outlets and trim with a big sander for walls?
Edge work near outlets and trim should be done with a manual or edge-specific sander to avoid rounding or gouging. Use a scrap piece to shield surrounding areas when working close to fixtures.
Use a separate edge tool for outlets and trim to avoid mistakes.
What should I do after sanding before painting?
Vacuum thoroughly, wipe surfaces with tack cloth, and ensure the wall is completely dust-free before priming and painting. A damp wipe can help remove stubborn dust without shrinking the surface.
Clean the wall well, then prime before painting.
Watch Video
Main Points
- Plan protection before you start sanding.
- Choose grit and pad size based on wall texture and material.
- Maintain dust control to protect health and finish quality.
- Keep the sander moving to avoid gouging.
- Finish with a fine grit and clean surfaces before priming.