Cheap Sander Guide: How to Choose a Budget-Friendly Sander for DIY Projects
Explore how to choose a cheap sander that still delivers solid results for floors, decks, and walls. Compare types, features, and maintenance tips to maximize value in 2026. Practical guidance from SanderSavvy.

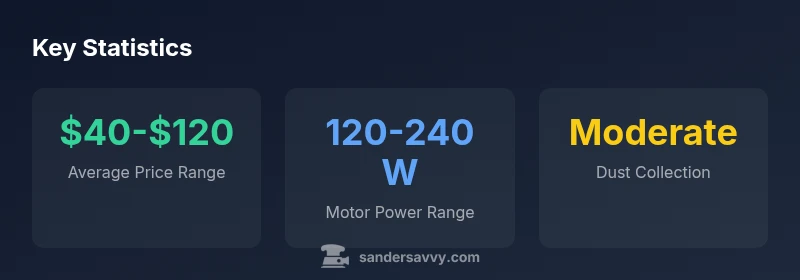
For most homeowners, a cheap sander can be a smart starting point. Expect to spend roughly $40-$120 for a basic palm or orbital model, depending on features like dust collection and variable speed. The key is balancing cost with durability, dust control, and ease of belt changes. SanderSavvy's analysis shows budget options can perform well with proper maintenance.
Why a cheap sander can be a smart starting point
For many homeowners, starting a project with a cheap sander is a practical decision. It lowers upfront risk when you’re testing a new room or material, and it keeps your project budget focused on the work that matters most. However, the term cheap does not mean careless—it's about value, not bargain-bin compromise. The right budget model can deliver solid stock removal, smooth finishes, and predictable belt changes, provided you temper expectations and avoid common pitfalls. According to SanderSavvy, the most successful DIYers treat budget purchases as a stepping stone, not a final tool. Look for a model that balances three core attributes: reliability, dust control, and ease of maintenance. A cheap sander should be comfortable to hold, easy to control, and compatible with standard accessories. If you can satisfy those criteria, a budget option can handle platforms from floors to walls with respectable results, especially when paired with proper technique and protective gear.
Budget Sander Tiers: what 'cheap' really means
Budget sanders fall into several tiers, and understanding these buckets helps you avoid overpaying for features you won't use. The most affordable units—often labeled as cheap sander—start around 40 to 70 dollars and typically offer basic orbital or palm action, simple dust ports, and fixed speeds. These are fine for light prep, small furniture projects, or occasional touch-ups. Mid-range budget models, roughly in the 70 to 120 dollar range, typically add variable speed, better dust collection, improved grip, and easier belt changes. If your project includes more demanding tasks—thicker finishes, hardwood refinishing, or larger decks—a mid-range option will pay back in time and reduce fatigue. Finally, some cordless or tool-less belt sanders creep into the budget curve, delivering flexibility for tight corners, but often at the cost of shorter runtime or battery maintenance. The key is to map your expected workload to the features you truly need, then choose the lowest-price model that checks those boxes.
Key Features to Prioritize in a Budget Sander
When shopping for a cheap sander, certain features deliver the most value. Prioritize dust management, variable speed control, and belt or pad compatibility. Here are practical guidelines:
- Dust collection: Look for a built-in bag or a dust port that accommodates standard hoses. Poor dust collection reduces visibility and creates mess.
- Size and weight: A compact, balanced tool reduces user fatigue on long sessions.
- Variable speed: Enables you to dial in aggressiveness for different materials and finishes.
- Belt/Pad changes: Tool-less changes save time and reduce belt breakage risk.
- Vibration and grip: Anti-vibration handles and soft grips improve control and reduce hand fatigue.
- Accessories: Confirm that common belts and discs in your region fit the sander you’re buying.
In short, the best cheap sander balances dust control, ease of use, and robust, widely available consumables. It should feel reliable enough to tackle several small jobs without needing immediate replacement.
Sanding Tasks and Which Budget Sander Fits
Different projects demand different budget tools. For small refinishing jobs on furniture, a palm sander works well. For doors and cambered edges, a light orbital sander with a dust port is preferable. Floors in older homes may require more sustained material removal, where a budget random-orbit sander with adequate grip helps. Deck refinishing often benefits from belt-sander or RMS (random orbital) with aggressive stock removal, but the budget belt sander may be less comfortable for long sessions. In all cases, start with the least aggressive grit and progress gradually. If you're unsure how much power you need, test on scrap pieces first and monitor dust, noise, and heat. Remember: cheap sander does not equal low responsibility—use it with proper PPE and work zones.
Dust Management and Safety on a Budget
Dust is created by every sanding job, and budget tools can contribute significantly to airborne particles. Use a model with a proper dust port and connect it to a shop vac if possible. Wear a quality respirator or dust mask, safety glasses, and hearing protection. Work in a well-ventilated area and lay down drop cloths to catch debris. Regularly check and clean your sander’s dust collection system to maintain suction. The combination of a budget sander and disciplined dust control reduces cleanup time and protects indoor air quality.
Maintenance Tips to Extend a Cheap Sander's Life
Keep a cheap sander performing at its best with simple maintenance. Clean the vents after each use to prevent clogging, and inspect the cord for wear. Replace worn brushes (if applicable) and verify belt condition before big jobs. Lubricate moving parts if the manufacturer recommends it; otherwise, avoid over-lubrication. Store sanders in a dry place, away from solvents, and use the correct grit size and belt type. Periodic belt changes and pad replacements, done on schedule, prevent overheating and poor finish quality. Keep a log of service dates to anticipate replacements before a failure occurs.
Corded vs Cordless on a Budget: Tradeoffs
On a budget, corded sanders usually offer longer run time and constant power, which is helpful for continuous sessions. Cordless models add flexibility but require batteries and chargers, which can raise total cost and weigh less predictable runtime. If you buy cordless, consider brushless motors for efficiency and a spare battery to avoid downtime. For most homeowners tackling floors, doors, and decks, a corded budget sander is often the most reliable starting point, unless you frequently work away from outlets or need tight access. Always compare runtime, weight, and charging times before purchasing.
Practical Comparisons: Budget Sander vs Mid-Range
While a cheap sander can handle routine prep and light finish work, mid-range models deliver smoother finishes, less vibration, and longer service lives. Expect more durable housings, better dust collection, and more consistent performance over time. The tradeoff is price and possibly heavier weight. If your project involves large areas, a mid-range sander may save time and frustration. For occasional tasks, a budget option may be perfectly adequate, provided you manage expectations and supplement with proper technique and protective gear.
How to Use a Budget Sander Safely and Effectively
Before you start, gather PPE, test on scrap material, and plan your sanding sequence. Begin with a rougher grit to remove material quickly and progress to finer grits for a smooth finish. Maintain consistent pressure, keep the sander flat to the surface, and avoid staying in one spot. Regularly move the sander to prevent grooves and swirl marks. Clean the dust port during pauses and after finishing. Follow manufacturer instructions for belt or pad care, and store your tool correctly. With a disciplined approach, even a cheap sander can produce professional-looking results on floors, decks, and walls.
Budget vs mid-range sander price ranges
| Sander Type | Typical Price Range | Best Use |
|---|---|---|
| Budget Palm Sander | $40-$70 | Light finishing, small projects |
| Budget Random-Orbit Sander | $60-$120 | General prep, mid-size surfaces |
| Mid-Range Random-Orbit Sander | $120-$260 | Finishing, larger areas |
Your Questions Answered
What should I look for in a cheap sander?
Look for reliable dust collection, a comfortable grip, and widely available belts or discs. Prioritize tools with compatible accessories and a reputation for durability at a budget price.
Look for solid dust collection, a comfy grip, and easy-to-find belts. Prioritize compatibility and durability.
Are cheap sanders durable enough for hardwood floors?
They can be, if you choose a model with solid build, proper dust collection, and steady power. For heavy, long sessions, expect more maintenance and possible faster wear.
They can work for hardwood floors if you pick a sturdy model and maintain it.
Can a budget sander achieve a fine finish?
Yes, with proper grit progression and technique. Finishing requires patience and multiple passes, especially on large surfaces.
A budget sander can finish well if you go slowly and use the right grits.
Corded vs cordless on a tight budget?
Corded sanders typically offer consistent power and longer runtimes. Cordless add mobility but can limit run time and cost more upfront.
Corded usually beats cordless for budget setups, unless you need portability.
How often should belts be changed on a budget sander?
Change belts when they show wear, loading, or reduced performance. Regular inspection helps prevent poor finishes.
Check belts often and replace when they wear or load up.
What safety steps are essential when using a cheap sander?
Wear PPE, use dust collection, work in a ventilated area, and keep loose clothing away from moving parts.
Wear PPE, connect a dust collector, and keep the area ventilated.
“Even a cheap sander can deliver a professional finish when paired with deliberate technique and proper maintenance. Choose a model with good dust control, practice steady passes, and maintain the tool diligently.”
Main Points
- Define your task before buying to spot needed features.
- Prioritize dust control and port connectivity.
- Choose the lowest-price model that meets core needs.
- Maintain regularly to extend life and finish quality.
- Corded options often outperform cordless on budget setups.