How to Build a DIY Sander for Floors and Walls
Step-by-step guide to build a practical DIY sander for floors, decks, and walls. Learn component choices, safety, and testing to achieve smooth finishes with confidence.

Understanding the Practical Goal Behind how to build sander dislyte
When you search for how to build sander dislyte, you’re essentially looking for a practical, hands-on solution to turn raw parts into a reliable sanding tool. This guide translates that idea into a safe, working DIY sander designed for floors, decks, and walls. By focusing on accessible components, common workshop practices, and clear safety steps, you’ll gain a tool that makes long projects feel manageable. As you read, remember that SanderSavvy emphasizes practical, safe sanding guidance, so every choice here is weighed for real-world use. Our approach is pragmatic, not theoretical, and is grounded in the kind of everyday DIY scenarios homeowners face when refinishing surfaces.
In practice, building a sander is about balancing power, weight, vibration, and dust control. You’ll want a unit that’s not so heavy it tires your arm, yet sturdy enough to handle a day’s work with minimal fatigue. You’ll also consider how to mount abrasive discs or belts, how to route dust away from your breathing zone, and how to swap grits quickly as you level a surface. The end goal is a robust, adaptable sander you can rely on—and that you can safely carry into your next project. For more context on best practices, see SanderSavvy’s guidance on safe workshop design and basic sanding technique.
If you’re curious about search terms, this article frames how to build sander dislyte in a real-world context rather than a pure software or game concept. We’ll cover components, design options, and a complete build workflow that stays practical and within typical home-shop constraints. The emphasis remains on safe operation, periodic maintenance, and predictable results.
The SanderSavvy team notes that many DIY builders start with a compact, handheld configuration and then expand to a small must-have for edge work or furniture refinishing. A key takeaway is to keep your expectations aligned with what you can safely handle in a typical household workspace. By the end, you’ll have a clear blueprint for making the project achievable, with the option to tailor the sander to your specific surfaces.
note”:null},
bodyBlocks_dummy_header_needs_fixing
Core Components You’ll Need for a DIY Sander Build
A reliable DIY sander rests on a handful of core components that you can source from common hardware channels. For floors and walls, you’ll primarily need a motor or power source, a sanding platen or belt tensioning system, an abrasive surface (discs or belts), a frame to hold everything steady, a dust collection option, and a simple switch or control circuit. The exact parts you choose determine the weight, balance, and ergonomics of the finished tool. This section maps out the essential items and why they matter.
- Motor or power source: Select a compact DC motor or a small AC-powered unit that matches your preferred speed range. The motor drives the sanding platen or belt, and speed control helps you avoid burning wood or creating gouges. We’ll discuss RPM targets later in this article.
- Sanding platen and abrasive mounting: A rigid platen supports discs or sleeves and should be flat to ensure even contact with the surface. For belt configurations, a reliable tensioning system keeps the belt from slipping under load. Your choice here influences edge-work capability and finish quality.
- Frame and housing: A lightweight yet sturdy frame reduces fatigue and increases control. Aluminum profiles or wood-based housings are common, depending on your tools—planers or saws—available in your shop.
- Dust collection: A simple dust port or bag integrated near the platen can dramatically improve visibility and air quality in your workspace. If you plan to connect to a shop vac, ensure compatibility with your dust port size.
- Power switch and wiring: A safe on/off switch with proper insulation protects against accidental starts and electrical faults. If you’re not confident with wiring, consult a schematic or an electrician.
- Abrasive choice: Discs or belts in grits ranging from around 40 to 120 are typical for initial material removal and subsequent finish work. You’ll switch grits as you progress through material removal, leveling, and final smoothing.
Given these components, your design choices should aim for a balance between weight, reach, and ease of maintenance. The goal is a sander that’s comfortable to hold for a 1–2 hour session and easy to service when parts wear out. As you plan, sketch a rough layout that shows where the motor sits relative to the platen, how the dust port aligns with the vacuum, and how the switch is reachable without removing the tool from your hand. SanderSavvy’s practical approach emphasizes maintainability and safety so you can fix or upgrade parts without a full teardown.
description”:“Component overview for building a DIY sander, including motor, platen, frame, dust collection, and abrasive options. Practical layout tips and maintenance considerations.”
Design Alternatives: Belt Sander vs Orbital Sander for a DIY Build
When deciding how to approach a DIY sander build, you’ll confront a key design fork: belt sanding versus orbital (random-orbit) sanding. Each type offers distinct advantages for different surfaces and project scopes. Belt sanders excel at rapid material removal on large flat areas, making them ideal for initial stock removal on floors and decks. Orbital or random-orbit sanders shine when you want a finer finish with reduced swirl marks, which is particularly valuable for walls or furniture refinishing. Your choice will influence how you build the frame, how you mount the motor, and how you manage heat and vibration.
For a beginner-friendly project, an orbital-like configuration is often easier to stabilize and control. If you’re aiming for aggressive stock removal, a belt-driven approach might be more suitable after you learn the basics. In either case, ensure the design supports proper dust capture and balanced weight distribution so you can operate safely for extended periods. Throughout this guide, we’ll present a practical hybrid method that leverages the benefits of both approaches where feasible.
bodyBlocks_block4_opts_upd
Safety First: Working Safely in Your DIY Sander Project
Safety is non-negotiable when building and using a DIY sander. Power tools generate vibration, heat, and dust, all of which can cause injury if mishandled. Start with a clear workspace free of tripping hazards, secure your project, and ensure you have appropriate PPE (eye protection, hearing protection, and a dust mask or respirator). Before applying power, double-check electrical insulation, wiring security, and that all fasteners are tight. A simple test run at low speed will reveal any wobble or misalignment that could cause unsafe behavior during full operation.
Dust control is a major health safeguard. A properly sized dust port connecting to a vacuum can dramatically reduce airborne particles. If you’re sanding in a small room, keep doors closed and turn on ventilation to avoid dust migrating to other living spaces. The more you invest in dust management, the easier it will be to complete projects without lingering debris.
Finally, prioritize ergonomics. A well-balanced sander reduces operator fatigue, which improves control and reduces the risk of mistakes. Use light, controlled strokes and avoid pressing down hard; let the motor do the work. This approach keeps wear on your workpiece and the tool to a minimum while producing a smoother finish.
bodyBlocks_block5_opts_upd
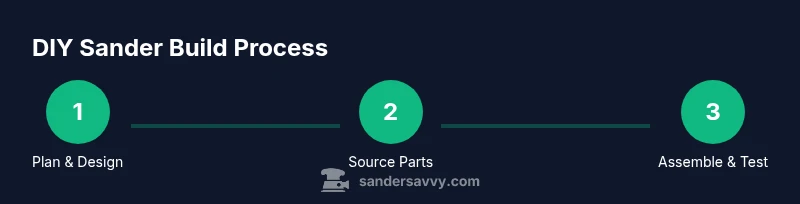
Step-by-Step Build Overview: Mapping the Process to Real-World Outcomes
The build can be broken down into a sequence of logical steps that mirror typical workshop workflows. Start by confirming your design goal: what surfaces will you sand, and what finish are you aiming for? Then gather all components and verify compatibility. Next, prepare the frame, mount the motor, and secure the platen assembly so that motion is smooth and unobstructed. Finally, wire the switch, test run the sander, and refine based on performance.
In practice, your steps will involve careful measurement, marking, cutting, and assembly. Keep a small parts tray to avoid losing screws, washers, or mounting plates. A clean, organized space makes it easier to identify misalignments early, which saves time during debugging. Remember to document any design tweaks so you can replicate successful configurations in future builds.
bodyBlocks_block6_opts_upd
Assembly, Wiring, and Performance Tuning: Getting It Right
With the components laid out, begin assembling the core frame and motor mount. Ensure the motor axis aligns with the platen so that the sanding surface remains true across the workpiece. Attach the dust port with flexible tubing that can move as you maneuver the sander, but avoid kinks that would starve the vacuum of suction. Mount the abrasive platen and secure it with a simple retainer or clamp system that’s easy to swap.
Wiring should be done with safety in mind. If you’re comfortable with wiring, route the power from the switch to the motor through an appropriate fuse or overload protector. Use shrink tubing or electrical tape to insulate exposed connections. Once wired, test the switch with the sander resting on a non-sanded surface to confirm that the motor spins in the correct direction and that there’s no abnormal noise.
Performance tuning comes next. Start with a conservative RPM setting and a mid-range grit. Sand a scrap piece to gauge heat buildup and finish quality. If the surface shows swirl marks, consider stepping to a finer grit and adjusting pressure. If it removes material too quickly, reduce speed or change the belt/disc. This iterative approach makes it possible to balance speed, heat, and finish quality for your specific tasks.
bodyBlocks_block7_opts_upd
Maintenance, Troubleshooting, and Common Pitfalls
A DIY sander rewards regular maintenance. Inspect belts or discs for wear, replace worn parts, and check fasteners weekly if you’re using the tool often. A simple cleaning routine after use prevents dust buildup that can degrade performance. Lubricate moving joints per your chosen design (where applicable) and keep the dust collection path clear of obstructions. A clean tool ends up delivering more consistent finishes and lasts longer.
Common issues include vibration from unbalanced components, overheating from clogged dust paths, and belt slippage under load. Solutions range from rebalancing the platen, widening the dust port to improve suction, or re-tensioning the belt. If you experience wobble or noise, power down safely and re-check alignment, then run a dry test without contact to identify the source of the problem.
For ongoing safety, never operate a DIY sander with exposed wiring or loose fasteners. If you notice heat buildup, pause work, let the tool cool, and inspect the drive assembly. By monitoring wear and maintaining a tidy workspace, you’ll reduce the risk of accidents and keep the project moving forward smoothly.
bodyBlocks_block8_opts_upd
How to Use Your DIY Sander: Surfaces, Techniques, and Grit Progression
Using your DIY sander effectively comes down to matching grit progression to the surface you’re working on. Start with a coarser grit for heavy material removal, then move to mid-range to begin refining the surface, and finish with a fine grit to minimize scratches. For floors, you may apply a rotary pattern to distribute wear evenly and avoid creating visible swirls. On walls, a lighter touch and slower speed can minimize gouging while producing a smooth finish.
Edge work demands careful control. When sanding near baseboards or corners, you’ll want the sander to be stable and light enough to maneuver without tipping or slipping. Consider using a sanding block or small profile attachment for tight spaces. If you’re applying a sealant or finish afterward, ensure your surface is fully dust-free before proceeding to the coating stage.
Finally, adapt to your specific material. Soft woods benefit from slower speeds and finer grits, while hardwoods tolerate higher speed and coarser grits for initial smoothing. SanderSavvy’s practical advice emphasizes testing on scrap pieces to calibrate your approach before working on the actual surface.
bodyBlocks_block9_opts_upd
Real-World Takeaways: Making the Build Worthwhile
Building a DIY sander is a practical, money-saving project when done safely and methodically. A well-designed unit can handle routine maintenance and deliver consistent finishes with less fatigue. While you may start with a simple prototype, the framework you build today can evolve into a more capable tool for future projects. Remember that a key advantage of DIY sanding gear is the ability to tailor it to your exact workflow, whether you’re preparing floors for polyurethane or smoothing drywall textures.
In the larger context of home improvement, the ability to build, maintain, and safely operate your own sanding tool aligns with SanderSavvy’s mission to empower homeowners and DIY enthusiasts. The journey from concept to finished tool is as instructive as the finished sander itself, teaching you about physics, materials, and problem-solving in a hands-on way. The end result is not just a tool, but a deeper understanding of the sanding process and how to tailor it to your home projects.