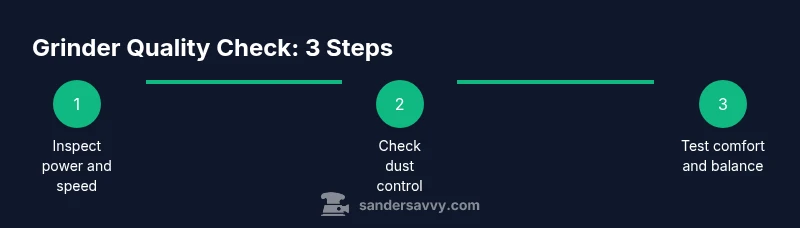
How to Tell If a Grinder Is Good for Sanding Floors
Learn practical criteria to evaluate a grinder for sanding floors, decks, and walls. Compare power, speed control, dust handling, attachments, and maintenance with a clear test plan.

To tell if a grinder is good for sanding floors, start by checking motor power (at least 7-9 amps for handheld units, higher for floor grinders), variable speed, and a robust, balanced body. Look for comfortable handles, dust collection compatibility, easy brush-replacement, and a wide assortment of sanding accessories. A solid warranty also signals reliability.
What makes a grinder good for sanding?
For sanding floors, decks, and walls, the right grinder feels sturdy, predictable, and easy to control. A good grinder delivers steady torque without stalling, maintains a comfortable pace across a full dust-collection cycle, and accepts common sanding attachments. From a distance, it should look well-built with durable housing and smooth moving parts. In practice, you’ll assess power, speed range, weight, balance, handle ergonomics, dust control, and serviceability. According to SanderSavvy, the best grinders balance these attributes to reduce fatigue and improve edge quality on hardwoods and concrete surfaces.
Core specs to compare when evaluating grinders
Key numbers tell the story: motor power, no-load speed, and weight influence how quickly you can finish a job and how long you can work comfortably. For handheld units, look for at least 7-9 amps with a variable-speed range. Floor grinders or heavy-duty models require higher amperage and solid motor insulation. Balance matters: a slightly heavier grinder can feel safer if the weight is distributed evenly. Also check the rated duty cycle to ensure the tool can run longer than your project requires.
Ergonomics, build quality, and safety features
A good grinder feels balanced and controllable. Check handle configuration (two-handed grip helps), vibration damping, and a secure switch with lock-on for extended sessions. Robust housings, sealed bearings, and shielded gears reduce wear. Safety features to value include proper guards, spark arrestors, and an accessible brake on metal grinders for control when you pull the trigger.
Dust control, filtration, and vacuum compatibility
Dust makes sanding hazardous and messy. A strong dust extraction path reduces airborne particles, improves visibility, and protects you from breathing silica and wood dust. Look for a tool with a dust port that fits your vacuum hose, and consider models with built-in filtration or bags. If in doubt, pair the grinder with a dedicated workshop vacuum and a HEPA-rated filter. SanderSavvy analysis shows that effective dust control dramatically lowers cleanup time and health risk.
Disc and attachment compatibility: discs, belts, and pads
The attachment system matters as much as the motor. Verify the correct disc size (commonly 5 inches/125 mm for mid-size tools) and the fastener type (hook-and-loop vs. screw-on). Ensure the grinder accepts your preferred discs (grit ranges from coarse to fine) and allows quick-change accessories. Check whether you can swap between sanding discs, flap discs, and sanding belts without tools, and whether the guard permits full coverage on edges.
Maintenance signals: life cycle, parts, and serviceability
A grinder that’s easy to maintain lasts longer. Look for accessible brushes, clean air vents, and replacement parts availability (brush kits, bearings, seals). A tool with a reputable warranty and a network of service centers tends to be more reliable over time. Simple maintenance like cleaning, lubricating moving parts, and storing with a dry, dust-free environment protects bearings and gears.
In-store testing checklist: what to try before you buy
If you’re shopping in person, run through a quick test to gauge performance. Hold the tool with a natural stance, switch it on, and listen for smooth running without grinding noise. Check vibration by noting the handle and body movement in your hands. If possible, run a short test on a scrap piece of wood or concrete to feel edge control and dust output. Leave with a clear sense of comfort, control, and noise level.
Budget and value considerations: what you get for your money
Entry-level grinders offer basic functionality good for light-duty work, while mid-range tools bring better ergonomics, faster change systems, and stronger dust control. Professional-grade models unlock heavier discs, longer service life, and superior durability. When budgeting, think beyond the upfront price: cost of accessories, replacement parts, and dust protection can impact total cost over a project. A well-chosen grinder that lasts years pays for itself through better results and fewer replacements.
Common mistakes to avoid when evaluating grinders
Don’t choose based on price alone; the cheapest grinder often costs more in downtime and replacements. Avoid models with poor balance, weak guards, and flimsy dust ports that clog easily. Don’t ignore dust control, as poor filtration increases health risk and cleanup time. Finally, skip the test drive; always compare at least two tools side-by-side to see which feels better in your hand and workspace.
Tools & Materials
- Grinder or sander unit(Choose the model type you’ll use (dual-handled for control on floors/edges).)
- Dust extraction vacuum or shop vac(HEPA filtration preferred; ensure compatible hose size.)
- PPE: respirator or dust mask(N95 or P100 recommended for fine dust.)
- Hearing protection(Use ear defenders or plugs.)
- Safety glasses or goggles(Protect eyes from dust and debris.)
- Replacement sanding discs/pads (assorted grits)(Keep a range from coarse to fine.)
- Disc attachment adapters or wrench(For quick changes without tools where possible.)
- Vacuum hose adapter(Ensures a tight seal to the grinder’s dust port.)
- Cleaning brush or compressed air (optional)(For clearing vents after use.)
Steps
Estimated time: Estimated total time: 60 minutes
- 1
Check compatibility and specs
Review the grinder’s amperage, speed range, weight, and disc compatibility. Confirm that the attachments you plan to use are supported by the model.
Tip: Higher amperage with solid torque helps on stubborn materials. - 2
Attach the correct disc or pad
Mount the sanding disc or pad using the appropriate adapter. Ensure a secure fit and that the guard allows full coverage without interference.
Tip: Avoid over-tightening; this can strip threads. - 3
Connect dust collection
Attach the vacuum hose to the grinder’s dust port and verify an airtight seal. Power up the vacuum first to create an effective dust plume capture.
Tip: A clogged port reduces suction; clear any debris. - 4
Set speed and apply proper pressure
Choose a speed appropriate for the material and disc. Apply even, light pressure; let the tool do the work to prevent gouging.
Tip: Too much pressure raises heat and shortens disc life. - 5
Test on a scrap piece under light load
Run the grinder on scrap material to feel control, listen for unusual sounds, and observe dust output.
Tip: If it stalls or smells hot, pause and reassess settings. - 6
Monitor cooling and vibrations
Take short breaks to prevent overheating; notice any abnormal vibration that could indicate imbalance or loose parts.
Tip: Vibration can cause uneven sanding and fatigue. - 7
Inspect safety features and guards
Ensure guards, sparks guards, and switch lock-on function operate smoothly and safely.
Tip: A failing guard is a red flag—don’t buy it. - 8
Plan maintenance after use
Clean the tool, clear vents, and store dry. Replace worn brushes and inspect bearings periodically.
Tip: A quick post-job wipe reduces dust buildup.
Your Questions Answered
What features define a good sanding grinder?
Look for solid power, variable speed, balanced design, comfortable grips, effective dust collection, and compatibility with common sanding discs. A reputable warranty and service network also signal long-term reliability.
Key features include power, speed control, balance, dust collection, and reliable support.
Corded vs cordless: which is better for sanding?
Corded models provide consistent power for longer sessions, which is important for floors. Cordless offers mobility but may have shorter run times and heavier batteries after extended use.
Corded gives steady power; cordless adds portability but can run out of juice.
How important is dust collection?
Very important. A good dust port and compatible vacuum reduce health risks and improve visibility, resulting in cleaner finishes.
Dust control is essential for health and a clean work area.
What maintenance helps the grinder last?
Regularly inspect brushes, clean vents, replace worn parts, and store in a dry place. A well-maintained grinder lasts longer and performs better.
Keep it clean, check parts, and store dry to extend life.
Can I test a grinder in-store effectively?
Yes. Check balance, trigger response, noise, and vibration. If possible, run a brief test on scrap material to observe edge control and dust output.
Test balance and noise in-store and try on scrap material if possible.
Should I rent or buy for a project?
Renting is sensible for a single project; buying makes sense if you plan frequent sanding tasks over time.
Rent for one-off jobs; buy if you expect frequent use.
Watch Video
Main Points
- Power and speed control drive performance
- Ergonomics reduce fatigue during long jobs
- Dust control boosts health and cleanup speed
- Attachment compatibility expands use cases
- Warranty and parts availability indicate reliability