Does Sanding Kill Mold? A Practical Troubleshooting Guide for Home DIYers
Learn why sanding alone isn’t enough to remove mold, plus a step-by-step troubleshooting approach for safe remediation, moisture control, and prevention.

Does sanding get rid of mold? Not on its own. Sanding may remove surface mold but cannot eliminate mold growth beneath walls, behind studs, or inside porous materials. For safe remediation, address moisture, remove contaminated materials, use containment and a HEPA vacuum, and consider professional help for larger infestations. Quick action is essential to prevent health risks.
Does sanding remove mold? the reality
According to SanderSavvy, does sanding get rid of mold? The short answer is no—sanding is not a mold remediation method. Mold growth is a biological contaminant that can penetrate porous materials such as drywall, plaster, wood, and studs. Sanding removes surface mold and may temporarily reduce visible staining, but it does not kill embedded spores or address the underlying moisture problem that fuels growth. For homeowners facing a mold issue after a leak or high humidity, the priority is to stop the moisture source, contain the area to prevent cross-contamination, and follow proper cleanup procedures. The SanderSavvy team emphasizes that any sanding near active mold should be done with caution and protective equipment to minimize exposure. The goal is to create a clean surface that can be properly treated, not to spread spores to new areas. Remember: does sanding get rid of mold? Not effectively without comprehensive remediation.
This guide uses practical, safety-first steps you can apply in real homes, while clearly noting when to call in professionals. Moisture control, material handling, and proper cleaning are the backbone of any successful remediation plan.
Why sanding is not a mold solution
Sanding fails to address the core problem because mold often lives behind surfaces and within porous materials. When you sand, you create dust that can carry spores to new areas, increasing the risk of cross-contamination. Additionally, some moulds release mycotoxins or irritants that can become airborne with dust. For does sanding get rid of mold, the correct perspective is that sanding is only a minor surface-prep step, if used at all during remediation. The most important decisions involve stopping moisture, isolating the work zone, and selecting appropriate cleanup methods. If the area remains damp after sanding, mold can reestablish in as little as 24-48 hours, making escalation a real possibility for homeowners who continue to moisture problems. Consider your space holistically: you aren’t just removing color; you’re reducing health risks.
The right sequence for mold remediation
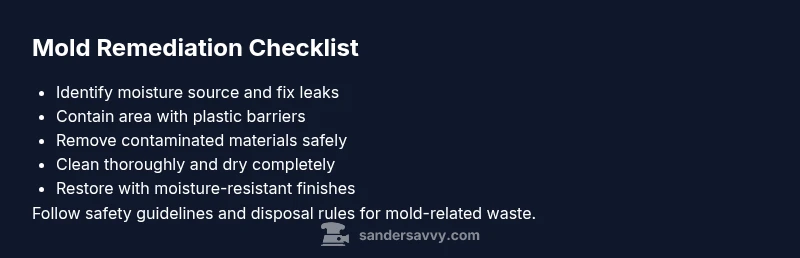
A proper mold remediation sequence starts with moisture control and ends with prevention. First, locate and fix the moisture source—leaks, poor drainage, or humidity. Then, isolate the affected area with plastic sheeting to prevent cross-contamination. Next, remove severely contaminated materials (drywall, insulation) following local safety guidelines. Clean remaining surfaces with mold-safe cleaners, rinse, and dry completely. Finally, repaint or refinish with moisture-resistant materials. While sanding might be part of surface prep, it should be reserved for non-porous finishes in areas cleared of active mold and moisture. SanderSavvy emphasizes that successful remediation hinges on moisture control, safe material removal, and thorough drying rather than aggressive sanding.
Tools, safety gear, and best practices
Before you touch any moldy surface, gather the right PPE: a NIOSH-approved respirator (or higher), chemical-resistant gloves, eye protection, and disposable coveralls. Use plastic drop cloths to protect adjacent spaces and seal the work area with tape and plastic sheeting. A HEPA-filter vacuum and a damp-wipe cleaning approach reduce airborne spores and dust. When sanding is necessary for non-porous finishes, keep it minimal, wear protection, and work slowly to minimize dust generation. Never mix bleach with ammonia or other cleaners, and always ventilate well. The key is containment and continuous airflow management to avoid spreading mold.
When to call a pro and costs expectations
For small, clearly contained areas, homeowners can often manage through careful containment and cleaning. However, call a professional for large infestations, mold behind walls, or signs of water damage that may have compromised the structure. A mold remediation professional can assess complexity, implement containment, and ensure safe removal of contaminated materials. The goal is not a quick cosmetic fix but a safe, lasting solution that prevents re-growth. If in doubt, prioritize safety and seek expert guidance rather than taking risky shortcuts.
Prevention and maintenance to stop mold returning
Prevention hinges on ongoing moisture control. Keep indoor humidity below 50-60% and use dehumidifiers in damp rooms. Fix leaks promptly and ensure good ventilation in kitchens, bathrooms, and laundry areas. Regularly inspect potential problem areas (basements, crawl spaces, under sinks) and address condensation or material damage immediately. When re-sealing surfaces, choose options with mold resistance and proper vapor barriers. Establish a routine for annual inspections to catch issues before they escalate. Remember, the best cure is prevention, not repeated remediation.
Real-world scenarios and examples
Example 1: A bathroom with a slow leak behind the tile shows visible mold on drywall. The homeowner stops the leak, isolates the area, removes damaged drywall, and dries the space for several days with dehumidification. Sanding is kept to minimal, non-porous finishes after containment. Example 2: A living room with mold growth behind warped paneling after a flood requires removal of affected insulation and drywall, professional assessment for hidden mold, and a full remediation plan. In both cases, sanding is not a standalone cure; moisture control and material removal drive successful outcomes.
Steps
Estimated time: 2-6 hours
- 1
Assess the scope and risks
Walk the area to identify visible mold, damp spots, and potential hidden growth. Document findings with notes or photos for reference. Decide whether to proceed as a small DIY task or call a professional for larger areas.
Tip: Safety first: protect yourself with PPE and avoid brushing mold into other rooms. - 2
Stop the moisture source
Repair leaks, fix drainage issues, and moderate humidity levels. Use a dehumidifier and fans to drive moisture out of the space. Do not start cleanup until the moisture source is controlled.
Tip: Ventilation helps, but it won’t solve the mold problem alone. - 3
Contain the work area
Seal off the room with plastic sheeting and close doors. Use tape to seal gaps and set up negative pressure if possible to prevent spores from migrating.
Tip: Keep pets and children away from the work zone. - 4
Decide what to remove
Evaluate porous materials for removal (drywall, insulation) and non-porous finishes to be cleaned. Remove contaminated materials using proper disposal methods and protective gear.
Tip: Double-bag removed materials and seal before disposal. - 5
Clean and disinfect surfaces
Clean remaining surfaces with detergent and rinse. Use an approved mold-cleaner or antifungal solution following label instructions. Dry all surfaces completely before proceeding.
Tip: Never mix cleaners; follow safety labels precisely. - 6
Dry thoroughly and inspect
Continue dehumidification and airflow until the space remains consistently dry for several days. Re-inspect for any signs of re-growth and address minor moisture issues promptly.
Tip: Use a moisture meter if available to confirm dryness. - 7
Repair and restore
Replace removed materials with moisture-resistant options if possible. Repaint with mold-resistant primer and finish when the area is fully dry. Consider preventative barriers to reduce future moisture intrusion.
Tip: Choose products with built-in moisture resistance where appropriate.
Diagnosis: Visible mold growth following water intrusion or in damp spaces
Possible Causes
- highMoisture intrusion from leaks, condensation, or high humidity
- mediumPoor ventilation and inadequate moisture control
- lowHidden mold growth behind walls, under flooring, or in HVAC spaces
Fixes
- easyIdentify moisture source and repair leaks; reduce humidity to below 50-60%
- easyContain the affected area with plastic barriers and use a HEPA air purifier to minimize spread
- mediumRemove mold-contaminated porous materials (drywall, insulation) following safety guidelines
- mediumThoroughly clean and dry surfaces; apply mold-resistant coatings after removal of contamination
Your Questions Answered
Can sanding cure a mold problem?
Sanding does not cure mold. It may remove surface mold but won’t eliminate growth behind walls or within porous materials. Proper remediation requires moisture control, material removal, and thorough cleaning.
Sanding alone won’t cure mold. Clean, dry, and remove contaminated materials, and address moisture to prevent recurrence.
What should I wear when dealing with mold?
Wear a respirator suitable for particulates, protective gloves, eye protection, and disposable coveralls. Use plastic sheeting to contain the work area and a HEPA vacuum for cleanup.
Protect yourself with a proper respirator and PPE, and contain the area to limit spores.
When is professional help necessary?
Call a pro for large infestations, mold behind walls, or if you notice persistent water damage. Professionals can assess scope, containment needs, and proper disposal.
If mold covers a large area or is hidden, get a mold remediation professional involved.
Can mold return after sanding?
Yes, if moisture returns and contaminated materials were not fully removed or properly dried. Ongoing moisture control is essential to prevent recurrence.
Mold can come back if moisture isn’t controlled after cleanup.
Are there safe DIY methods for small mold spots?
Small, clearly contained mold spots can be addressed with proper PPE and cleaning, but avoid large or hidden infestations. When in doubt, consult a professional.
For small areas you can DIY with caution, but larger issues need expert help.
Watch Video
Main Points
- Address moisture before mold cleanup; sanding alone won’t fix the problem
- Contain the area and use PPE to prevent exposure and spread
- Remove contaminated materials and dry thoroughly to prevent regrowth
- Call a professional for large infestations or hidden mold
- Maintain humidity control to prevent future mold growth