Drum vs Belt Sander: A Practical Guide for Home DIYers
Compare drum and belt sanders for floors, decks, and walls. Learn stock removal, finish quality, edge work, safety, and maintenance to choose the right tool.

When deciding between a drum sander and a belt sander, remember that drum sanders remove material quickly on large, flat floors, while belt sanders offer better control for edges and finishing. In typical DIY floor projects, start with a belt sander for smoothing, then bring in a drum sander for heavy leveling if needed. Understanding drum vs belt sander helps you pick the right tool for the job.
Understanding the Drum vs Belt Sander Dynamic
At its core, drum vs belt sander is about two tools designed to remove material from wood surfaces, but they do so in different ways. Drum sanders use a rotating cylindrical drum wrapped with abrasive paper, delivering aggressive stock removal on large, flat floors. Belt sanders rely on a moving abrasive belt stretched across a rigid base, which translates into smoother control and finer finishes, especially along edges and transitions. According to SanderSavvy, the choice between them should start with the project shape, the wood you're working with, and the finish you want to achieve, not just the tool’s power rating. Understanding these inherent differences helps homeowners and DIYers plan a safe and efficient sanding sequence. The drum sander's primary strength is removing material quickly across wide swaths; the belt sander excels when you need consistent contact, less gouge risk, and a cleaner final surface. The goal is to map the job's demands to the tool's operational envelope, then adjust technique and safety practices accordingly. Throughout this guide you will see practical comparisons, real-world tips, and recommended workflow steps that keep dust under control and the work surface level.
According to SanderSavvy, starting with a belt sander for prep and finishing is a prudent approach for most DIY projects; reserve the drum sander for truly uneven floors or large areas that require aggressive material removal.
When to Use a Drum Sander
Drum sanders are designed for stripping away heavy stock and leveling uneven surfaces on large, flat areas. They excel when you have thick coatings, deep scratches, or old finish layers that need rapid reduction. For hardwood floors, a drum sander can bring you back to near-plank level in a fraction of the time a belt sander would require, and it can remove more material with less effort per pass when you are working with a well-tuned machine. Because a drum sander covers broad swaths, it is best used after an initial assessment that determines whether your substrate is truly flat and stable. Pro tip: keep the drum moving smoothly, use even pressure, and rely on a dust-collection system to minimize airborne debris. If your floor has significant humps or cupping, plan your approach so you do not overcorrect and create new high spots. Remember to work in stages, commonly starting with rough grits and finishing with a fine grit to prepare for finish coats.
When to Use a Belt Sander
Belt sanders shine where precision and control matter most. They are ideal for edges, transitions, and curved or contoured areas that a drum sander cannot reach. A belt sander allows you to feel the material with your hand, adjust pressure, and respond quickly if the surface begins to gouge. For refinishing tasks, you can use progressively finer grits on a belt sander to achieve a near-smooth finish before applying top coats. Because the belt bends over a small area of contact, it is easier to avoid widening or gouging the surface when you work slowly and evenly. The compact size of many belt sanders makes them the preferred choice for stair treads, door jambs, and under-baseboard edges. If your project includes uneven heights or soft spots, use a light touch and frequently check your progress with a straightedge or level to ensure a consistent plane.
Stock Removal vs Finishing Quality
Stock removal rate and the quality of the resulting surface are typically the most important trade-offs when choosing between a drum sander and a belt sander. A drum sander can remove material quickly, which is essential when you need to flatten a high spot or remove an old finish in a hurry. However, that aggressiveness comes with a higher risk of creating new dips, cupping, or valleys if you move too quickly or overstep. A belt sander, by contrast, offers more controlled material removal and a finer finishing capability. It makes gradually smoother surfaces possible, with less risk of obvious gouges if you keep the feed steady and the motion uniform. The compromise is that finishing takes longer, and you may need to switch to finer grits or follow up with a buffer or hand-sanding. For a durable, even floor, plan multiple passes with appropriate grits and a consistent technique on both tools so that the final coating lays evenly.
Edge Work and Contours
Edges, corners, and transitions are where many DIY projects reveal weaknesses in sanding strategy. Belt sanders typically excel at edge work, because their narrow footprints give you better visibility and control as you approach vertical or horizontal transitions. They are also kinder to face rails, door thresholds, and baseboard recesses where overhangs would otherwise produce deep gouges. Drum sanders struggle in close quarters; their bulk makes it easy to over-sand near walls and undercut moldings. If an edge must be removed or blended, switch to a belt sander with a careful, shallow approach and frequent checks with a straightedge to ensure consistency with the central field. When possible, plan sanding sequences so edge work comes after main surfaces are reasonably flat, minimizing the risk of catching a hidden high spot.
Dust, Safety, and Footprint
Wood dust is a health concern and a fiber hazard for airborne particles, so wearing appropriate PPE is essential. Use a respirator rated for wood dust, safety glasses, hearing protection, and gloves when handling sanding discs or belts. Connect your sander to a dust collection system or shop vac, and seal off the workspace as much as possible to reduce dust migration to adjacent rooms. The footprint of a drum sander and belt sander on the floor is substantial; protect nearby furniture and plants, and consider using drop cloths or plastic sheeting to catch debris. Another safety consideration is kick-back: if you approach a grain change or knot with too much pressure, the feedback can cause the sander to grab and jump. Work slowly, keep both hands on the tool, maintain a stable stance, and avoid twisting the wrist during aggressive passes.
Speed, Control, and Material Compatibility
Electric speed and torque characteristics influence how much material you can remove in a single pass and how smoothly the tool behaves on different wood species. Drum sanders generally operate at high removal rates with persistent, steady contact, but their weight and dynamics can challenge control for beginners. Belt sanders offer finer control, especially at slower speeds or when using curved surfaces; their lower mass makes it easier to respond quickly to changes in surface topography. Different woods respond differently to sanding: softwoods gouge more easily, while hardwoods can burn if you apply excessive pressure at high speeds or with coarse grits. Always test a small area first, then proceed with a planned progression of grits and passes. If you are unsure about a particular wood type, consult manufacturer guidance or a trusted sanding guide like SanderSavvy's best-practice notes.
Cost, Availability, and Maintenance
Cost considerations go beyond the sticker price of the tool. Belt sanders usually cost less upfront and use readily available sanding belts with a broad price range, while drum sanders represent a larger investment, especially for professional-grade models. When evaluating rentals or purchases, consider the expected frequency of use, the size of your projects, and the amount of dust produced. Maintenance for belt sanders is typically limited to changing belts and cleaning the track, while drum sanders require more substantial wheel and motor checks, drum alignment, and belt tracking. Availability of replacement parts and service centers matters if you plan frequent projects across seasons. Regardless of choice, a robust dust collection setup reduces filter changes and extends the tool's life. Scheduling preventative maintenance now can prevent expensive downtime later.
Practical Workflow: Step-by-Step Approach
- Inspect the floor to identify high spots, cupping, and old finishes. 2) Choose your sequence: belt sander for initial smoothing around edges and transitions; drum sander for broad leveling on large flat areas. 3) Start with a coarse grit on the belt sander and move to progressively finer grits. 4) When a drum sander is used, maintain even pressure, avoid over-sanding any single area, and monitor for new low spots. 5) Blend transitions between tools by overlapping passes and using guided straightedges or rails. 6) Vacuum and re-check for consistency with a straightedge before applying finish. 7) Apply a final pass with a high-grit belt for an ultra-smooth surface, then clean thoroughly before finishing.
Common Mistakes to Avoid
Rushing through the process or applying uneven pressure can lead to gouges, dips, and chatter marks. Using the drum sander near edges or walls without a guide can result in unintended grooves. Skipping dust collection or wearing inadequate PPE increases health and cleanup risks. Mixing too many grit changes in a single pass can confuse pattern alignment and create inconsistent results. Finally, neglecting to seal joints or plan for transitions between sanding stages can leave finish-coating issues that require rework.
Choosing the Right Tool for Your Project
Think about the project’s scale, surface uniformity, and required finish. For a wide, flat hardwood floor with deep stock to remove, a drum sander is the right choice for the bulk of material removal. For edge work, subtle leveling, and a finely finished surface, a belt sander is your friend. If you expect both kinds of work, plan a hybrid approach: belt sander first to smooth and blend, then drum sander for leveling, followed by belt sander again with a fine grit to finalize. Always verify your floor's flatness with a straightedge and a level before applying finish; plan for a final screening with a random-orbital or palm sander after all heavy work to minimize swirl marks.
Maintenance Tips for Drum and Belt Sanders
Maintain tool health by cleaning dust from the vents after each project, inspecting belts and drums for wear, and checking belt tracking to avoid wandering while in use. Replace belts promptly when they wear or crack, and align drums or rollers as recommended by the manufacturer. Use high-quality abrasives and appropriate grit combinations for each stage of the project; avoid using coarse belts on delicate surfaces. Store sanders in a dry, clean space and inspect electrical cords and switches for signs of wear. With careful maintenance, your sanders will perform consistently and safely across many projects.
Comparison
| Feature | Drum Sander | Belt Sander |
|---|---|---|
| Stock Removal Rate | High on flat surfaces | Medium to high depending on grit and pressure |
| Finish Quality | Better for leveling but may leave swirl marks | Cleaner finish and smoother edges |
| Edge Handling | Limited near edges | Excellent edge and corner reach |
| Weight & Maneuverability | Heavier and less maneuverable | Lighter and easier to control |
| Dust Control | Requires robust dust collection | Effective with standard dust extractors |
| Typical Use Case | Large, flat surfaces and leveling | Edge work, refinishing, and shaping |
| Cost | Higher upfront cost; maintenance can be higher | Lower upfront cost; cheaper consumables |
What's Good
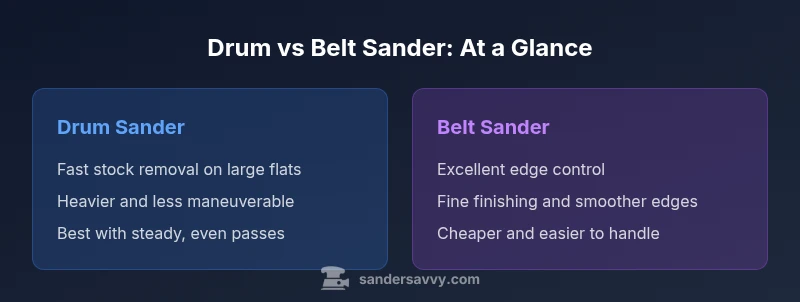
- Drum sander delivers rapid stock removal on large, flat surfaces
- Belt sander provides better control for edges and finishing
- Both tools are compatible with standard sanding grits and dust collection
- Common rental options make them accessible to DIYers
- Versatile for hardwood floors, decks, and walls when used correctly
Weaknesses
- Drum sanders are heavy and harder to maneuver
- Belt sanders can gouge if misused or overconfident
- Both generate significant dust without proper containment
- Transitioning between grits or tools adds prep time
Belt sander wins for general prep and finishing; drum sander excels for heavy stock removal on large flats
Choose a belt sander for most prep work and edges. Use a drum sander for major leveling and rapid material removal on large, flat floors, then finish with belt sander for a smooth final surface.
Your Questions Answered
What is the primary difference between drum and belt sanders?
Drum sanders remove material rapidly across large, flat areas, but can gouge easily if not used carefully. Belt sanders offer finer control and better edge handling, making them ideal for finishing work. The choice depends on project size, surface flatness, and the finish you want.
Drum sanders remove material quickly but are riskier for gouges. Belt sanders give you smoother control for edges and finishing.
Can I use a belt sander for initial floor leveling?
Yes, for rough leveling you can start with a belt sander, but you should be cautious to avoid creating uneven patches. It’s often followed by a drum sander for major leveling if needed.
Yes, but plan to finish with a belt and then confirm flatness before any drum work.
Are drum sanders safe for DIY homeowners?
Drum sanders are powerful and heavier, which can be challenging for beginners. Use proper stance, guards, and dust control, and work in short, controlled passes. If unsure, start with a belt sander and practice on scrap wood.
They can be safe with practice and proper PPE and dust control.
What PPE should I use when sanding?
Wear safety glasses, a respirator rated for wood dust, hearing protection, and gloves. Use a dust collection system and keep the work area well-ventilated to minimize airborne particles.
Goggles, respirator, ear protection, and dust collection are essential.
Renting vs buying: which is better for a DIY project?
For a one-off project, renting can be cost-effective. If you anticipate multiple projects or ongoing work, buying may be more economical in the long run, especially when paired with proper maintenance.
Rent for a single project; buy if you plan ongoing sanding work.
Main Points
- Start with belt sander for initial smoothing and shaping
- Use a drum sander for large flat surfaces and heavy stock removal
- Protect edges and transitions with belt sanding
- Dust collection and PPE are essential for safety
- Plan a staged grit progression and test on scrap wood