When to use belt sander vs disc sander: A practical guide
A practical guide to choosing belt vs disc sanders for floors, decks, and walls. Compare removal speed, finish quality, safety, and technique with actionable tips for homeowners and DIY enthusiasts.

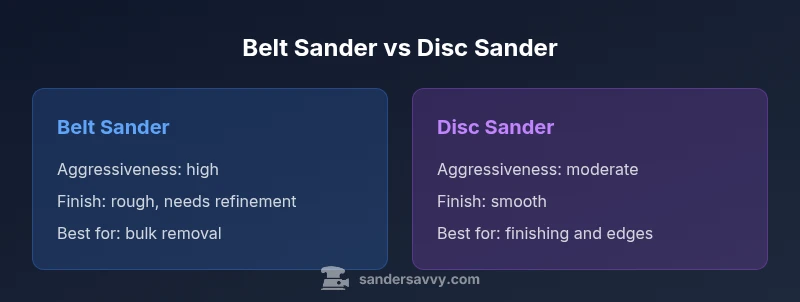
The belt sander is your go-to for rapid material removal on flat, wide surfaces, while the disc sander excels at finishing and edge work with better control. For most flooring jobs, start with a belt sander for bulk removal, then switch to a disc sander for a smooth, even finish. Choose based on surface size, desired finish, and edge access.
Understanding when to use belt sander vs disc sander
In woodworking, choosing the right sander is as important as selecting the right grit. when to use belt sander vs disc sander is a fundamental question for homeowners tackling floors, decks, or walls. According to SanderSavvy, the belt sander excels at rapid material removal on large, flat surfaces, while the disc sander provides finer control for finishing. The SanderSavvy team found that understanding the core mechanical differences—drum-like belt movement versus rotation of discs—helps you map tasks to tools before you start. Belt sanders use continuous belt abrasive around a drum, generating aggressive stock removal; disc sanders use a round abrasive disk mounted on a table or hand guide, offering consistent but slower material removal. This first distinction matters, because you will avoid over-sanding and creating gouges if you misapply the tool.
What is a belt sander?
A belt sander uses a moving abrasive belt that loops around two drums. The belt delivers aggressive stock removal, making it ideal for flattening high spots on large surfaces such as floorboards or tabletops. Belt sanders are typically heavier and can be less forgiving near edges, so plan work with guides and clamps. For best results, begin with lower grit belts to strip material quickly, then advance to higher grits for refinishing. When used with dust collection, they create substantial dust, so a connected vacuum is recommended. Belt sanders excel on flat, straight runs but require care to avoid gouging at edges. The belt's continuous action allows rapid removal of rough material, yet you must monitor heat build up and belt wear. Also consider belt width and length when choosing a model, as wider belts cover more area and reduce cycle time, which is practical on large floor sections.
What is a disc sander?
A disc sander uses a circular abrasive disk mounted on a rotating platen or on a handheld head. The disc provides more precise control and consistent contact, making it well suited for finishing work, smoothing edges, and tackling small to medium sized surfaces. Disc sanders are generally lighter and easier to maneuver in corners, but their stock removal rate is slower than belt systems. They shine when you need a uniform finish and minimal risk of gouging since you can feather the cut with lighter pressure. The selection of grit grades matters: start with medium grits for initial shaping and move to fine grits for finishing. Dust collection is still important to keep the work area clean and safe. For edge work, the disc can reach tighter angles when used with a table or a flexible backer, and many models offer adjustable tilts and fences to improve accuracy.
Key decision factors for choosing between them
Start by assessing the project scale. If you need bulk stock removal on a large flat surface, a belt sander will perform fastest. For a smooth finish and careful edge work, a disc sander provides better control and can produce cleaner results with less risk of gouging. Consider the workholding setup: a belt sander benefits from a stable, flat reference area, whereas a disc sander may require a bench or tilting table for precise angles. Grit selection matters: coarse grits remove quickly but leave rough texture; finer grits create a finer finish. Dust management is essential for both tools; ensure your shop vacuum is rated for fine dust and use a mask when sanding. Weight and maneuverability influence fatigue over long sessions. Budget is another factor: entry level belt sanders range in price and belt availability can affect cost over time. Based on SanderSavvy analysis, the belt sander is typically favored for bulk removal, while the disc sander is preferred for finish work in tight spots.
Belt sander use cases floors decks and large flat surfaces
On floors, belt sanders are the go to for leveling and removing old coatings. A belt sander can quickly reduce uneven boards and remove old polyurethane layers when used with the right belt grit progression. On decks, a belt sander helps remove splinters and level high spots, but you must protect adjacent bearings and avoid scorching the wood. For large flat surfaces such as wide planks or tabletops, the belt is efficient but you should keep the sander moving and maintain a consistent pass to avoid creating waves. As you progress, switch to finer grits to prepare for finish coats. Always wear a dust mask and use a compatible dust extraction system because belt sanding can generate a lot of fine particles and resin dust.
Disc sander use cases finishing and detail work
Disc sanders excel where edges and details matter. They are ideal for flush edges along a doorway, the curved contour of a cabinet face, or around windows where a belt cannot easily reach. The disc provides a more controlled contact and can deliver a uniform finish with less risk of gouging if you apply light pressure and move slowly. On smaller surfaces, a disc sander with a relatively fine grit can remove glaze from wood without rapidly removing stock. For intermediate stock shaping, discs can blend between passes from different angles. Keep the disc clean and mounted on a stable backer to prevent wobble. Dust extraction helps maintain visibility and reduces airborne dust.
Safety setup and technique tips
Always wear eye protection, a dust mask, and hearing protection. Confirm dust collection is attached and functioning before starting. Use steady, even pressure and let the tool do the work rather than forcing it. Maintain the correct stance to balance weight and control, especially on floors and vertical surfaces. Make practice passes on scrap wood first to gauge removal rate. Keep blades sharp, belts intact, and discs free of glaze to avoid clogging. When working near edges, test the tool on a sacrificial piece to prevent accidental gouging. After finishing, power down, unplug, and inspect belts or discs for wear.
Maintenance and consumables
Maintain belts and discs by checking surface glazing, tension, and alignment. Replace belts before they start to slip or wear unevenly, and swap discs when they become glazed or chipped. Keep sander surfaces clean and use a soft brush to remove embedded dust between passes. Store belts and discs in a cool, dry place and rotate belt colors to extend life. Calibrate dust collection and ensure vacuum filters are clean. Periodic lubrication of moving parts and checking motor bearings can extend tool life. Always match grit progression to the job and avoid exposing belts to moisture.
Practical decision guide and workflow
Start with a quick survey of the surface and decide if bulk removal is needed. If yes, grab the belt sander and choose a coarse belt to begin, then step through grits up to finish. If the goal is finishing or edge work, start with the disc sander using a mid range grit and refine with higher grits as needed. In complex projects, you may alternate between tools to blend transitions. A simple decision tree helps: Is bulk material present? Belt sander. Is the finish critical and edges accessible? Disc sander. Is space tight or corners limited? Disc sander with careful technique. Always test on a scrap piece first and adjust grit and speed based on observed results. This workflow supports safer, faster, and higher quality outcomes for homeowners and DIY enthusiasts.
Comparison
| Feature | Belt Sander | Disc Sander |
|---|---|---|
| Aggressiveness/removal rate | high (bulk stock removal) | moderate (controlled material removal) |
| Surface finish quality | rougher texture; requires finishing pass | smoother finish; ideal for finishing passes |
| Best for | large flat surfaces and flattening floors/decks | edge work and finishing with precise control |
| Edge handling | less precise on edges; higher risk of gouges | better edge reach with careful guidance |
| Dust generation | high during aggressive removal, needs strong collection | moderate to high, manageable with good dust control |
| Price range (tool only) | $50-$200 | $60-$250 |
What's Good
- Fast bulk material removal on large flat surfaces
- Excellent for flattening floors and leveling decks
- Wide belt options offer versatility with grit range
- Lower effort per square foot for big jobs when used correctly
Weaknesses
- Can gouge edges if not carefully guided or clamped
- Produces more dust and requires robust dust collection
- Bulky and harder to maneuver in tight spaces or corners
- Over-sanding risk if the operator loses control
Belt sander wins for bulk removal; disc sander wins for finish and precision
In most DIY flooring projects, start with a belt sander for leveling and bulk stock removal, then switch to a disc sander for finishing and edge work. The SanderSavvy team recommends this two step approach to maximize speed while protecting edges and achieving a smooth final surface.
Your Questions Answered
What is the main difference between belt sander and disc sander?
The belt sander uses a continuous belt to remove material rapidly on flat, wide areas. The disc sander uses a round disk on a fixed head for smoother finishes and tighter control. Choose the belt for bulk removal and flattening, then the disc for finishing and edge work.
Belt sander for bulk removal, disc sander for finish and edge work.
Can I use a belt sander on curved surfaces?
Belt sanders are designed for flat surfaces and struggle on curves. You can approximate curves with jigs or use a flexible disc or orbital sander for contours to avoid gouging.
Belt sanders are best on flat surfaces; for curves, use a disc or orbital sander.
Which sander is better for edges?
Disc sanders generally offer better edge access and control, especially with a table or backer. Belt sanders can reach along edges but require careful handling to avoid gouges.
Disc sanders handle edges better with control.
Is a belt sander dangerous for floors?
Any sander can be hazardous if misused. Protect existing finishes, clamp the work, and maintain a light touch near edges. Allow heat buildup to dissipate and use dust collection to keep visibility clear.
Use caution near edges and finish; keep dust down.
Should I use the same grit progression for both sanders?
Yes and no. Start with coarse grits for material removal on belt or disc when needed, then progress to mid and fine grits for finishing. Adapt based on tool and surface response.
Start coarse, then move to finer grits for both sanders.
How do I prevent burn marks when sanding?
Maintain light pressure, keep the sander moving, and avoid staying in one spot. Use proper grit progression and let the machine do the work rather than forcing it.
Keep light pressure and move smoothly to prevent burns.
Main Points
- Assess surface size to choose bulk removal with belt sander
- Switch to disc sander for fine finish and edge control
- Use appropriate grit progression to avoid gouges
- Employ dust collection and PPE for safety
- Test on scrap wood before committing to the project