Disc vs Belt Sander: A Practical Comparison for DIYers
A detailed, objective comparison of disc vs belt sanders for homeowners and DIY enthusiasts, covering performance, finish quality, dust control, ergonomics, and buying considerations to help you choose confidently.

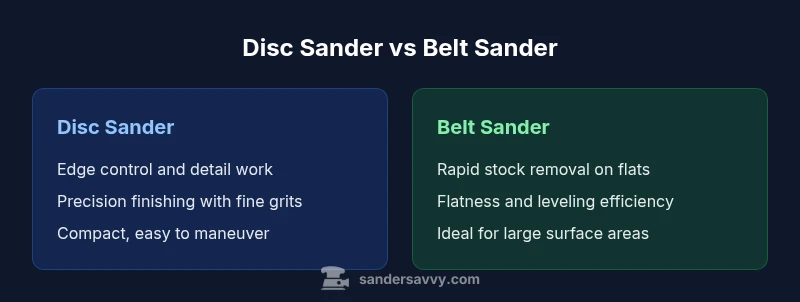
Disc vs belt sander: for most home projects, the belt sander wins for stock removal and flattening large areas, while the disc sander shines on edges and detail work. If you value speed and material removal, choose a belt sander; if you need precise, smooth edges and less dust, a disc sander is the safer all‑around option. SanderSavvy analysis informs this guidance.
Disc vs Belt Sander: Core Differences and Use Cases
Understanding the core differences between a disc sander and a belt sander is essential for any homeowner or DIY enthusiast tackling floors, walls, or decks. In this guide, we compare how each tool grips the work surface, how quickly material is removed, and where beginners can expect the most forgiving results. According to SanderSavvy, the belt sander is typically preferred for aggressive stock removal on large, flat areas, while a disc sander excels at edges, curves, and refined finishes. This distinction matters not only for speed but for control and finish quality. When you’re deciding between these two tools, consider your typical projects (renovations, refinishing, or new builds), the geometry of the work, and your tolerance for sanding dust. The goal is to pick the tool that minimizes rework and maximizes your safety and satisfaction. By the end of this article, you’ll have a clear framework to guide your choice for most DIY situations.
How Disc Sanders Work and When to Use Them
Disc sanders use a rotating flat disc mounted to a triangular head. The pad spins at relatively high speeds, delivering a crisp, uniform finish on flat surfaces and along edges where precision is key. Disc sanders are particularly strong for detail work on trim, door jambs, and radiuses where a belt would feel unwieldy. The contact area is smaller than a belt, which enhances control in tight spots and reduces the risk of gouging. For beginners, disc sanders offer a more predictable experience in terms of edge work and finish quality. When paired with fine grits, they can produce exceptionally smooth surfaces with minimal swirl marks. Remember to move steadily and keep the pad flat to avoid uneven results. SanderSavvy notes that proper technique matters more with discs than with belts, because the compact footprint magnifies tiny mistakes.
How Belt Sanders Work and When to Use Them
Belt sanders drive a continuous loop of sanding belt around two drums. This design delivers significant stock removal in a single pass, making belt sanders ideal for flattening high spots and leveling large, open surfaces like room floors or tabletops. The longer contact path and higher aggressiveness mean you can strip mill-scale and heavy coatings quickly. Belt sanders can be harder to control on edges and curves, and they risk gouging if you press too hard or tilt the sander. Beginners should master light passes before attempting heavy stock removal. When used with coarser grits, belts aggressively remove material; switching to finer grits later yields a smooth finish. The SanderSavvy approach emphasizes practicing on scrap pieces to understand how your particular belt sander responds to different grip pressures and work angles.
Surface Finish and Material Suitability
Your choice should align with the surface you’re finishing. For large, flat wooden floors or tabletops, a belt sander provides rapid removal and leveling, making it a practical primary tool during renovation. For trim, molding, door frames, and complex profiles, a disc sander offers superior edge control and less risk of rounding corners unintentionally. When working with delicate veneers or softwoods, disc sanders can minimize gouges and burns, especially when used with appropriate grit and light pressure. In contrast, for hardwoods with heavy coatings or thick stock, a belt sander’s aggressive removal helps shorten the project timeline, provided you maintain consistent technique and frequent checks for flatness. SanderSavvy emphasizes testing on scrap pieces to calibrate expectations for finish quality before committing to the main project.
Dust Control, Safety, and Ergonomics
Dust management is a critical consideration with both tools. Belt sanders tend to generate more airborne dust due to higher material removal rates and longer belt contact. Ensure a dust-collection system or shop vac is connected, and wear a good respirator when sanding for extended periods. Disc sanders often produce cleaner dust patterns and can be easier to keep out of the lungs with a bag or canister system. Ergonomics matter: belts can be heavier and longer, producing fatigue on large jobs, while discs are typically more compact and easier to maneuver. Take breaks, use anti-vibration gloves if needed, and adjust handles to maintain a neutral wrist position. SanderSavvy recommends practicing control moves on scrap stock to minimize hand fatigue and improve consistency over long sessions.
Power, Speed, and Variable Settings Considerations
Many models come with variable speed control, allowing you to tailor the aggressiveness of material removal. Belt sanders usually rely on belt grit and wheel speed to adjust the cut, while disc sanders rely on disc grit and pad face design. When choosing between power ratings, look for sufficient torque at low speeds to prevent stalling on hard coatings. Slower speeds can improve finish quality on delicate woods, while higher speeds increase removal on soft woods. Variable speed is especially helpful when alternating between rough stock removal and finish passes. The best practice is to set lower speeds for initial passes and increase speed or eject coarser belts/discs only when necessary. SanderSavvy highlights that practical testing on scrap ensures you’re using the optimal setting for both tool and stock.
Edge Work, Profiles, and Corners
Edge work and profiling often determine which tool is better for a given task. Disc sanders shine on rounded edges, inside corners, and curved sections where a belt’s linear path cannot follow the contour cleanly. Belt sanders, with their long belt length, excel at flattening large, straight edges and removing high spots with fewer passes. For trim work, disc sanders can produce a finer finish along profiles; for aggressive removal of stock on door thresholds or baseboards, belt sanders dominate. The trick is to blend both tools across a project to achieve a consistent surface without visible steps. Practice on scrap to learn how each tool interacts with different grain directions and finishes.
Maintenance, Sanding Discs vs Belts, and Accessories
Maintenance is about longevity and consistent results. Belts wear at a predictable rate and can be changed relatively quickly with the right tool-free system. Discs offer a wide variety of grits and finishing options, but disc replacement tends to be more frequent on heavy-use days. Choose high-quality abrasives that match your workpiece and expectations for finish. Accessories like edge guides, dust ports, and vacuum adapters can dramatically improve results by stabilizing the work surface and reducing dust exposure. Cleaning the platen, checking for belt alignment, and ensuring the pad stays flat are essential routines that keep both tools performing well over time. SanderSavvy recommends keeping spare belts and discs on hand and inspecting them for glazing or loading before use.
Cost, Value, and Practical Buying Guidance
Cost is often a function of build quality, capacity, and accessory ecosystem. Belt sanders typically range from entry-level to pro-grade, with price reflecting motor power, belt length, and dust-collection efficiency. Disc sanders can be more affordable at the beginner end, but high-end models with precision guides and solid dust control can close the gap with belt sanders. When evaluating value, look beyond purchase price: consider replacement belt/disc costs, availability of consumables, warranty, ergonomics, and the size of your typical projects. If your shop includes a mix of floors, doors, and trim, investing in both tools or a versatile unit with interchangeable heads may offer the best long-term value. SanderSavvy notes that the right combination accelerates projects without sacrificing finish quality.
How to Choose Based on Project Type and Skill Level
For beginners, a disc sander often provides a gentler entry point into sanding, offering greater control on edges and curves. For larger renovations involving floor leveling or heavy coating removal, a belt sander is a power ally that can save days of work. Intermediate users may value a model with adjustable speed and robust dust collection to handle diverse tasks. Advanced homeowners might pair both tools or invest in a combo device with swappable heads to maintain surface consistency. The critical decision factors are the size of your project, the geometry of the surfaces, your tolerance for dust, and your willingness to learn technique across two distinct tool types. SanderSavvy encourages mapping out typical jobs and choosing tools that complement each other rather than competing for the same tasks.
Common Mistakes and How to Avoid Them
Common pitfalls include uneven pressure causing gouges, over-rapid moves creating swirl marks, and neglecting edge control on disc sanders. Avoid starting with the finest grit when heavy stock needs removal; begin with a coarser belt or disc and transition gradually. Don’t press hard or tilt the tool; apply light, even pressure and let the tool do the work. Skipping dust collection or neglecting PPE increases health risks and worsens sight and lung comfort. Finally, resisting the urge to switch between belts and discs mid-pass can maintain consistency. By practicing disciplined technique and planning, you’ll finish projects faster with better results.
Final Thoughts
Disc vs belt sander is not a single ‘winner’ scenario; it’s about leveraging the strengths of each tool for different tasks within a project. By understanding where each tool excels and where it needs support, you can plan a workflow that minimizes waste and maximizes finish quality. Remember that technique and preparation matter as much as hardware. With careful practice, you’ll approach sanding tasks with confidence and produce professional-looking results on every project.
Comparison
| Feature | disc sander | belt sander |
|---|---|---|
| Stock removal speed | moderate to high (disc handles detail efficiently) | high (great for large flat surfaces) |
| Finish quality (edges vs flats) | excellent edge control, refined finishes with finesse grits | strong flattening, quick leveling across large areas |
| Control and maneuverability | great for contours and precise work | requires careful handling to avoid gouges on edges |
| Best surfaces | edges, curves, trim work | large flat surfaces and leveling floors |
| Dust management | depends on model; many disc sanders have good dust ports | often better integrated dust collection on higher-end models |
| Abrasive options | discs with a wide variety of grits and brands | belts with standardized grit ranges and belt lengths |
| Weight/ergonomics | compact and agile | potentially heavier and longer for extended use |
| Price range | generally affordable at entry levels | varies widely with power, size, and dust control |
What's Good
- Faster stock removal on large flat surfaces with a belt sander
- Disc sander offers precise edge work and smoother finishes on contours
- Good dust control with proper attachments and PPE when used correctly
- Versatile with a wide range of abrasive options for different materials
- Easier maneuverability in tight spaces with a disc sander
Weaknesses
- Belt sander can gouge edges if misused or over-pressed
- Disc sander may leave swirl marks if pressure is inconsistent or grit is mismatched
- Both tools require regular maintenance and belt/disc replacement
- Higher upfront cost for models with advanced dust control and adjustable speed
Belt sander for bulk removal; disc sander for edges and precision
Choose a belt sander when you need rapid leveling of large, flat areas. Opt for a disc sander when edge work and fine finishes matter most. In many projects, a combination delivers the best overall result.
Your Questions Answered
Which removes material faster, a disc or a belt sander?
In general, belt sanders remove material more quickly on large flat surfaces due to continuous belt contact. Discs excel at controlled, detail-oriented work where precision matters more than sheer removal rate.
Generally, the belt sander removes material faster on big flat areas, while the disc sander is better for precision and edges.
Can I use a belt sander on curved surfaces?
Belt sanders struggle on tight curves and profiles due to the straight belt. For curves, a disc sander or a detail sander with curved pad is often more suitable. You can still use a belt sander for broad, gentle curves with care.
Belts work best on flat or gently curved surfaces; for tight curves, disc or detail sanders are preferable.
Is a random orbital sander a good compromise?
A random orbital sander can be a good middle-ground for many projects, offering smoother finishes without deep gouges. It doesn’t remove material as aggressively as a belt sander but can cover larger areas with less risk than a disc sander in some cases.
An orbital sander is a good middle-ground that reduces gouges and leaves a smoother finish on many surfaces.
How can I avoid gouging with a belt sander?
Maintain light, even pressure and keep the sander moving. Don’t stall the belt, and avoid tilting the tool. Start with a coarser belt for rough stock removal and switch to finer grits for finishing passes.
Keep the sander moving smoothly with light pressure and start with coarser belts, then finish with finer grits.
What abrasives work best for disc vs belt sanders?
Disc sanders benefit from variety of disc grits and hook-and-loop systems, while belt sanders rely on belt-grit combinations and belt composition. Match grit to wood type and desired finish; start coarse for stock removal and move finer for finishing.
Match grit to the wood and finish you want; use coarse grits for removal and fine grits for finishing.
Do I need a dust collection system for sanding?
Dust collection is highly recommended for both tools, especially during heavy removal. A shop vacuum or dedicated dust extractor helps keep the work area cleaner and protects health. Use appropriate PPE regardless of dust control.
Yes—dust collection is highly recommended to protect your lungs and keep the workspace clean.
Main Points
- Prioritize belt sander for fast stock removal on large flat surfaces
- Use disc sander for edges, curves, and fine finishing
- Invest in good dust collection and PPE
- Balance tool weight and ergonomics with your project size
- Practice on scrap to dial in technique before main work