Sheet Sander vs Belt Sander: A Practical Side-by-Side Guide
Compare sheet sanders and belt sanders: performance, finish quality, edge access, dust control, and practical guidance for homeowners and DIYers from SanderSavvy.

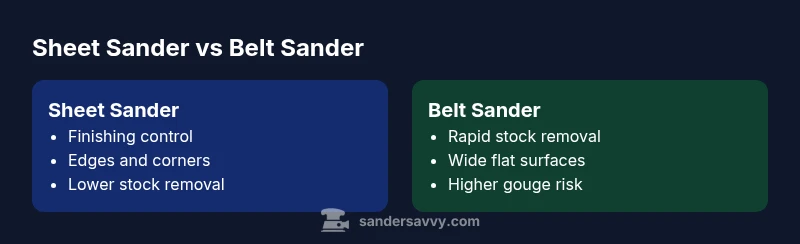
Sheet sander vs belt sander: Belt sanders excel at rapid material removal on flat surfaces, while sheet sanders offer finer control and a smoother finish for edges and detail work. For most DIY projects, start with a belt sander for stock removal and switch to a sheet sander for finishing and edge work. Use the sheet sander to refine transitions and avoid gouges near trim and corners.
Why the distinction matters for DIY woodwork
Choosing between a sheet sander and a belt sander directly affects project timing, finish quality, and the level of control you have over delicate edges. According to SanderSavvy, understanding the core difference—sanding aggressiveness versus finishing accuracy—helps homeowners and DIY enthusiasts plan a stepwise approach rather than fighting with the wrong tool. In practice, this means mapping your project from stock removal to final refinement, and selecting the tool that best fits each phase. The sheet sander vs belt sander decision is less about which tool is universally better and more about using the right tool for the job at hand, especially when working on floors, decks, cabinetry, or trim.
Core differences at a glance
- Pad design and sanding medium: A sheet sander uses a flat, square pad with interchangeable sanding sheets, while a belt sander uses a continuous belt that moves around two drums. This difference drives control, surface contact, and edge access.
- Aggressiveness vs finish: Belt sanders remove material quickly but can gouge if not guided properly; sheet sanders offer a finer touch and smoother finishes on flat surfaces and near edges.
- Typical tasks: Belt sanders shine in rough leveling and substantial stock removal, whereas sheet sanders excel in finishing work, smoothing faces, and delicate corners.
Tip from the SanderSavvy Team: Start rough with a belt sander on large, flat stock, then switch to a sheet sander for the final pass to achieve a uniform, chatter-free surface.
How each tool handles edges and corners
Edges and corners demand precision. Sheet sanders, with their square footprint and paper sheets, allow closer guidance along trim and tight profiles. Belt sanders struggle to maintain a consistent edge line and require careful steering to avoid rounding or gouging the corner radius. For narrow frames or cabinet doors, the sheet sander provides better control, while the belt sander can handle broad horizontal surfaces with fewer passes. The trade-off is clear: control versus speed.
Dust collection and filtration considerations
Dust management is crucial for safety and finish quality. Belt sanders often rely on a dust bag or simple porting, which can let fine particles escape if you don’t attach a vacuum system. Sheet sanders typically use sanding sheets that wipe away easily and often integrate well with shop vac systems, especially when you pair a dust port with a hose. Regardless of choice, use a mask, ensure proper ventilation, and maintain your filters to sustain performance.
Selecting by project type: floors, furniture, and panels
- Floors: Belt sanders remove material quickly but can leave grooves if misused; a sheet sander is ideal for the final smoothing after bulk removal. For edges and near toe-kick areas, a small square sheet sander provides better control.
- Furniture: Start with a belt sander for heavy stock removal on flat surfaces, then switch to a sheet sander for refinishing curves and edges.
- Panels and doors: Sheet sanders excel here due to their precise control and less aggressive contact with edges.
Sandpaper choices and maintenance tips
Sanding sheets for sheet sanders come in grits from rough to very fine. Belts come in abrasive grades too, but belt tracking and belt wear require careful maintenance. A frequent tip is to keep belts and sheets clean, replace worn abrasives promptly, and store them in a dry, stable environment to maintain grip and prevent glazing. Regularly check clamps, tension, and alignment to avoid belt wandering or sheet rips.
How to combine both tools into a workflow
A practical workflow begins with a belt sander on the majority of flat surfaces to remove stock efficiently. After achieving a baseline, switch to a sheet sander for finishing passes, refining edges, and eliminating sanding marks from the belt stage. For detailed edges, use a corner pad attachment on the sheet sander to reach tight areas. Finally, inspect the surface under raking light to spot any remaining irregularities and address them with a final hand pass if needed.
Safety and ergonomics of long sanding sessions
Both tools generate vibration and dust; choose low-vibration models if you plan extended sanding sessions. Use anti-fatigue mats and proper stance to maintain control and reduce fatigue. Wear a respirator or dust mask, protective eyewear, and hearing protection as standard practice. Select the right grit progression and take regular breaks to preserve accuracy over time.
Budget considerations and buying tips
When evaluating price, consider the total cost of ownership: the belt sander generally costs less upfront for basic models, but accessory belts can add up. Sheet sanders vary by pad size, weight, and dust collection options. For most DIYers, a mid-range belt sander paired with a mid-range sheet sander offers a balanced combination of performance and value. Look for models with comfortable grips, reliable dust collection, and easy belt or sheet changes.
Common mistakes and how to avoid them
A common mistake is using a belt sander for all tasks, which can leave gouges and uneven finishes. Another pitfall is neglecting dust collection, which degrades visibility and air quality. Always practice on scrap material first, maintain consistent pressure, and avoid stopping the sander in place on a surface. Finally, never skip sanding progression—coarse to fine grit—before applying finishes.
Practical buying checklist for homeowners
- Define your project scope: rough stock removal versus finishing and edge work.
- Check dust collection compatibility: shop vac or integrated dust ports.
- Test ergonomics: handle position, weight distribution, and vibration.
- Confirm availability of belts and sheets for the brands you’re considering.
- Review replacement costs and warranty terms.
Comparison
| Feature | Sheet Sander | Belt Sander |
|---|---|---|
| Best for | Finishing, edges, panels | Rough stock removal, flat surfaces |
| Sanding aggressiveness | Control-oriented, finer finishes | Faster material removal, more aggressive |
| Finish quality | Smooth, uniform finish with minimal gouges | Coarser surface by default; needs finishing |
| Edge access | Excellent near trim and corners | Limited access to tight corners |
| Dust control | Good with bags or vacuums, consistent dust pickup | Dust collection depends on bag or extraction setup |
| Ease of use | Easier to guide for precise finishing | Requires steady guiding to avoid abrasive mistakes |
| Maintenance & belt/sheet changes | Easy sheet changes; frequent replacement of sheets | Belt changes require tracking and alignment |
| Ideal projects | Furniture edges, cabinet doors, panel work | Decks, large flat surfaces, rough stock removal |
What's Good
- Finer finish control for edges and tight curves
- Versatile for a range of light-to-moderate jobs
- Lower risk of gouging with careful technique
- Compatible with common sanding sheets
Weaknesses
- Slower for heavy stock removal
- Sheet sanders can be less effective on very flat, wide areas without stepping
- Edge work may require more passes than a belt on large surfaces
- Dust collection is model-dependent
Belt sander for bulk removal; sheet sander for finishing and edges
For most DIY projects, start with a belt sander to remove material quickly and then switch to a sheet sander for final passes and edge work. This approach balances speed, control, and finish quality, reducing the risk of gouges and uneven surfaces.
Your Questions Answered
What is the primary difference between a sheet sander and a belt sander?
A belt sander removes material quickly on flat surfaces using a looping belt, while a sheet sander uses flat sheets for finer control and edges. The belt handles rough stock; the sheet handles finishing and detail work.
The belt removes material fast, but the sheet finishes with better edge control.
When should I choose a sheet sander over a belt sander?
Choose a sheet sander for edges, corners, and finishing passes where you want a smooth, uniform surface and minimal gouging. It’s ideal after bulk removal with a belt sander.
Use sheet sander for finishing after roughing with a belt.
Can a sheet sander replace a belt sander for stock removal?
A sheet sander generally cannot replace a belt sander for heavy stock removal. For quick leveling of large flat areas, a belt sander is usually more efficient.
Sheet sanders are not ideal for heavy stock removal.
Are these sanders suitable for deck sanding?
Yes, but with caveats. A belt sander speeds bulk removal on deck boards, while a sheet sander can help with edge work and refinishing. Always protect yourself from dust and check for surface irregularities.
They can, with care and proper techniques for decks.
What should I consider for dust collection with these tools?
Choose models with reliable dust ports and compatible vacuum options. Using a shop vac or extractor improves visibility and finish quality and protects lungs during extended sessions.
Dust collection is key for safety and a clean finish.
Can I use either sander on tight corners or curved edges?
A sheet sander with a square pad handles corners better than a belt sander. You may still need small sanding blocks or corner attachments for very tight profiles.
Sheet sanders win for tight corners with the right attachment.
Main Points
- Start with belt sander for bulk removal
- Finish with sheet sander for edges and detail
- Prioritize dust collection and ergonomics
- Plan a two-stage workflow to maximize finish quality
- Use appropriate grits and change as you transition to finish