Belt Sander vs Sheet Sander: Which Wins for Sanding?
A comprehensive, objective comparison of belt sanders and sheet sanders, covering speed, control, finish quality, edge work, and best-use scenarios for DIY wood projects.

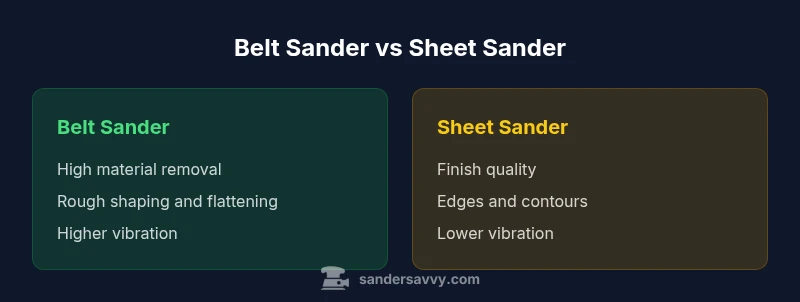
TL;DR: Belt sanders remove material quickly on rough surfaces, but can gouge edges. Sheet sanders deliver smoother finishes and better edge control, though they remove material more slowly. For most DIY projects, start with a belt to level material, then switch to a sheet sander for finishing and final smoothing. This two-step approach minimizes passes and improves overall surface quality.
What belt sander vs sheet sander really mean
Across woodworking projects, belt sander vs sheet sander are two common power sanders with distinct roles. The belt sander uses a continuous loop of abrasive belt that spins at high speed to remove material quickly. The sheet sander uses a flat sanding sheet mounted on a pad, delivering a more uniform, finish-ready surface. Together they cover the spectrum from aggressive stock removal to refined finishing. For homeowners and DIY enthusiasts, understanding this belt sander vs sheet sander distinction helps you plan your workflow, select compatible abrasives, and avoid common mistakes.
According to SanderSavvy, the core choice hinges on whether your priority is speed or finish quality. For rough stock, a belt sander can level uneven boards quickly and flatten warped surfaces. For final finishing, a sheet sander offers more predictable scratch patterns and less risk of gouges. Knowing this distinction helps you calibrate your grit strategy, protect the wood, and finish with confidence.
How belt sanders are built and how sheet sanders differ in construction
Belt sanders and sheet sanders share a basic goal—remove material and create a smooth surface—but their mechanical layouts set them apart. A belt sander uses a motor to drive two drums and a continuous abrasive belt. The belt forms a moving contact area that removes material aggressively, often with a front-end dust chute and a lever to change belts. A sheet sander relies on a flat pad or a spring-loaded platen that carries a disposable abrasive sheet; oscillation or rotation provides finish smoothing with less aggressive cut. Weight distribution, handle design, and vibration dampening affect comfort and control for long sessions. Because of these differences, belt sanders are heavier and louder, while sheet sanders tend to be lighter and more maneuverable, especially on edges and curved surfaces. Your choice should reflect how you balance speed against control in real-world tasks.
Abrasives and grit compatibility: choosing the right paper and belt grits
Abrasive selection is a key part of the belt sander vs sheet sander decision. Belt sanders typically run thicker, wider belts that tolerate coarse grains for rapid stock removal. Sheet sanders use standard sandpaper sheets, available in a wide range of grits and finishes. The grit you choose influences how quickly the material comes off and how the surface feels. In practice, start rough for leveling and switch to finer grits for smoothing. With belts, you might go from a coarse belt to a mid-range belt as the surface becomes flatter. For sheet sanders, move from heavy grits to lighter ones as you approach the final finish. Additionally, consider backing material, dust efficiency, and compatibility with dust collection bags or canisters. Matching the abrasive to the workpiece—hard maple, soft pine, or plywood—produces the best results.
Material removal speed vs surface finish: expectations for each tool
One of the main contrasts in belt sander vs sheet sander is how fast they remove material versus the quality of the finish. Belt sanders excel at bulk removal, flattening high spots, and leveling boards, especially when stock has knots or warp. However, the aggressive action can leave visible scratch marks and burnish if you press too hard or stay in one spot. Sheet sanders trade raw speed for control, producing uniform scratch patterns that are easier to sand smooth in subsequent passes. The result is a smoother surface with fewer deep gouges. Real-world work often combines both tools in sequence: heavy removal with a belt sander, then finishing with a sheet sander to achieve a glassy, even surface. Your goal is to minimize pass count while maintaining consistency across the entire piece.
Edge work and contours: where each tool shines or falters
Edges, corners, and curves pose a challenge for any sander. Belt sanders can struggle to maintain flat contact along irregular edges and may gouge if you approach too aggressively. Some belt sander models include guiding features to improve control, but the risk remains. Sheet sanders shine on edges and contours, thanks to their flat pads and more forgiving contact area. They can reach into corners with careful angling and maintain an even pressure that avoids showing the belt marks. For steps, rails, or furniture edges, plan a finishing pass with a sheet sander after a preliminary belt stroke. The best practice is to blend the two tools so the transition between removal and finish is seamless.
Dust collection and dust safety: keeping your workshop clean
Dirt and dust management is essential for safe sanding. Belt sanders typically generate a heavier dust plume due to rapid belt movement, so a robust dust collection system with a proper hose and bag matters. Sheet sanders also produce dust, but the pattern is more dispersed and often easier to capture with a good vacuum and a micro-filter bag. Regardless of tool type, attach a dust port and use negative-pressure setups when possible. Wear a dual-cartridge respirator for fine particles on wood species like maple or oak, and never sand coatings that can off-gas harmful particles. Regularly empty dust bags and clean the workspace to prevent recontamination of surfaces.
Ergonomics, weight, and vibration: long sessions matter
Sander ergonomics influence the quality of your work as much as the tool's cutting power. Belt sanders tend to be heavier and generate more vibration, which can cause fatigue and hand-arm discomfort over long periods. Sheet sanders are generally more balanced and comfortable, especially during edging work or finishing passes along long boards. If you anticipate days of sanding, prioritize models with anti-vibration handles, good grip texture, and a comfortable weight distribution. Take breaks to avoid repetitive-motion injuries, and use a proper stance to reduce fatigue.
Cost, durability, and maintenance: budgeting and care
From a cost perspective, belt sanders are often less expensive upfront than high-end sheet sanders, but maintenance costs can vary. Belts require periodic belt changes, which can add to the ongoing cost, while sheet sanders demand replacement sheets and pads. Durability hinges on motor quality, bearing life, and how well you maintain the tool. Clean the vents, check the belt or pad for wear, and replace worn components promptly to prevent scorching or uneven cuts. Regular lubrication of moving parts and keeping dust from the motor can extend service life. For DIY projects, plan a budget that accounts for abrasives, dust collection accessories, and replacement parts rather than a single purchase price.
Practical project scenarios: floors, doors, decks, and furniture
For floors, a belt sander can efficiently remove old finishes and level uneven planks, but you’ll finish with a sheet sander to achieve a smooth, even surface before applying stain or sealant. For doors and cabinetry, finish sanding with a sheet sander is usually preferred to avoid gouges. Deck refinishing benefits from initial belt removal of old stain and rough areas, followed by sheet sanding to create a uniform deck surface ready for sealer. When working with reclaimed wood or softwoods, adjust your approach to avoid burnishing the grain. By mapping tasks to tool strengths, you can minimize passes and protect the wood’s integrity.
How to choose: a practical decision framework
To decide between belt sander vs sheet sander, start with the project stage: is your priority stock removal or finish quality? If you need fast leveling across a wide surface, a belt sander is the right tool; if you’re nearing the final surface finish, reach for a sheet sander. Consider the workpiece size, edge access, and the amount of dust you can safely manage. Create a clear plan: rough grind with belt, switch to sheet for smoothing, and finish with light passes. If you anticipate edge work, ensure the sheet sander is ready to handle corners and contours. As a sanity check, test on a scrap piece before tackling the actual project.
Common mistakes and quick troubleshooting tips
Common mistakes include applying too much pressure, staying in one spot, and neglecting dust extraction. Overuse of belt sanders can leave deep scratches, while over-aggressive sheet sanding can create hazy finishes. Troubleshooting steps include verifying belt tension, inspecting the pad for wear, and ensuring the grit progression makes sense for the surface. If you notice chatter, reduce pressure, rotate the sander, and re-check alignment with the workpiece. Always sand with controlled motions and maintain consistent speed to avoid uneven results.
Quick-start checklist: get set for a successful project
- Define goals: stock removal vs finish quality
- Prepare equipment: belt sander, sheet sander, abrasive grits, dust collection
- Practice on scrap: test on waste wood
- Plan a two-step workflow: rough pass with belt, finish with sheet
- Protect surrounding surfaces and PPE
- Clean after sanding and inspect for runs or gouges
Comparison
| Feature | Belt Sander | Sheet Sander |
|---|---|---|
| Material removal speed | high | moderate |
| Finish quality | low to moderate (roughing) | high (final finish) |
| Edge and contour control | difficult to control edges | excellent for edges and contours |
| Dust collection efficiency | variable with model | often clearer with good dust control |
| Best use case | bulk stock removal | finish work and edges |
What's Good
- High material removal speed on rough stock
- Good for flattening and leveling large surfaces
- Sheet sanding delivers a superior finish and edges control
- Widely available abrasives and relatively simple maintenance
Weaknesses
- Risk of gouging or burn marks with belt sanders if pressed too hard
- Finish work on flat surfaces may require additional passes
- Dust collection effectiveness varies by model and setup
- Switching between tools adds setup time and extra passes
Use belt sander for rapid stock removal and flattening, then switch to a sheet sander for finishing and edge work.
The fastest, most reliable approach is to combine both tools in sequence. This minimizes passes, reduces risk of gouges, and delivers a more uniform surface suitable for staining or sealing.
Your Questions Answered
What is the main difference between belt sander and sheet sander?
The belt sander uses a moving belt for rapid stock removal, while the sheet sander uses a flat abrasive sheet for finer finishing and edge control. Your choice depends on whether you need speed or finish quality.
Belt sanders cut fast, but the finish isn’t as smooth as with a sheet sander; finish with a sheet for best edges.
Can you finish with a belt sander?
Generally not ideal for the final finish because of visible scratch patterns; use a sheet sander or palm sander for the final passes.
Belt sanders are for roughing; finish with a sheet sander for a smooth final surface.
Is a sheet sander better for edges?
Yes, sheet sanders provide better access to edges and contours, reducing the risk of gouges when finishing.
Sheet sanders reach edges and corners much more easily than belts.
What should I consider when choosing between them?
Consider removal needs, surface area, edge work, dust management, and how much setup time you want for tool changes.
Think about whether you need fast removal or careful finishing, and how much edge work you’ll do.
Should I rent or buy?
For infrequent projects, renting may be cost-effective; for regular use, owning both a belt and sheet sander saves time and improves consistency.
If you sand a lot, owning both tools is usually worth it; otherwise, renting can work.
Main Points
- Assess project stage: removal vs finish.
- Begin with a belt sander for rough leveling.
- Finish with a sheet sander for a smooth surface.
- Plan edge work early and test on scrap.
- Prioritize dust control and ergonomic setups.