Floor Sander vs Belt Sander: An Analytical Comparison
A rigorous, practical comparison of floor sander and belt sander to help homeowners choose the right tool for hardwood floors, decks, and walls, with usage tips, safety, and maintenance guidance.

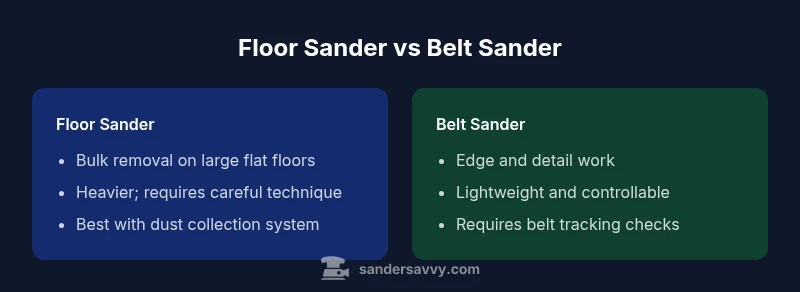
When deciding between a floor sander vs belt sander, the choice hinges on project scale and surface needs. Floor sanders excel at rapid bulk removal on large, flat hardwood floors, while belt sanders offer precise control for edges and detailed work. For most DIY floor jobs, expect to use the floor sander for the main area and the belt sander for edges and touch-ups.
Core Differences: Floor Sander vs Belt Sander
The floor sander and belt sander serve distinct roles in wood finishing projects. A floor sander is typically a drum-based machine designed to cover vast, flat surfaces quickly, delivering aggressive material removal on hardwood floors. In contrast, a belt sander uses a continuous abrasive belt for controlled, precise work, making it ideal for edges, corners, and sash-like details. Understanding these roles is essential for planning a project timeline and avoiding common mistakes. According to SanderSavvy, homeowners often underestimate how quickly a floor sander can remove material and how crucial technique is to avoid gouges on the floor. This article uses real-world scenarios to explain when and why you’d choose one tool over the other, and how to combine them for a professional result.
Tool Anatomy and Ergonomics
Both tools share core components—an abrasive surface, a motor, and a handle—but their form factors and balance influence how you maneuver them. Floor sanders are heavier, with a broader footprint and a front-to-back motion that favors straight, wide paths. Belt sanders are lighter and more compact, offering nimble handling for tight spaces, edge work, and contour shaping. Ergonomics matter: long sessions demand comfortable handles, vibration damping, and a dust port that actually fits your vacuum. When you pick between the two, weigh how much time you’ll spend on the floor versus along walls, and how comfortable you are with managing a heavier machine over long runs.
Finish Quality: Sanding Patterns and Material Removal
Finish quality depends on control, grit progression, and how you feed the tool across the surface. Floor sanders require a planned pass sequence to avoid roller marks and uneven spots; a systematic, crisscross pattern often yields the smoothest results on large areas. Belt sanders, when used correctly, produce finer control of edges and transitions, reducing visible lines where the floor meets trim. The interplay between the two tools determines the final finish: start with the floor sander to level the bulk material, then switch to the belt sander to clean up edges, corners, and tricky contours. Consistency in movement and grit progression is more important than raw removal rate, especially on engineered wood floors.
Dust Management and Safety Considerations
Dust control is a critical factor in any sanding project. Floor sanders generate a lot of fine dust across large areas, so a robust dust collection system is essential. Belt sanders typically have smaller dust ports, but you can attach a dedicated vacuum to extract debris at the source. Always wear a respirator with organic vapor filters when sanding, and use a hearing protectors to guard against long-term exposure to noise. Good practices include sealing off adjacent rooms, using plastic sheeting, and cleaning dust frequently to prevent re-entrainment into the air. SanderSavvy recommends testing dust collection on a patch before committing to a full-room run.
Use Case Matrix: Floors, Decks, and Walls
Floor sander workflows shine on large, flat hardwood floors where uniform material removal is needed. For deck surfaces, belt sanders are more versatile for railing and rail-end treatments, but a specialized deck belt or orbital sander may be preferable for curved sections. Walls and ceilings near doors or window casings require careful edge work; a belt sander or detail sander handles these edges well. A practical rule: reserve the floor sander for the main field, and reserve the belt sander for perimeters, edges, and refinishing joints. This combination minimizes gouges and yields a consistent finish across the project.
Setup, Calibration, and Safe Practice
Preparation matters as much as technique. Begin by inspecting the floor for nails or staples and filling any loose boards. Choose a grit sequence that starts coarse for heavy leveling and progresses to finer grits for finishing passes. Test a small patch to confirm that you’re not leaving deep scratches. Align the belt correctly if you’re using a belt sander, and ensure the drum is clean and free of debris before starting. Maintain steady, even pressure and keep the sander moving to avoid creating dips or heavy gouges. Take breaks to re-check dust collection and mask off off-limit areas to protect occupants and pets.
Budget, Availability, and Long-Term Costs
Two realities shape the decision: upfront cost and ongoing maintenance. Floor sanders tend to be a larger upfront investment due to their capacity and mass, while belt sanders are generally more affordable and widely available. Over time, maintenance costs include replacement belts, sanding discs, and service parts such as drive belts and bearings. Consider the total cost of ownership, including consumables and the time required to reach a satisfactory finish. In most DIY scenarios, renting a floor sander for a weekend could be a cost-effective option when paired with a belt sander for detailed work.
Maintenance, Longevity, and Correct Storage
Regular maintenance helps both tools perform consistently. Check belts for wear and alignment, inspect dust ports for blockages, and lubricate moving parts per the manufacturer’s guidelines. Clean after use to remove sanding dust that can degrade components. Proper storage—keeping machines away from moisture and extreme temperatures—extends life and maintains performance. If you notice unusual vibration, noise, or belt drift, pause work and re-check alignment and mounting. A well-maintained sander delivers predictable results and reduces the risk of unexpected downtime.
Common Pitfalls and How to Avoid Them
Gouges and burn marks are common when operators rush or misjudge material removal. Start with a test patch and maintain a consistent motion that covers every pass. Avoid overloading the drum or belt by applying excessive pressure; let the machine do the work. Don’t skip the baseboard or edge areas; failing to address these sections creates visible seams after finishing. Finally, neglecting dust collection increases exposure and cleanup time, so always run a vac through the process and clear dust frequently.
Summary and Practical Guidance
For most wood floor refinishing projects, a floor sander provides the bulk of the material removal on large flat regions, while a belt sander fills in edges, corners, and transitions with precision. The best outcome comes from a planned approach: plan the pattern, stage the grit progression, and maintain consistent technique. By combining these tools strategically, you can achieve a professional finish without costly mistakes. Remember to prioritize safety and dust control throughout the project. For homeowners who want clarity and structure, this approach minimizes risk and maximizes results.
Comparison
| Feature | _floor sander_ | belt sander |
|---|---|---|
| Weight and Handling | Heavy, wide footprint | Lightweight, compact |
| Primary Use | Bulk material removal on large, flat floors | Edges, corners, and precise edgings |
| Finish Control | Aggressive material removal; requires technique to avoid gouges | Fine control for transitions and contours |
| Dust Management | Requires robust vacuum system; larger dust output | Smaller port; compatible with portable vacuums |
| Skill Requirement | Steep learning curve for floor leveling | Easier for beginners in detailed work |
| Best For | Whole-room floor prep on hardwoods | Edges and trimmed areas during refinishing |
What's Good
- High removal efficiency on large flat areas
- Reduces project time on big rooms
- Floor sanding creates uniform levels when done correctly
- Belt sanders offer precise control for edges
Weaknesses
- Significant learning curve for floor sanding
- Dust and cleanup can be substantial without proper collection
- Potential for gouges if misused on edges
- Belt sanders require frequent belt changes for best results
Floor sander generally wins for bulk removal; belt sander is essential for edges and detail work
Choose floor sander for the main area to achieve even leveling. Use belt sander to clean edges and refine transitions for a professional finish.
Your Questions Answered
What is the primary difference between a floor sander and a belt sander?
A floor sander is designed for rapid material removal on large, flat floors, often with a drum or disk contact. A belt sander uses a continuous belt for precise control, making it better for edges, corners, and refined spots. The two tools complement each other in most floor refinishing projects.
The floor sander does bulk work on big flat floors, while the belt sander handles edges and detail areas for a smooth finish.
Can I use a floor sander on walls or edges?
Floor sanders are not ideal for walls or tight corners. Use the belt sander or a detail sander for edges and irregular areas to avoid gouging and fit around trim.
Floor sanders aren’t suited for walls; save the edges for a belt or detail sander.
Is dust control essential when sanding a wood floor?
Yes. Effective dust control reduces health risks and cleanup time. Attach a compatible vacuum to the sander and seal off adjacent areas to prevent dust migration.
Dust control is essential—hook up a good vacuum and seal off the area.
Which tool is easier for beginners?
Belt sanders are generally easier for beginners because of their lighter weight and precise control. Floor sanders require more skill to avoid gouges and finish imperfections.
Belt sanders tend to be easier for beginners; floor sanders need a steadier hand.
How do I change the belt on a belt sander?
Turn off and unplug the sander, release the tension, remove the old belt, and install a new one following the manufacturer’s alignment guide. Inspect pulleys for wear and ensure the belt tracks true during testing.
Power off, release tension, replace belt, and recheck tracking.
What maintenance should I perform after a sanding project?
Clean the machine, inspect belts and pads for wear, remove dust from vents, and store in a dry place. Lubricate moving parts if specified by the manual and check dust ports for clogs.
Clean, inspect, and store properly after sanding.
Main Points
- Plan the workflow: bulk removal first, detail work last
- Reserve belt sander for edges and corners
- Prioritize dust control and safety throughout
- Progress grit from coarse to fine for a smooth finish
- Maintain equipment and inspect for wear regularly