Drywall Sander vs Normal Sander: A Practical Guide for DIYers
Explore a practical comparison of drywall sander vs normal.sander. We cover finish quality, dust control, ergonomics, and cost to help homeowners pick the right sanding tool for walls, ceilings, and woodwork.

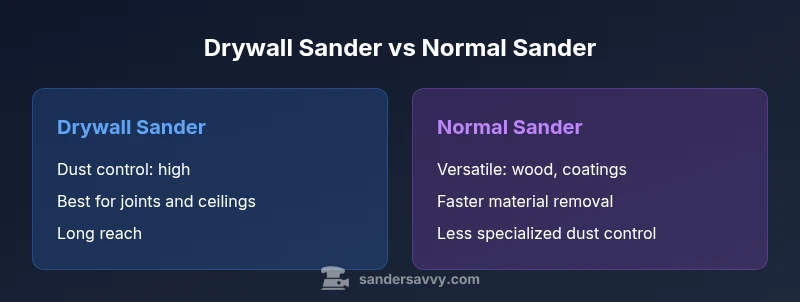
Drywall sander vs normal.sander: The drywall sander excels for walls and ceilings with fine joint compound, offering long reach and built-in dust collection; a normal sander (orbital or belt) is more versatile for wood and rough finishes but creates more dust and risks gouging drywall. For drywall work, choose the drywall sander; for mixed jobs, assess surfaces first.
What sets drywall sanding apart?
According to SanderSavvy, drywall sanding is a finishing step focused on joint compound and paper-based surfaces rather than wood, metal, or plaster. The drywall sander is built to glide along vertical and overhead walls with a long neck or extension pole, allowing you to reach ceilings without ladders. Its abrasive pad is optimized for fine grits, which reduces the risk of scratching or tearing the setting compound. In contrast, a 'normal' sander—whether an orbital, random orbital, or belt model—prioritizes material removal and speed. You’ll find broader pads, higher removal rates, and compatibility with a range of grits for wood floors, painted surfaces, and other substrates. For DIYers, the choice between drywall sander vs normal.sander often hinges on the project profile: are you smoothing a patchwork of drywall joints, ceilings, and corners, or are you sanding wooden trim, old paint, or flooring? The SanderSavvy team notes that proper tool selection, combine with technique and dust management, is more important than raw power alone. SanderSavvy Analysis, 2026 shows that most drywall touch-ups benefit from extended reach and dust-control features, not sheer grinding speed.
drywall sander vs normal.sander: Key differences by design
Design affects performance more than you might think. A drywall sander often uses a narrow, rectangular or oval pad that remains flat against drywall for uniform contact and minimal gouging. It usually features a longer handle or extension pole, making overhead sanding feasible without compromising control. Dust ports and bags are integrated or sized for fine drywall dust, which is lighter and more pervasive than wood dust. Normal sanders, by contrast, emphasize versatility. They come in palm-sized orbital variants and larger belt-style units. They may support quick grit changes, variable speed, and interchangeability of sanding pads to tackle wood, painted surfaces, or metal edges. The trade-off is that wood dust is heavier and more abrasive, and without a robust dust collection system, you’ll see more airborne particles. For many homeowners, the choice boils down to surface type, access, and the tolerance for cleanup. For drywall-specific finish work, the drywall sander typically wins on consistency and dust control; for mixed projects, you’ll value versatility and speed from a normal sander. The needle-moving factor is control at the edges and the ability to maintain a flat surface across taped seams.
Dust control and safety considerations
Drywall dust is a health hazard when inhaled and can permeate HVAC ducts. A drywall sander with a sealed dust box or an integrated vacuum creates the least airborne dust. Always wear a P100 respirator, eye protection, and hearing protection, and consider sealing off the room or using a negative pressure setup during long sessions. Even with good dust collection, fine particles can drift into adjacent rooms through doorways, so plan a controlled area, close gaps, and wait for space to ventilate. The choice between drywall sander vs normal.sander becomes a safety question as much as a performance one: the drywall-oriented tool reduces the necessary cleanup and the occupational exposure during overhead work. Remember that the clean-up step, including vacuuming and wet wiping of surfaces, is essential to reduce residual dust after the sander is stored. SanderSavvy Analysis, 2026 suggests prioritizing tools with efficient dust collection for indoor projects.
Finishing quality and throughput
Finish is king on drywall projects. A drywall sander is designed to deliver a consistent, feathered edge on patched joints, minimizing swirl marks and ridges that can telegraph through primer and paint. The fine grit range and controlled speed help you preserve the surface texture of skim coats and joint compound, which is critical when skip-ticking or when there are multiple skim coats. Normal sanders rely on larger-area pads that can flatten paint or gouge soft spackle if you push too hard. They are excellent for removing paint, smoothing wooden surfaces, or profiling edges, but you’ll need patience to avoid over-sanding. If the priority is drywall finishing quality, a drywall sander provides visible advantages. For fast material removal on wood, a normal sander can deliver results quickly, but you risk creating an uneven surface on drywall joints.
Speed, grit, and material compatibility
Speed control matters on both tools, but the practical implications differ. Drywall sanding benefits from moderate speeds and fine grits to achieve an ultra-smooth surface. Typical drywall practice uses grits in the lower to mid range and patience to finish multiple layers of mud. Normal sanders shine with a broad grit spectrum, from coarse to ultra-fine, enabling removal of paint, varnish, and heavy coatings. The mismatch between grit and substrate can lead to scuffs on drywall or excessive material removal on wood. When choosing, align grit range with the surface and the stage of the project; for drywall finishing, start coarser than you intend to end, then move with progressive fines. The key is to avoid overworking any one area, which can result in a halo or uneven sheen.
Reach, ergonomics, and workload handling
Overhead sanding is common in drywall projects; hence reach and balance matter. A drywall sander with extension capability allows you to stay comfortable while keeping the pad flat. Ergonomics matters because prolonged sanding can cause wrist strain and shoulder fatigue. Normal sanders are typically lighter and smaller, which reduces fatigue for small patches but can be awkward on large surfaces. To manage workload, set up a clean workflow, moving from high to low areas, and frequently check your progress with a straightedge or level. The right tool reduces the number of passes, saving time and improving consistency. Remember that consistent cadence and posture reduce the risk of fatigue and injury.
Noise, vibration, and user fatigue
Vibration and noise levels vary by model, but both tool classes can cause fatigue if used for long durations. If you’re sensitive to vibration, look for sanders with vibration damping, cushioned grips, and low-peak speed settings at the start of a session. A drywall sander typically runs more smoothly on small, controlled passes due to its specialized pad and balance; a normal sander can create more dynamic swirls if pushed aggressively. Rest breaks and proper stance help; if you find yourself losing control or hearing a hum that accompanies fatigue, switch activities or take a break. Safety and comfort are legitimate components of your sanding strategy.
Power sources, cords, and dust collection setups
Electric cord length and cordless options influence mobility. Drywall sanders often prioritize consistent suction with a dedicated dust port and bag or hose attachment to a vacuum. Normal sanders show flexibility with dust ports and accessories, but you may need adapters or separate vacuums for optimum performance. Plan your workspace between outlets, extension cords, and dust-collection capacity. A robust dust setup saves time cleaning and reduces exposure to fine particles. When selecting equipment, ensure your chosen tool supports a compatible dust extractor, if possible. Always inspect the hose, filter, and port seals before starting a session.
Cost considerations and tool longevity
Cost varies with build quality, features, and whether you rent or buy. A drywall sander's premium features—long reach, better dust control, and specialized pads—can add to price. A normal sander price range covers a wide spectrum, reflecting versatility and mechanical complexity. Over the lifespan of either tool, careful maintenance—cleaning, replacing pads, and storing properly—extends life and reduces downtime. If you sand drywall professionally or on an ongoing basis, investing in a dedicated drywall sander often pays off through faster workflow and cleaner outcomes. For occasional DIY work, renting may be the better option.
When to rent vs buy
Your decision hinges on project frequency and the surfaces you tackle. If you’re only finishing a patch here and there, renting a drywall sander is usually the most economical approach, especially when you need extended reach and built-in dust collection for overhead ceilings. If you run a home workshop with frequent drywall and plaster projects, owning a dedicated drywall sander becomes more practical. Normal sanders may remain valuable for mixed projects, but their dust control is often not tailored to drywall assemblies. Weigh the cost of purchases, rental terms, and maintenance against expected usage.
Practical workflow for drywall smoothing
Begin with inspection and patch evaluation; identify seams, joints, and flush against surrounding surfaces. Use a vacuum to remove loose debris before you start; mount the extension pole to the drywall sander; start with a coarse grit to knock down high spots, then progress to finer grits as you even out the surface. Move slowly in consistent, overlapping passes. Wipe surfaces with a damp cloth after each pass to remove dust. Finish with a light pass of the finest grit to leave a surface ready for primer. The process requires careful attention to edge and corner work, especially near tape lines. An efficient sequence reduces sanding time and ensures consistent outcomes.
Common mistakes and how to avoid them
Rushing the process with aggressive passes leads to gouges and poor edge control. Skipping dust collection increases health risk and cleanup time. Using the wrong grit for the stage and surface results in a rough finish or halo marks. Neglecting a final wipe or vacuuming before priming can cause paint adhesion issues. Finally, failing to inspect edges and corners before moving on to finishing coats can lead to visible seams after painting. Avoid these traps with a deliberate, methodical approach.
Comparison
| Feature | Drywall Sander | Normal Sander (Orbital/Belt) |
|---|---|---|
| Dust Control | Excellent with integrated dust port/bag | Moderate to good with vacuum adapters |
| Finish Quality on Drywall | Very smooth, feathered joints | Good for wood, variability in drywall |
| Reach and Maneuverability | Long-reach/pole designs | Compact, versatile but shorter reach |
| Versatility | Primarily for drywall work | Handles drywall and wood coatings |
| Grit Range and Speed | Fine-grit emphasis, controlled speed | Broad grit range, higher removal rates |
What's Good
- Superior dust control minimizes cleanup
- Better finish quality on drywall joints
- Long reach helps overhead work
- Low risk of gouging drywall due to soft pads
- Dedicated tools often yield consistent results
Weaknesses
- Limited use beyond drywall and patch work
- Higher upfront cost or rental fees
- Requires different pads and grits for other surfaces
- Dust still can escape if seal is poor
Drywall sander wins for drywall finishing; normal sander remains essential for mixed projects
For dedicated drywall work, a drywall sander provides better finish and dust control. If you regularly work with wood or coatings, keep a versatile normal sander in your kit.
Your Questions Answered
What is a drywall sander and how does it differ from a normal sander?
A drywall sander is specialized for finishing joint compound on walls and ceilings, with a long reach and fine-grit pads. A normal sander (orbital or belt) is more versatile for wood and coatings but less tailored to drywall dust and edges.
A drywall sander is built for drywall finishing, while a regular sander handles wood and other surfaces.
Can a normal sander be used for drywall?
You can use a normal sander on drywall, but the results may be uneven and dust control is harder. For best results on joints and patches, a drywall sander is preferred.
A normal sander can work, but a drywall sander is usually better.
What grit should I use for drywall finishing?
Start with a coarser grit to flatten joints, then move to finer grits. Typical progression includes around 120-150 for initial passes and 180-220 for final smoothing. Always test on a hidden area first.
Begin with a coarser grit, then finish with a fine grit.
Is renting or buying better for a single drywall project?
For a one-off project, renting a drywall sander is usually more economical. If you expect recurring drywall work, owning a dedicated unit can save time and improve consistency.
Rent if it's a one-time job; buy if you'll do more soon.
How do I maintain a drywall sander's dust collection?
Keep filters clean, check seals, and empty the collection bag regularly. Periodically inspect hoses for clogs and ensure the vacuum system remains properly attached during use.
Clean and inspect the dust system regularly.
Main Points
- Assess your primary project surface first
- Prioritize dust control for indoor work
- Choose long-reach drywall sander for ceilings
- Rent vs buy based on frequency
- Always wear PPE and follow safety guidelines