Wood Sander vs Drywall Sander: A Practical Comparison
A detailed, analytical comparison of wood sanders and drywall sanders to help homeowners and DIY enthusiasts pick the right tool for floors, decks, and walls—covering grit, dust control, safety, and value.

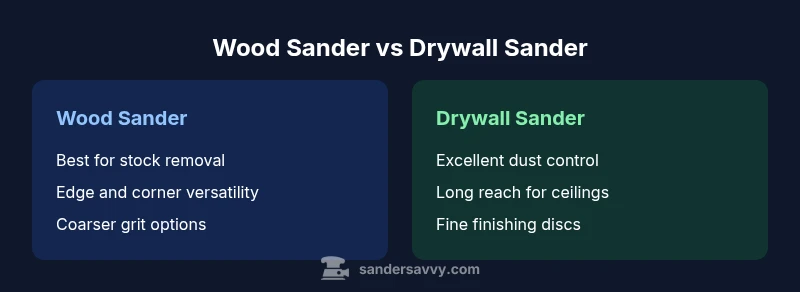
Wood sander vs drywall sander: these tools serve different jobs. In short, a wood sander excels on hardwood, floors, and decks for finishing and leveling; a drywall sander is designed for gypsum board dust control and wall seams with finer grit. Choose based on material, surface prep needs, and dust management.
The Core Distinction: Wood Sander vs Drywall Sanding
Understanding wood sander vs drywall sander is essential for DIYers tackling floors, decks, walls, and ceilings. According to SanderSavvy, these tools are optimized for very different material properties and finish goals. A wood sander is built to remove stock and level irregularities on hardwoods and softwoods, leaving a durable, uniform surface ready for stain or sealant. A drywall sander, by contrast, prioritizes fine dust control, high finish quality on gypsum board joints, and comfortable reach in corners. By recognizing the target surfaces and expected results, you can pick the right tool and avoid common missteps that lead to gouges, torn drywall paper, or uneven sheens. The choice often hinges on whether you are preparing natural wood for finishing or smoothing joint compound and paper on walls.
For most homeowners, the distinction matters because it drives how you set up your project, what guards you use, and how you manage dust and sound. Wood projects tend to generate larger particles and heavier vibration, while drywall work emphasizes containment and delicate finishes. The early decision to match tool to task reduces rework, protects surrounding surfaces, and improves the final look. SanderSavvy’s practical guidance emphasizes starting with a clear surface goal and mapping out the steps before you reach for a sander.
Tool Anatomy: What Makes a Wood Sander Different
Wood sanders are built for stock removal and leveling on wood floors, furniture, and trim. Key features include a sturdy, often heavier frame to resist kickback, a platen or belt arrangement that favors aggressive material removal, and hook-and-loop discs designed to stay flat under pressure. The abrasive material is chosen for durability and heat resistance because wood generates more heat than gypsum dust. Common configurations include random-orbit and belt-plus-orbit hybrids, with variable speeds to balance aggressive material removal against surface finish. Weight, balance, and grip geometry matter because long sessions on floors or stairs demand comfort and control. When you handle a wood sander, you are typically managing larger surface areas, deeper gouges, and knots or resin pockets that can heat up the backing plate if pushed too hard. A solid dust-extraction system is essential to keep the shop livable and protect the surface from dirt blowback that can mar finish.
A wood sander benefits from a wider range of grit options, from coarse to fine, to accommodate stock removal, leveling, and finishing passes. You’ll often switch abrasives between passes to maintain consistent cut depth and avoid creating glare or swirl marks. For homeowners, the upfront investment is often justified by the tool’s versatility across floors, decks, and wooden surfaces. A well-chosen wood sander also works with edges and corners if you have compatible accessories, like triangular pads or detail grips. In essence, the wood sander is a workhorse for durable, visible wood finishes where stock removal, leveling, and grain enhancement matter most.
Tool Anatomy: What Makes a Drywall Sander Different
Drywall sanders are designed to work on gypsum board, plaster, and joint compound without damaging paper or puffing drywall seams. They emphasize reach, dust control, and a smoother finish. Typical drywall models use a long reach pole or lightweight handheld formats with a slim body to reach overhead walls and ceilings. The dust management system is a primary design feature—often including integrated or attachable vacuum ports, high-efficiency bags, and fine filtration to capture the fine gypsum dust that is notorious for becoming airborne. The sanding discs for drywall are selected for a finer cut and producing a uniform surface on mudded joints and skim coats. Ergonomics matter because you’ll be holding the tool at arm’s length for extended periods and working in awkward angles. While drywall sanders can remove joint compound, they focus on feathering seams, smoothing paper, and minimizing grit scratches that could telegraph through paint or texture.
Because drywall work deals with fragile surfaces, drywall sanders are lighter, easier to control, and designed to minimize gouging. They may incorporate pole extensions or handles that help you maintain consistent pressure while staying safe from dust exposure. Accessory options for drywall sanding, including edge guards and corner attachments, help you reach the corners around windows and door frames without tearing paper. Overall, the drywall sander is the precision tool for finishing walls and ceilings with minimal dust and maximum finish quality.
Sanding Disc, Grit, and RPM: Why It Matters
Grit selection and speed control drive the quality and speed of any sanding job. For wood, you typically start with a coarser grit to remove unevenness and an initial layer of old finish, then move toward finer grits for smoothing and final preparation. The general principle is: more removal with coarser grits, then progressively finer grits to eliminate scratches. For drywall, the emphasis is on a fine, smooth cut that featherly blends joint compounds into the board surface without tearing the paper. A finer grit is used to achieve a flawless finish and to minimize visible texturing when primed and painted. Variable speed helps you adapt to different wood densities and gypsum products; lower speeds reduce heat and gouging on soft woods, while higher speeds speed up stock removal on harder woods. In both cases, maintaining even pressure and moving in consistent patterns (such as overlapping strokes) reduces swirl marks and ensures a uniform surface.
The RPM or speed setting is a balance between aggressiveness and control. On wood, you some days need higher speeds to break through rough coatings, followed by slower passes to refine detail. On drywall, slower speeds often yield a smoother finish with less chatter along seams while improving control near outlets, trims, and textured surfaces. Your choice of disc material—aluminum oxide, ceramic, or silicone carbide—also impacts cut rate, heat generation, and dust performance. The overarching rule is to tailor grit and speed to the material, the amount of stock you need to remove, and the finish you intend to achieve.
Dust Management: VACs, Hoses, and Filtration
Dust control is a non-negotiable factor in both wood and drywall sanding, but the approach differs. Wood sanding typically produces heavier, larger dust particles and can generate heat that degrades airborne cleanliness if not contained. A dedicated vacuum system with a strong cutoff and a cyclone or a high-quality bag improves efficiency and reduces cleanup. If you don’t have a built-in vacuum, a canister vacuum with a tight-fitting bag or an industrial shop vac with a proper HEPA or P100 filter helps capture most of the loose grit. For drywall sanding, the goal is maximum capture of fine gypsum dust, which otherwise becomes airborne and irritates eyes, lungs, and skin. A drywall sander often includes a low-dust option, a large exhaust port, and compatibility with a vacuum hose designed to handle fine particles. It’s essential to seal off work areas, use a respirator when dust levels are high, and wear appropriate eye protection and a mask at minimum. The investment in a robust dust-management setup pays dividends in health, cleanup time, and finish quality.
In many professional setups, a central dust-extraction system feeds through multiple tools, maintaining a cleaner workspace and reducing cross-contamination between tasks. This is particularly important for long projects on walls and ceilings where dust can drift into HVAC systems or other rooms. A properly sealed environment also helps you re-sand selective areas without redepositing dust into fresh finishes.
Surface Prep Scenarios: Floors, Walls, Ceilings
Different substrates demand different preparation strategies. For wood floors, you often prioritize stock removal speed, leveling graphically, and ensuring round edges remain smooth for finishing. You’ll plan several passes—starting with a coarse grit, moving through a mid-range, and finishing with a fine grit to eliminate micro-scratches. Decks require the same approach but with adjustments for weathered boards and potential grain raising. When sanding walls or ceilings, you focus on preventing chalking or tearing of the wall surface and maintaining a consistent finish that will accept paint or texture. The drywall sander’s reach is a major benefit for overhead work, as you can avoid ladders and still maintain control. For textured walls, you must adjust the angle to avoid digging into mud or texture coats. Always test on a small area first to see how the surface responds to grit and pressure, then adjust your sequence accordingly. In mixed projects combining wood and drywall work, you might switch tools between tasks to optimize both the finish quality and the dust control strategy.
Safety and Health Considerations
Sanding generates airborne particles that can irritate eyes and lungs, especially with drywall and joint compound. PPE should include an approved respirator or dust mask, eye protection, and hearing protection for extended sessions. Work in a well-ventilated area and use dust collection whenever possible. Keep cords organized to prevent trip hazards, and never force a sander through a tough patch; instead, make multiple light passes to avoid gouging or burning the edge of the surface. Be mindful of hidden hazards like old paint containing lead or other contaminants. If your project involves historic finishes or potential lead paint, follow local regulations and consider professional testing. Regular maintenance on your sanding equipment—cleaning vents, inspecting cords, and replacing worn discs—helps maintain performance and safety over the life of the tool.
Cost of Ownership: Upfront vs Maintenance
From a budgeting perspective, the wood sander and drywall sander occupy different value niches. Wood sanders tend to be slightly heavier and more robust, reflecting their role in heavy stock removal and long sessions on floors and decks. Drywall sanders are often lighter and designed for comfort during overhead work, which can reduce user fatigue and error rates during extended projects. Consumables—discs, pads, and replacement parts—vary by model and brand, but the key is predicting how often you’ll replace abrasive discs and filters rather than chasing the lowest upfront price. Maintenance tasks include cleaning the exhaust path, replacing worn pads, and inspecting the dust collection system for blockages. If you anticipate doing both wood and drywall projects, consider building a small portfolio of accessories and two separate machines that maximize efficiency and reduce idle time between task switches. The value of a thoughtful setup is measured not just in upfront cost, but in how smoothly you can complete a project with minimal rework and dust exposure.
Practical Demo Scenarios: Step-by-Step Use Cases
Demo 1: Smoothing an old oak floor. Start with a coarse grit (or belt sander attachment if available) to level the surface, then step down to mid-range grit to remove sanding scratches. Move in long, overlapping strokes with consistent pressure, taking care around edges and transitions to avoid gouges. Finish with a fine grit for a smooth, paint-ready surface.
Demo 2: Finishing a drywall seam. Use a drywall sander with a long reach to skim over mudded joints, feather the edges, and avoid pressing too hard on the joint paper. Work in gentle, even strokes and monitor heat buildup to prevent tearing. Finish with a very light pass using a fine grit to achieve a uniform surface ready for primer.
Demo 3: Above-counter room touch-ups. For ceilings or high-wall areas, attach the appropriate extension pole and maintain controlled movements, frequently cleaning the exhaust port to prevent clogging. This approach minimizes dust in the room while maintaining an even finish on textured surfaces. These practical steps illustrate how each tool excels in real-world tasks when used with discipline and the right accessories.
How to Choose Your Sander Portfolio
The decision framework starts with project scope. If your primary objective is stock removal on wood floors or decks, prioritize a capable wood sander with a broad grit range, solid weight distribution, and a dependable dust-control setup. If your main work involves drywall or plaster walls, opt for a drywall sander with extended reach, a quiet motor, fine finishing discs, and a dust system that minimizes airborne particles. For mixed projects, consider owning both tools and plan your workflow to switch efficiently between them. You can also look for hybrid tools that offer wood-friendly and drywall-friendly attachments, but be mindful of each tool’s optimized performance characteristics. Always choose a model with safety features such as an effective vibration dampening system and a reliable dust collection port. Read user reviews and verify service support and replacement part availability in your region to ensure the investment pays off over time.
Common Pitfalls and How to Avoid Them
One common pitfall is using the wrong grit for the surface, which leaves visible scratches or dulls the finish. Another is neglecting dust control, which not only creates a messy workspace but can degrade air quality and finish integrity. A third pitfall is ignoring edge and corner work, leading to uneven edges or gouges near trim. To avoid these issues, plan grit progression, keep your sander moving with steady, overlapping strokes, and test on scrap sections before proceeding to the main area. Always maintain even pressure and avoid forcing the tool; let the disc or belt do the work. Finally, store discs correctly to prevent flat spots and maintain abrasive integrity.
Understanding these pitfalls helps you achieve professional results with less rework and a better final appearance. The keys are preparation, deliberate technique, and attention to dust management and surface condition.
Maintenance and Longevity Tips
Regular maintenance extends tool life and consistency of results. Clean the dust paths after each project and inspect the filter or bag for wear. Check power cords for fraying and avoid using dull discs, which cause overheating and reduce performance. Store abrasives out of direct sunlight and in a cool, dry place to prevent glazing and backing plate damage. Lubricate moving parts if recommended by the manufacturer and replace worn handle grips for a safer, more comfortable grip. If your tools are used infrequently, perform a quick inspection and cycle the motor to keep brushes in good shape. With routine maintenance and mindful operation, both wood and drywall sanders can deliver reliable performance across multiple projects.
Comparison
| Feature | Wood sander | Drywall sander |
|---|---|---|
| Best for | Hardwood floors, decks, furniture finishing and stock removal | Gypsum board walls, ceilings, joint compound smoothing |
| Typical grit range | Coarse to medium (40-120) for stock removal; fine up to 220-320 for finishing | Fine to very fine (120-220, sometimes 240-320) for feathering joints |
| Dust management | Often relies on external VAC systems; heavier dust, robust containment recommended | Designed for high dust control with vacuum ports and bags; best with dedicated drywall dust system |
| Surface reach | Typically handheld with edge-access limitations; some belt or hybrid models offer edges well | Long-reach pole options for ceilings; compact handheld variants for corners |
| Weight and balance | Heavier, more stable for floor work; momentum helps aggressive stock removal | Lighter, easier overhead use; reduced fatigue during long wall/ceiling sessions |
| Ease of use | Straightforward for aggressive removal but demands more care to avoid gouges | User-friendly for feathering seams; focus on dust control and smoother finishes |
What's Good
- Specialized performance increases finish quality when used on matching materials
- Better dust control and surface finish for drywall projects
- Higher efficiency for stock removal on wood with appropriate grit
- Flexible accessories enable edge and corner work
- Long-term value from owning purpose-built tools
Weaknesses
- Using the wrong tool for a material can damage surfaces
- Both tools require dust management to protect health and surfaces
- Initial cost and maintenance can be higher if you own two dedicated tools
- Switching tools adds setup time in a multi-material project
Wood sander is the go-to for wood-based surfaces; drywall sander excels in wall/ceiling finishing and dust control
For heavy stock removal and wood finishing, choose a wood sander. For drywall joints and smooth wall finishes with superior dust containment, choose a drywall sander. A blended project benefits from having both tools on hand.
Your Questions Answered
What is the main difference between a wood sander and a drywall sander?
The wood sander is built for stock removal and finishing on wood surfaces, while the drywall sander focuses on fine dust control and smooth finishes on gypsum board. Each is optimized for its target material, which affects grit choices, ergonomic design, and dust management.
Wood sanders remove stock and shape wood; drywall sanders prioritize dust control and even seams for walls.
Can I use a drywall sander on wood?
You can, but it may not remove material efficiently and could be uncomfortable for longer wood tasks. It is better suited for light smoothing and feathering on wood only when you lack a dedicated wood sander. For significant stock removal, a wood sander is preferred.
Drywall sanders aren’t ideal for heavy wood stock removal; use them for light smoothing only if needed.
Which sander is better for finishing hardwood floors?
A dedicated wood sander with appropriate grit progression and a strong dust system is typically best for hardwood floors. It handles stock removal, leveling, and finishing passes efficiently when used with the right abrasives.
For floors, pick a wood sander with a good grit range and dust collection.
What safety precautions should I take with sanding dust?
Wear a respirator or dust mask, eye protection, and hearing protection. Use a dust collection system or vacuum with HEPA/P100 filtration, work in a ventilated area, and seal off spaces to minimize dust spread.
Protect your lungs and eyes with proper PPE and contain dust with a good vacuum setup.
What maintenance does a sander require?
Regularly clean dust paths, inspect the power cord, replace worn discs, and check the vacuum port for blockages. Store tools in a dry place and perform periodic lubrication if the manufacturer recommends it.
Clean, inspect, and replace worn parts to keep your sander performing well.
Are there universal sanding discs that fit both tools?
Most discs are designed for specific pad types (hook-and-loop or adhesive). Some discs fit multiple tool platforms, but performance is best when you match discs to your sander’s pad and speed settings.
Discs usually fit specific pads; check compatibility before buying.
Main Points
- Identify your primary material first to pick the right sander
- Use the grit progression strategy for best results
- Prioritize dust control to protect health and finish
- Test on scraps before committing to the main surface
- Maintain your tools for longevity and consistent performance