Drywall Sander vs Orbital Sander: A Practical Guide for Homeowners
Compare drywall sander and orbital sander for walls, ceilings, and wood finishing. Learn differences, dust control, grit guidance, and step-by-step tips from SanderSavvy to pick the right tool for your project.

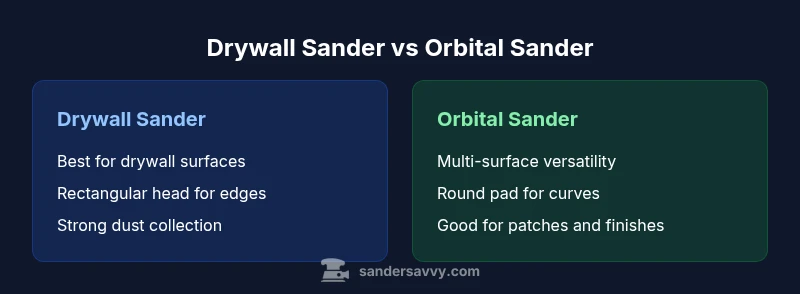
Drywall sander vs orbital sander is a common decision for wall prep. A drywall sander focuses on plaster and joint compound with better dust control for large drywall areas, while an orbital sander handles wood, patches, and finish work with greater versatility. The choice depends on surface type, dust management, and the finish you want. This guide explains when to use each tool and how to pair them.
Understanding the Core Difference: drywall sander vs orbital sander
According to SanderSavvy, the drywall sander vs orbital sander decision hinges on surface type, dust control, and the desired finish. Drywall sanding is typically an interim step during drywall installation or repair, requiring smooth joint compound surfaces and efficient dust management. Orbital sanders are designed for multi-surface work, from smoothing drywall patches to refining wood edges and paint prep. The two tools share a common goal—leave a clean, even surface—but their design, capabilities, and best-use scenarios diverge significantly. This section unpacks the core distinctions so homeowners can plan their workflow without tool clutter. In practical terms, if your walls are finished with joint compound, a drywall sander is often the most efficient path; if you anticipate patchwork on wood, or a mix of textures, an orbital sander adds versatility. As you read, you’ll notice how dust management, pad shape, and motion influence results more than raw motor power alone. The takeaway is simple: match the tool to the task, and you’ll minimize rework and maximize consistency.
SanderSavvy’s approach is to start with the surface type and the expected finish, then map tool capabilities to the project phases. This method reduces tool clutter and helps you plan a workflow that keeps dust under control while preserving surface integrity. The drywall sander vs orbital sander decision isn’t about which tool is better overall; it’s about which tool fits each job most efficiently, with the fewest compromises.
How Each Tool Works: Construction, Motion, and Sanding Surfaces
Drywall sanders typically feature a rectangular sanding head designed to reach flat walls, ceilings, and interior corners with a perforated pad and integrated dust port. The design emphasizes aggressive but controlled removal of joint compound and skim coats, while allowing for a strong vacuum hookup to minimize airborne dust. This tool excels when you’re smoothing large drywall surfaces where consistent texture is crucial. In contrast, orbital sanders use a round sanding pad driven in orbital motion. The orbiting action provides forgiving, multi-surface performance that’s well-suited to wood, patched drywall areas, trim, and light finishing work. The key difference is intended use: drywall sanders maximize drywall work efficiency and dust capture, while orbital sanders emphasize versatility across materials. Ergonomics, weight distribution, and vibration control also differ between the two, influencing comfort during long sessions. For homeowners, this means planning tasks so you can switch between tools as surfaces and finish requirements evolve during a project. A practical workflow often involves sanding drywall with a dedicated drywall sander for bulk work, then finishing edges or patches with an orbital sander.
From a design perspective, some drywall sanders provide integrated telescoping handles for ceiling work, while orbital sanders emphasize compactness and balance for tighter corners. The right combination of sanding pad, backing pad, and dust collection accessories will depend on the job size and the level of cleanliness you expect on completion. If you’re working indoors, investing in compatible dust-collection attachments for both tools can dramatically improve air quality and reduce cleanup time. The core lesson is: understand the motion and pad geometry, then pair them with the surfaces you intend to treat.
Dust Control and Indoor Air Quality
Dust management is often the most critical factor when choosing between drywall sander vs orbital sander for indoor projects. Drywall sanding produces a distinctive mix of plaster and joint compound dust, which can linger as fine particulates. A drywall sander is typically designed to accept a robust vacuum system, and many models are configured to connect directly to a large-capacity dust extractor. The consistent airflow around the rectangular head helps capture dust at the source, reducing contamination across nearby surfaces and stored items. Orbital sanders may have onboard dust bags or smaller vacuums; while useful for quick patches, they can generate more dispersed dust in larger smoothing tasks. Regardless of the tool, ensure you have a high-quality filter or HEPA system, seal off the work area, and wear a respirator when sanding drywall. Practical tips include pre-cleaning the area, using tack cloths between passes, and choosing sanding sheets with open coats to maximize dust capture. The SanderSavvy approach emphasizes a controlled environment as much as surface preparation. For best results, pair any sander with a dedicated contract-grade vacuum and regularly replace or clean filters to maintain suction efficiency.
Practical Use-Cases: Walls, Ceilings, Wood, and Repairs
Walls and ceilings are the primary theaters for drywall sanding. When finishing new drywall or skim coats, a drywall sander is often the most efficient instrument, especially for large, uniform surfaces where you want to achieve a consistent texture. Ceilings present their own challenges: reach, gravity, and edge control require careful technique and sometimes a long-reach model. Patching and finishing small areas, on the other hand, can be a strong scenario for an orbital sander, particularly where visual finishes on wood trim or patched drywall require a smoother touch. For repairs in kitchens or bathrooms, where moisture and humidity can affect finish texture, the orbital sander’s versatility can help you blend repaired areas with adjacent surfaces. A practical plan is to reserve the drywall sander for the bulk of drywall work and reserve the orbital sander for finishes, patches, and light stock removal on wood. This approach minimizes rework and optimizes the surface texture across different materials. Remember to check the grit sequence and move methodically to avoid gouging or over-smoothing edges.
Speed, Pad Size, and Grit: Practical Guidelines
Understanding speed, pad size, and grit is essential for predicting outcomes with drywall sander vs orbital sander. Drywall sanding favors larger, rectangular heads and steadier, wide strokes to achieve even texture, often with slower, controlled speeds to prevent gouges. In contrast, orbital sanders excel with round pads and a wider range of speeds that support both rapid material removal and fine finishing. When sanding drywall joints, start with a medium grit to smooth high spots, then move to a finer grit for the final pass. For wood or patched drywall areas, begin with a coarser grit to remove material and gradually progress to finer grits for a smooth finish. The choice of grit should align with the surface type and the level of finish required. A common mistake is applying an overly aggressive grit to walls, which can lead to deep scratches and uneven textures. By planning passes and switching to finer grits as surfaces become flatter, you’ll achieve a more consistent result. The overall recommendation is to match grit to the task and use a consistent, vertical or horizontal motion to avoid creating ridges.
Ergonomics and Personal Safety for Long Jobs
Long sanding sessions demand attention to ergonomics and safety. Drywall sanding, with its larger working area, can be heavier and place more strain on the shoulders and back. A properly balanced drywall sander with an adjustable handle helps maintain a natural posture, while a vacuum system reduces airborne dust and improves visibility. Orbital sanders are typically lighter and easier to maneuver for detailed work, but prolonged use can still cause vibration-related fatigue. When selecting tools, prioritize weight distribution, grip comfort, and vibration dampening. Wear a respirator, safety glasses, and hearing protection as a baseline, and schedule breaks to reduce repetitive strain. Regular maintenance such as cleaning vents, inspecting cords, and replacing worn sanding sheets will extend tool life. Remember that dust control also protects your home environment and reduces cleanup time, which is especially valuable for DIY projects with tight deadlines.
Step-by-Step: Choosing the Right Tool for Your Project
- Define the project scope: walls, ceilings, patches, or wood surfaces. 2) Assess access: high ceilings or tight corners may favor the drywall sander with long reach. 3) Consider dust control: if you must minimize dust in a living space, a dry-wall-specific model with strong vacuum hookup is preferred. 4) Plan for finish: if you need a finish similar to wood or paint prep, an orbital sander adds versatility. 5) Budget and frequency: for a one-off project, renting a drywall sander might save money; for ongoing work, owning a versatile orbital sander can be more practical. 6) Test and sequence: practice on a small area to calibrate pad pressure, speed, and grit progression before tackling larger sections. By following this framework, you’ll select the tool that optimizes your workflow and minimizes rework.
Maintenance, Accessories, and Longevity
Maintenance matters for both tools. Clean dust from vents after each use, inspect the sanding pad for wear, and replace worn sheets promptly to maintain consistent results. Dust ports, vacuums, and filters should be kept clear to preserve suction efficiency. Accessories such as edge guides for drywall sanders and dust collection attachments for orbital sanders extend your reach and flexibility. Replacement parts and sanding sheets are typically widely available, making it easy to tailor your setup to the project. Consider a modest investment in a quality vacuum system or a capable shop vac for monthly use, especially in environments with limited ventilation. Proper storage of sanding equipment and blades also extends life and keeps them ready for the next job.
Rent vs Buy: Cost Considerations and Decision Factors
For most homeowners, renting is a smart starting point when you anticipate sporadic drywall work or a few heavy patch projects. Renting lets you access a dedicated drywall sander for large-scale wall prep without committing to ownership costs. If you expect to sand frequently across projects—repairing wood furniture, refinishing surfaces, and maintaining walls—buying a versatile orbital sander or a compact drywall sander can be more economical in the long run. When evaluating cost, factor in the price of compatible dust collection systems, replacement sanding sheets, and potential downtime due to tool maintenance. SanderSavvy recommends calculating your project load, then comparing rental vs purchase costs over the project timeline. In many cases, a mixed approach (rent for big drywall tasks, own an orbital sander for ongoing projects) offers the best balance of efficiency and cost.
Comparison
| Feature | Drywall Sander | Orbital Sander |
|---|---|---|
| Primary purpose | Specialized for drywall surface preparation and joint compound sanding | General-purpose sander for wood, drywall patches, and finish work |
| Dust management | Typically larger dust-collection systems; drywall-specific vacuums | Built-in dust collection; less aggressive on fine dust |
| Sanding pad size | Rectangular or long rectangular head; designed for flat surfaces and edges | Round pad; common sizes 5-6 inches; versatile for curved areas |
| Speed and power ranges | Lower RPM for controlled drywall finish; some models offer variable speed | Higher RPM; versatile for wood removal, smoothing, and finishing |
| Best-use scenarios | New drywall prep, skim coats, and patch smoothing on wide walls | Wood finishing, patch sanding, trim work, and mixed-surface prep |
| Typical grit guidance | Coarse to medium (roughly equivalent to 60–120 for drywall smoothing; finer for skim coats) | Medium to fine (roughly 120–220 for finishes; coarser for material removal) |
| Price range | $80-$250 for dedicated drywall sanders; accessories extra | $60-$180 for basic orbital sanders; higher with extra features |
| Best for | Professional drywall prep with clean edges | General remodeling and multi-surface projects |
What's Good
- Dedicated drywall sanding improves dust control when paired with a vacuum
- Orbital sanders offer multi-surface versatility and quicker surface swaps
- Reduces manual labor compared to hand sanding
- Wide accessory ecosystems and widespread availability
Weaknesses
- Drywall sanding can be slower for large areas if not paired with a vacuum
- Orbital sanders can gouge joints if used improperly on drywall
- Dust control quality depends on the vacuum and technique
Drywall sanding excels on drywall-centric tasks, while orbital sanding offers broad versatility for mixed surfaces.
For mostly drywall work, use a drywall sander to maximize texture control and dust capture. For projects that blend walls, patches, and wood, an orbital sander provides efficient flexibility. The SanderSavvy guidance favors choosing based on surface type and finish goals, often benefiting from owning an orbital sander while renting a drywall sander for large jobs.
Your Questions Answered
What is a drywall sander best used for?
A drywall sander is designed for smoothing joint compound, skim coats, and plaster on walls and ceilings. It’s optimized for efficient material removal with integrated or external dust collection, which helps minimize mess and health hazards in indoor environments.
Best for smoothing joint compound on walls and ceilings; it pairs with a dust collector for clean air.
Can you safely use an orbital sander on drywall?
Yes, you can use an orbital sander on drywall, but it’s not ideal for large, flat surfaces due to edge tracking and potential surface mars. It’s more suitable for patches, light finishing, and wood surfaces that may adjoin drywall.
You can use it, but it’s best for patches and wood; drywall bulk work tends to be more efficient with a drywall sander.
Which tool is best for ceilings?
Drywall sanders are generally preferred for ceilings because of longer reach and rectangular pads that cover broad areas evenly. Orbital sanders can work, but they require more effort to maintain an even finish at height.
Ceilings benefit from drywall sanders for reach and even texture.
How important is dust collection?
Dust collection is critical for indoor air quality and cleanup efficiency. Connect a good vacuum to a drywall sander or ensure strong filtration when using an orbital sander to prevent fine particles from recirculating.
Dust control matters a lot—use a strong vacuum and good filtration.
What grit should I start with for drywall smoothing?
Start with a medium grit to smooth uneven joints, then move to a finer grit for a final pass. Avoid overly coarse grits that can gouge the surface and require extra passes.
Use a medium grit first, then finish with a finer grit for a smooth surface.
Rent or buy—what’s the better option?
For a single project, renting is often more economical. If you sand frequently across multiple projects, owning a versatile orbital sander can be cost-effective in the long run.
Rent if it’s a one-off; buy if you sand often.
Main Points
- Assess surface type before selecting tools
- Prioritize dust control in indoors projects
- Pair drywall and orbital sanding where surfaces vary
- Match grit to finish goals and surface type
- Consider rental for large drywall jobs to manage costs