How to Prevent Dust from Sanding Drywall
Discover practical, safe methods to minimize drywall sanding dust, protect floors and furniture, and keep your workspace clean with a detailed step-by-step guide.

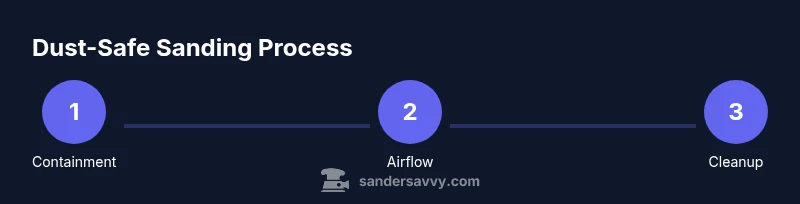
You can prevent dust from sanding drywall by sealing the workspace, creating dust barriers, and using a dedicated dust collection setup. Start with a taped plastic containment, cover floors with drop cloths, and use a HEPA-filter vacuum for cleanup. Keep sanding tools equipped with dust bags or attach a dust extractor, and wear a respirator to protect your lungs.
Why dust control matters when sanding drywall
Dust control is not a cosmetic concern; it affects health, safety, and finish quality. When you learn how to prevent dust from sanding drywall, you reduce airborne particulates that irritate eyes and lungs, prevent dust from settling into joints, and minimize cleanup time later. According to SanderSavvy, effective containment at the source can dramatically reduce the spread of dust, making the project safer and faster overall. This section outlines why dust control matters and how it affects every stage of drywall sanding.
First, consider health and safety. Gypsum dust, joint compound, and sanding debris can irritate mucous membranes and skin. People with allergies or asthma may notice symptoms even with short exposure. Wearing a proper respirator, eye protection, and gloves helps reduce risk. Second, protect the surfaces you’re not sanding. Drywall dust clings to baseboards, countertops, and furniture; a small amount can compromise paint, finishes, and floor finishes. By containing dust, you preserve the work area and the investment in the house.
Finally, think about efficiency. When dust stays in the air, it lands back on the wall you just worked, requiring re-sanding. A well-implemented dust control plan saves time, reduces rework, and improves the final finish. SanderSavvy analysis shows that when builders and homeowners invest in containment and ventilation, the job is smoother and more predictable.
Tools & Materials
- Plastic sheeting (4 mil or thicker)(Cover walls and floors; seal edges with painter's tape)
- Painter's tape(Secure plastic sheeting to create sealed barriers)
- Drop cloths or old tarps(Protect floors and furniture under the work area)
- HEPA vacuum(For frequent cleanup and capturing fine dust)
- Dust collection hose or sander with dust port(Attach to sander to pull dust away from the surface)
- Respirator or dust mask (NIOSH-approved)(Protect lungs from drywall dust; use eye protection as well)
- Safety goggles(Shield eyes from flying particles)
- Damp cloths or microfiber cloths(Wipe surfaces to trap settled dust during cleanup)
- Trash bags(Sealed disposal of debris)
Steps
Estimated time: 60-90 minutes
- 1
Set up containment and workspace
Clear the room of nonessential items. Install plastic sheeting to create a contained work zone and seal edges with painter's tape. Use a second sheet to create a simple airlock at the doorway so you can enter/exit with minimal dust spread.
Tip: Secure edges with multiple layers of tape to prevent billowing. - 2
Seal doors, vents, and HVAC if possible
Close doors to the room and seal any gaps around vents with plastic and tape. If you can, temporarily disable or isolate the room from the central HVAC to prevent dust recirculation.
Tip: Label the room so others know to avoid opening doors during sanding. - 3
Attach dust collection to sanding tools
Connect a dust port or hose to your sander. If your tool lacks a port, use a sanding sponge with a light touch and vacuum nearby debris frequently to minimize dust release.
Tip: Run the vacuum continuously during sanding to capture dust at the source. - 4
Choose a gentle sanding approach
Begin with broad, light passes to avoid throwing dust into the air. Move steadily, avoiding heavy pressure and quick, jerky motions that kick up dust cloud.
Tip: Let the sander do the work; pressing hard creates more dust and scratches. - 5
Vacuum between passes and wipe surfaces
After each pass, vacuum the area and wipe down surfaces within arm's reach. This prevents settled dust from becoming airborne when you resume sanding.
Tip: Keep a damp microfiber cloth handy to trap fine dust on surfaces. - 6
Progress to finer finishing passes
As you approach a smooth finish, switch to finer grits or lighter sanding. Maintain the dust collection setup to keep air clean while you refine seams and edges.
Tip: Avoid creating glossy spots by over-sanding; aim for uniform texture. - 7
Finish area prep for priming/painting
Do a final check for dust on walls, baseboards, and corners. Wipe with a damp cloth, then run a final vacuum before priming to ensure a clean surface.
Tip: A clean surface improves paint adhesion and finish quality. - 8
Final cleanup and air quality check
Bag and dispose of debris in sealed bags. Remove barriers carefully so dust doesn’t spill. Ventilate the room or use an air purifier to restore air quality before using the space normally.
Tip: Dispose of dust waste away from entrances to prevent re-entry.
Your Questions Answered
What is the best way to seal a room for drywall sanding?
Use heavy-duty plastic sheeting to cover walls and doors, secure with painter's tape, and seal gaps around windows and vents. Create a simple airlock at the doorway to minimize dust migration.
Seal the room with plastic, tape the edges, and keep the door closed to limit dust spread.
Do I need a respirator when sanding drywall dust?
Yes, wear a suitable respirator rated for dust, along with eye protection. A simple dust mask is often not enough for fine drywall dust.
Yes, protect your lungs with a proper respirator and keep your eyes shielded.
Can I sand without a dust extraction system?
A dust-extraction system is strongly recommended, but you can reduce dust with barriers and frequent vacuuming if one isn’t available. Expect more cleanup and longer work time.
A dust extractor is best, but if not available, clean as you go and seal your space carefully.
How often should I vacuum during sanding?
Vacuum after each major pass and at the end of the session to prevent re-entrainment of dust. Keep the vacuum running during sanding when possible.
Vacuum often—after each major pass to keep dust under control.
Is drywall dust hazardous?
Drywall dust can irritate eyes, skin, and lungs. Use PPE and ensure proper ventilation to minimize exposure risk.
Drywall dust can irritate your eyes and lungs; wear protection and keep the space ventilated.
What about post-sanding cleanup and airing out the space?
Ventilate the area, wipe surfaces with damp cloths, and vacuum. Let the room air out before painting to reduce residual dust.
Clean up with a damp cloth and vacuum, then air out the room before finishing.
Watch Video
Main Points
- Seal the workspace to prevent dust spread
- Use barriers, drop cloths, and a dust-collection system
- Vacuum and wipe surfaces between passes
- Finish with a thorough final cleanup before painting
- Air quality should be restored before resuming normal activities