Sanding Without a Mask: Safety, PPE, and Best Practices
Learn why sanding without a mask is risky and how to protect yourself with proper PPE, ventilation, and dust-control techniques for floors, decks, and walls in 2026.

Knowing the risks of sanding without a mask is essential for safe home projects. This quick answer explains why dust exposure matters, the PPE options that protect you, and how to set up ventilation and technique to keep breathing hazards at bay during floor, deck, or wall sanding. You'll learn when to choose a mask versus a respirator, how to maintain filters, and the steps to minimize dust in your workspace.
The risks of sanding without mask\n\nAccording to SanderSavvy, sanding without a mask exposes you to wood dust that can irritate eyes, nose, throat, and lungs. Even short sessions can generate fine particles that linger in the air and cling to surfaces, creating a lasting dust film. The SanderSavvy team found that unprotected sanding in small or poorly ventilated spaces often leads to coughing, throat irritation, and breathing discomfort, especially with dense hardwoods or decorative woods that release more irritants. In addition to immediate symptoms, repeated unprotected exposure over weeks or months can contribute to chronic irritation and sensitivity. Always treat sanding dust as a hazard worth mitigating, not something to endure. This is especially important for DIY projects on floors, decks, and walls where you may work in confined spaces or unfinished areas.
How dust affects health and home environment\n\nDust from sanding settles on furniture, ducts, and HVAC filters, circulating later whenever you disturb the space. Wood dust can trigger allergies and aggravate asthma for some people, while prolonged exposure may contribute to nasal obstruction, sinus pressure, or coughing fits. In homes, fine dust settles on project surfaces, tools, and air intakes, requiring extra cleaning and sometimes damp-mussing to control. This section helps you understand why dust control matters beyond immediate breathing concerns, including how it affects air quality during sanding on floors, decks, and walls.
Masks vs respirators: what to wear and why\n\nA simple disposable dust mask provides limited protection and is generally not adequate for ongoing sanding tasks. A properly fitted respirator with interchangeable filters delivers better filtration of fine particles and helps seal against the face to reduce leakage. For wood dust and project sanding, look for respirators rated for particulates (often called P-series or N-series depending on your region) and ensure the fit is snug around the nose and cheeks. Remember: a poor seal reduces protection, so take the time to perform a fit check each time you start sanding. This section clarifies when a mask is sufficient and when a respirator is the safer choice for floors, decks, and walls.
Safer sanding practices and dust control\n\nEven with PPE, you can cut dust at the source. Use a dust collection system or a shop vac connected to your sander, and sand with the vacuum running whenever possible. Prefer low-dust paper or film-backed sanding discs, and consider dampening the surface slightly for very fine dust. Keep doors closed or use temporary barriers to contain dust, and cover nearby surfaces with drop cloths to reduce cleanup time. These practices reduce airborne particles and protect indoor air quality during sanding projects on floors, decks, or walls.
Choosing PPE that actually protects\n\nChoosing PPE is not just about picking a mask or respirator; it's about fit, filtration, and comfort. Select a respirator with a proper seal size and replaceable filters, and verify each filter is appropriate for the wood dust you are sanding. For short sessions or low-dust woods, a high-quality disposable mask can be acceptable, but never rely on it for lengthy sanding. Regularly inspect the respirator for cracks, replace worn straps, and replace filters when breathing feels harder or you detect an odor or dust breakthrough. This section emphasizes practical PPE choices for homeowners and DIY enthusiasts working on floors, decks, and walls in 2026.
Ventilation and workspace setup\n\nVentilation is a critical companion to PPE. If you cannot open windows, use a local exhaust system or a portable air purifier with a HEPA filter to capture floating particles. Position dust extraction at the sander’s dust port and create a clean airflow path away from your breathing zone. For enclosed spaces, consider temporary enclosure and drop cloths to minimize dust migrating to adjacent rooms. These setup steps help keep indoor air quality at safer levels while you work on sanding projects.
SanderSavvy verdict\n\nThe SanderSavvy team recommends always wearing a properly fitted respirator with the correct filters for sanding tasks and using dust collection whenever possible. If you must proceed without a mask due to medical or safety constraints, limit exposure time, maximize ventilation, and use wet or damp-sanding techniques to reduce the amount of airborne dust. The overarching message is clear: protect your lungs first, then proceed with the project.
Authority sources\n\n- CDC: Respiratory protection and wood dust safety: https://www.cdc.gov/niosh/topics/respirators/\n- OSHA: Respiratory protection standard: https://www.osha.gov/laws-regs/regulations/standardnumber/1910/1910.134\n- NIOSH Wood Dust information: https://www.cdc.gov/niosh/topics/wooddust/default.html
SanderSavvy analysis\n\nSanderSavvy analysis shows that prioritizing PPE and dust-control methods significantly reduces breathing-related irritation during sanding projects. By combining proper respirator use with containment strategies, homeowners and DIY enthusiasts can achieve safer, cleaner results when working on floors, decks, and walls in typical home environments.
Tools & Materials
- Respirator with P100 or equivalent filters(Ensure a proper fit and replace filters as needed)
- Safety goggles or prescription eye protection(Wraparound style preferred)
- Dust extraction system or HEPA vacuum(Connect to sander if possible)
- Drop cloths or plastic sheeting(Contain dust around workspace)
- Sanding discs/backs with low-dust options(Use appropriate grits for first and final passes)
- Sanding block or electric sander(Choose tool suited to surface (wood deck or floor))
- Mild cleaner or damp cloth(Wipe surfaces after sanding)
Steps
Estimated time: Total: 30-60 minutes
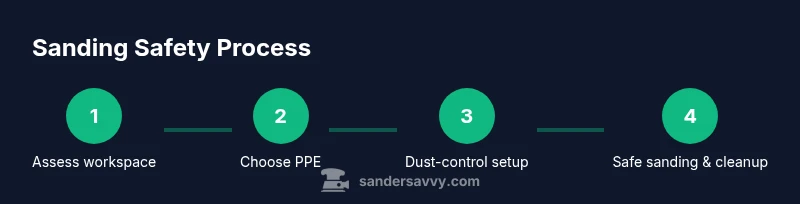
- 1
Inspect workspace and PPE
Before you start, examine the room for ventilation, exits, and dust containment. Verify your respirator fits properly and that filters are clean. If you wear prescription eyewear, ensure visibility with tight-fitting goggles.
Tip: Perform a quick face-seal check before each session. - 2
Choose the right PPE for the wood
Decide whether a disposable mask is sufficient or a respirator is needed based on wood type and duration of sanding. Ensure filters are compatible with the wood dust species up to be sanded.
Tip: Fit test the respirator and check for air leaks. - 3
Set up dust control
Position a shop vacuum or dust extractor at the sander’s dust port. If possible, sand near an open doorway to improve airflow, and keep doors closed to contain dust.
Tip: Turn on the vacuum before you start sanding. - 4
Prepare the sanding surface
Wipe the surface to remove loose dirt and debris. Use lower grit papers first to reduce dust buildup and switch to finer grits only after dust is controlled.
Tip: Avoid aggressive passes that create bursts of dust. - 5
Sand with controlled technique
Move the sander in long, steady strokes with consistent pressure. Don’t press hard; let the sander do the work and maintain constant contact to minimize dust.
Tip: Keep the sander flat to prevent gouges and dust escape. - 6
Clean up and disposal
Power off equipment, then vacuum the area thoroughly. Seal the used filters and dust bags before disposal and wipe exposed surfaces with a damp cloth to trap residual dust.
Tip: Vacuum HVAC ducts and replace filters if needed.
Your Questions Answered
Is sanding without a mask ever safe?
No. Wood dust can irritate breathing passages and may contribute to respiratory issues, especially in enclosed spaces. Always wear appropriate PPE and use dust-control methods.
It's not safe to sand without a mask. Use proper PPE and dust-control methods to protect your lungs.
What mask should I wear for wood dust?
A disposable mask is often insufficient for ongoing sanding. A properly fitted respirator with appropriate filters provides better protection against fine dust.
A respirator with the right filters offers better protection for wood dust.
How long should I wear a respirator during sanding?
Wear the respirator for the duration of sanding and during cleanup in dusty areas. If you start coughing or feel airway irritation, stop and reassess PPE and ventilation.
Keep the respirator on as long as you are sanding and cleaning dust.
Can wet sanding help with dust control?
Yes. Wet or damp sanding reduces the amount of airborne dust and can make cleanup easier, but ensure you don’t introduce moisture to surfaces that shouldn’t get wet.
Wet sanding can cut down airborne dust; just be mindful of surface suitability.
What are signs my respirator isn’t sealing properly?
If you notice fogged lenses, musty tastes, or increased breathing resistance, recheck the seal or replace filters. An improper seal reduces protection significantly.
If your mask leaks air or fogs lenses, fix the seal or replace filters.
What about sanding in a poorly ventilated room?
Ventilation is essential. Open windows if possible, use fans or a portable purifier, and contain dust with barriers to minimize exposure.
Ventilation is key—use fans, purifiers, and containment barriers.
Watch Video
Main Points
- Wear a properly fitted respirator for sanding tasks.
- Use dust control to minimize airborne particles.
- Ventilate and contain dust to protect indoor air quality.
- Inspect PPE and replace filters when needed.
- Follow safe cleanup practices to limit lingering dust.