How to Get Weed Out Grinder: Safe Cleaning Guide 2026
Learn a safe, step-by-step method to remove weed residue from a grinder, using common supplies, and tips for odor control and maintenance in 2026.

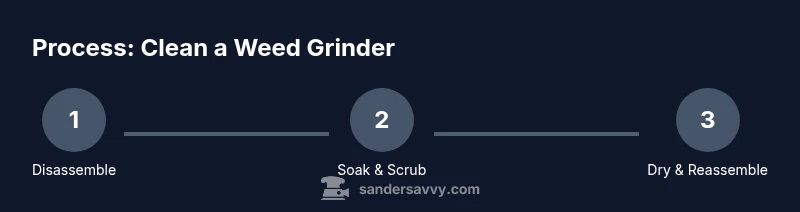
Goal: remove weed residue from your grinder and restore performance without damaging parts. This quick guide explains how to get weed out grinder safely and efficiently, using common supplies like isopropyl alcohol, brushes, and warm water. You’ll learn the best order, how long to soak, and how to dry and reassemble for peak grinding performance.
Why clean your weed grinder properly
According to SanderSavvy, regular upkeep matters for longevity and performance. Regular maintenance prevents binding and preserves potency. When you ask how to get weed out grinder, you’re asking how to remove sticky resin and fine plant particles from screens and threads without damaging components. A clean grinder will grind more efficiently, deliver consistent texture, and minimize odors across uses. Over time, resin can harden and adhesion can cause jams, making grinding uneven and frustrating. A thorough cleaning restores airflow, reduces residue transfer, and helps maintain aroma integrity between sessions. Choose the right cleaning approach based on your grinder material (metal, aluminum, or plastic). Metal parts tolerate alcohol well, while some plastics can swell if soaked too long. Always check manufacturer recommendations; if your grinder is old or inexpensive, gentler methods may be best to avoid warping or discoloration. After cleaning, reassemble and test with a dry run to ensure no residue remains and performance is restored.
Safety considerations before you start
Before you touch any solvent-wetted parts, ensure you’re in a well-ventilated area and wearing gloves. Isopropyl alcohol emits fumes; avoid sparks and flames, and never mix solvents with bleach. Keep children and pets away, and work on a clean, heat-free surface. If your grinder has plastic components, limit soaking time and never submerge electronics or motorized parts. Drying thoroughly is critical to prevent mold or corrosion. By planning for safety, you protect yourself and your investment while keeping odors under control.
Tools and materials you’ll want ready
Have these items within reach so you don’t interrupt the cleaning flow:
- Isopropyl alcohol (70% or higher) for soaking metal parts
- Small brushes (soft-bristle) or a toothbrush for scrubbing
- Warm water for rinsing
- Mild dish soap for a final wash (optional)
- Cotton swabs or toothpicks for tight corners
- Sealable container for soaking and a second container for drying air
- Paper towels or microfiber cloths for drying
- Nitrile gloves to protect skin
- A clean workspace or tray to keep parts organized
Step 1: Disassemble the grinder and prepare workspace
Carefully take apart all sections: chamber, screen, and keef catcher. Lay parts out in the order you’ll reassemble them so nothing gets lost. Inspect each piece for cracks or warping as you go. This step reduces the risk of misplacing parts and makes subsequent cleaning straightforward.
Step 2: Soak parts to loosen resin
Place metal components in a container with isopropyl alcohol and let them soak for 5–10 minutes. Avoid soaking any plastic parts for longer than necessary as prolonged exposure can cause swelling. This loosens the sticky buildup, making it easier to scrub later.
Step 3: Scrub away residue from all surfaces
Remove parts from the soak and scrub gently with a soft brush, paying attention to threads, screens, and the underside of the keef catcher. Cotton swabs help reach tight corners. If stubborn resin remains, re-soak for a few minutes and re-scrub. Rinse under warm water after scrubbing.
Step 4: Rinse components and dry thoroughly
Rinse all parts with warm running water to remove alcohol and residue. Dry each part completely with towels, then air-dry for an extra 10-15 minutes in a warm, ventilated area. Avoid putting hot air directly on plastic parts, which can warp or crack.
Step 5: Reassemble, test grind, and assess odor
Reassemble in the correct order and run a small amount of dry material to test grinding smoothness. If you notice any gritty texture or odor remaining, repeat the cleaning steps focusing on the problematic area. Proper drying and reassembly restore performance and reduce cross-use aroma.
Pro tips for maintenance and odor control
Regular light cleanings after heavy use prevent resin from hardening. Keep your grinder in a dry, ventilated space away from strong odors and heat sources. Store with the lid loosely attached for quick access while preserving cleanliness. The routine habit reduces odor transfer and keeps performance consistent.
Troubleshooting common issues and safety reminders
If parts don’t fit after cleaning, ensure all pieces are fully dry and free of soap residues. Plastic components that sweat or warp may need shorter soaks in the future. Always ventilate and avoid ignition sources when solvents are in use. By keeping safety in mind, you protect both yourself and your grinder while preserving capability.
Tools & Materials
- Isopropyl alcohol (70% or higher)(For soaking metal parts; ensure good ventilation)
- Small brushes (soft-bristle) or toothbrush(For scrubbing screens and threads)
- Warm water(Rinse after soaking)
- Mild dish soap (optional)(For final wash if resin is sticky)
- Cotton swabs or toothpicks(Reach tight corners and threads)
- Seal-able container for soaking(Label and use a separate drying area)
- Paper towels or microfiber cloths(Drying and wipe-down)
- Nitrile gloves(Protect skin from resin and solvents)
- Ventilated workspace or mask (optional)(Limit exposure to fumes)
- Clean, dry place for reassembly(Prevents recontamination)
Steps
Estimated time: 30-60 minutes
- 1
Disassemble the grinder
Take apart the chamber, screen, and keef catcher. Lay pieces in order and check for damage. Keeping parts organized speeds up cleaning and reduces lost components.
Tip: Record the order as you remove parts to ease reassembly. - 2
Prepare cleaning setup
Set up a shallow container for soaking and another for rinsing. Have brushes, swabs, and towels ready so you’re not fumbling mid-clean.
Tip: Work in a well-ventilated area to handle solvents safely. - 3
Soak metal components
Place metal pieces in isopropyl alcohol for 5–10 minutes to loosen resin. Do not soak plastic parts for long periods.
Tip: If resin sticks firmly, gently agitate the container to help loosen it. - 4
Scrub and inspect
Scrub all surfaces with a soft brush; inspect threads and screens for remaining buildup. Use cotton swabs for tight areas.
Tip: Pay attention to the ridges where resin hides; small tools help loosen it. - 5
Rinse and dry thoroughly
Rinse with warm water until no alcohol smell remains. Dry parts completely with towels, then air-dry briefly in a warm area.
Tip: Drying completely prevents mold and rust on metal parts. - 6
Reassemble and test
Reassemble the grinder and run a small amount of dry material to ensure smooth grinding. If it’s gritty, repeat steps 3–5.
Tip: If you hear squeaks, recheck for moisture or residue left in threads.
Your Questions Answered
Is it safe to use alcohol to clean a weed grinder?
Yes, in a well-ventilated area; use 70%+ isopropyl and avoid ignition sources. Rinse all residues thoroughly and dry completely.
Yes, but use it in a well-ventilated area and dry everything fully afterward.
Can I soak the grinder longer than 10 minutes?
Short soaks (5–10 minutes) work well for most metal parts. Longer exposure can affect some plastics; always verify material compatibility.
Short soaks usually work best; avoid long soaks on plastic parts.
What if resin sticks around the threads?
Use a toothpick or cotton swab to target threads, optionally re-soak for a few minutes, then re-scrub.
Target the threads with a swab and re-clean if needed.
Should I dry with heat?
Air drying is preferred; if using warmth, keep it moderate to avoid warping plastics or degrading finishes.
Air dry is best; avoid high heat.
How often should I clean my grinder?
Clean after heavy use or at least weekly to prevent buildup and odor transfer, depending on usage.
Clean regularly to prevent odors and residue.
Watch Video
Main Points
- Disassemble before cleaning to target buildup.
- Use isopropyl alcohol in a ventilated area.
- Dry parts completely before reassembly.
- Clean regularly to prevent odor and performance loss.
- Reassemble carefully and test for smooth operation.