Which Electric Sander to Use: A Practical DIY Guide
Discover which electric sander to use for floors, decks, and walls. This guide compares belt, orbital, and detail sanders with practical tips and dust control guidance.

For most DIY sanding projects, the orbital sander offers the best blend of speed, finish, and control when deciding which electric sander to use. Belt sanders excel at rapid material removal for rough stock, while detail sanders and random orbital sanders handle edges and finishing work with less gouging. Choose based on project type and finish goal.
Understanding which electric sander to use
Choosing the right sander is not just about power. It hinges on surface type, finish goals, and your tolerance for dust and vibration. When addressing the question of which electric sander to use, start with the surface you plan to work on and the level of removal you need. According to SanderSavvy, the best outcomes come from matching tool type to surface behavior, not just price or horsepower. This section introduces the four most common categories you’ll encounter in DIY projects: belt sanders, orbital sanders, random orbital sanders, and detail sanders. You’ll see how each tool behaves on different materials, what finishes they excel at, and where they fall short. This approach helps you build a simple decision rule you can apply to floors, decks, walls, and trim as you prepare for sanding tasks.
Belt Sander Basics: When rough removal rules the day
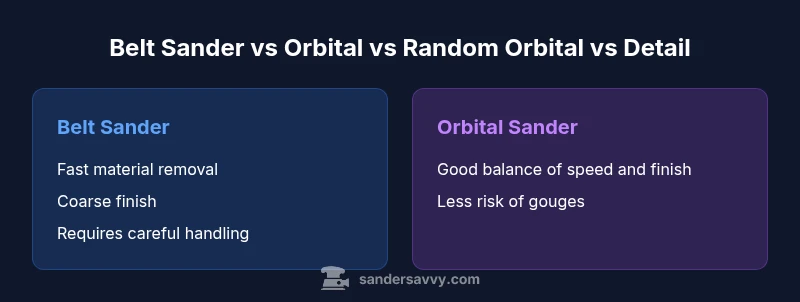
Belt sanders are built for speed and aggressive stock removal. They shave material quickly, which makes them ideal for leveling high spots on rough floors, smoothing across large, flat decks, and taking off old coatings in short order. The trade-off is control: belt sanders can gouge if you press too hard or misalign the belt. They shine when you pair power with a sharp belt and a steady, even stance. For beginners, use light strokes and move the sander in consistent, overlapping passes. If your goal is a flat, even surface before finishing, a belt sander can save hours, but you should have a plan for the subsequent finish work with finer tools.
Orbital Sander Basics: The finish-focused workhorse
Orbital sanders move in a fixed rotation pattern with a circular pad. They’re ideal for surface preparation where you want a relatively smooth base without heavy gouging. The key advantage is predictable, cleaner finishes on flat surfaces and smaller projects, such as tabletops or door panels. They’re less aggressive than belt sanders and can leave tiny swirl marks if used with coarse grits or improper technique. For most DIY tasks, starting with a mid-range grit, using steady pressure, and finishing with a finer grit yields a balanced surface ready for stain or polyurethane.
Random Orbital Sander: Best of both worlds
The random orbital sander combines the aggressive material-removal traits of a belt sander with the finish quality of an orbital sander. It uses a randomized sanding pattern to minimize swirl marks, making it versatile for both rough prep and final finishing on larger flat surfaces. For beginners and intermediate DIYers, this is often the most forgiving choice. A well-chosen random orbital sander with a good dust-extraction setup can handle most surfaces with fewer tool changes and a smoother finish.
Detail Sander: Edges, corners, and tight profiles
Detail sanders are compact, narrow, and designed for tight spaces—think around door frames, window casings, and inside cabinet edges. They’re not meant for wide surfaces, but they excel where the other tools struggle. Use a detail sander for final edging and finishing—spotting old coatings, feathering transitions, and cleaning up corners after larger tools have done most of the work. Paired with the right grit and light pressure, detail sanders can save time and improve overall finish when working in restricted spaces.
Grit Guide and Surface Prep: From rough to ready
Choosing the right grit sequence is as important as the tool itself. Start with a coarse grit (like 40–60) for aggressive stock removal on rough surfaces, then move to mid-range (80–120) for leveling and scratch removal, and finish with a fine grit (180–220) for a smooth base. For hardwood floors, you’ll typically move from 40–60 up to 100–120, then finish with 150–180 to prepare for finish coats. Always test on a small area first and adjust grit progression based on how the surface feels under your hand. This approach helps you avoid gouges and achieve even, predictable results.
Dust Control and Extraction: Keeping the workspace clean and safe
Dust control is a top priority when choosing which electric sander to use. Look for sanders with integrated dust bags or compatible vacuum ports. A productive setup often includes a shop vacuum with a hose attachment to capture fine particles early in the process. Proper dust control not only keeps the finish cleaner but also reduces health risks from inhalation. If you’re sanding large areas, consider pre-sealing the workspace and wearing a suitable respirator or mask to protect yourself from fine dust.
Noise, Vibration, and Comfort: Tools that feel manageable
Sanding can be a surprisingly tiring task, especially when you’re standing for extended periods. When selecting tools, pay attention to vibration ratings and ergonomic design. Heavier tools can lead to fatigue and inconsistent results, while lightweight models with anti-vibration handles tend to feel steadier. For decks and floors, gloves and wrist supports can reduce fatigue over long sessions. Keep the weight distribution in mind and choose a model whose grip feels natural in your hand.
Project Scenarios: Picking the right sander for common jobs
Different projects call for different sander types. For leveling rough stock on a wooden deck, a belt sander might be the fastest way to remove material. For refinishing a wide oak plank floor, a random orbital sander is usually the best compromise between material removal and finish quality. Finishing around edges, rails, and trim benefits from a detail sander. Use a combination of tools across a project to minimize time and maximize finish quality. This real-world guidance helps you translate theory into practice.
Practical Selection Checklist: A quick-start decision aid
Before you buy or pick up a sander, walk through this checklist: surface type, desired finish, amount of material to remove, room or workshop size, available dust control, and your comfort with tool handling. Keep extra sanding discs and belts on hand so you can switch quickly as you change grits or move between surfaces. If you’re a homeowner tackling occasional projects, a compact random orbital sander paired with a detail sander often provides the most versatility without overwhelming your toolbox.
Real-World Examples: How to test sanders side-by-side
A practical test can help you feel the differences between sanders in your own shop. Take a small off-cut piece of hardwood and run the same rock-well test on each tool with a mid-range grit to compare finish, swirl marks, and ease of use. Note how each tool handles corners and edges, how much dust is produced, and how easy it is to control the sander during extended sessions. Recording your impressions helps ensure that your final choice aligns with your actual workflow.
Maintenance and care: Keeping your sander performing well
Regular maintenance extends the life of your sander and keeps finishes consistent. Clean the dust collection path after every use, check belts and paper/discs for wear, and store tools in a dry environment to prevent rust. Replace sandpaper and belts promptly to avoid clogged surfaces. For dust seals and bearings, inspect for wear and lubricate as needed according to the manufacturer’s guidance. A well-maintained sander performs more predictably and lasts longer.
Authority and sources: where to learn deeper insights
For safety and technique standards, consult authoritative sources. See OSHA on dust safety practices, CDC/NIOSH for respiratory protection, and EPA for general environmental health guidelines. These references help you sand more safely and effectively over time.
Feature Comparison
| Feature | Belt Sander | Orbital Sander | Random Orbital Sander | Detail Sander |
|---|---|---|---|---|
| Typical surface prep speed (rough to fine) | High | Medium-High | Medium | Low |
| Finish quality on flat surfaces | Coarse to mid | Excellent with flat surfaces | Excellent with uniform finish | Good precision in corners |
| Best for edges and contours | Not ideal for edges | Partial | Excellent for edges and contours | Ideal for tight spaces |
| Dust collection compatibility | Requires strong vacuum setup | Mid-range dust bag | Integrated dust collection with vac | Basic dust bag |
| Weight and maneuverability | Heavy | Moderate | Moderate | Light |
| Price range | Low to mid | Mid to high | Mid to high | Low |
What's Good
- Versatile across many surfaces and tasks
- Good balance of speed and finish for DIY projects
- Wide accessory and belt/disc ecosystem
- Relatively affordable for hobbyists
- Improved dust control with modern vacuums and bags
Weaknesses
- Not ideal for heavy material removal or gouging risk with belts
- Requires more technique to avoid swirl marks or gouges
- May require multiple tools for complete project coverage
- Storage and maintenance of several tools can be cumbersome
Orbital sanders dominate as the best all-around choice for most DIY tasks; belts excel for rough stock, and detail sanders fit tight spaces.
For everyday projects, start with an orbital or random orbital sander for balance and finish quality. Use a belt sander for rapid stock removal on rough surfaces, and bring in a detail sander for edges and tight spots to complete the job.
Your Questions Answered
What is the main difference between an orbital sander and a belt sander?
An orbital sander uses a circular pad to create a smooth finish with less risk of gouging, while a belt sander uses a long abrasive belt for fast material removal and is less forgiving on surfaces. Choose orbital for finishing and belt for material removal.
Orbital sanders are for smooth surfaces, belts remove material quickly, and neither should be overworked on delicate woods.
Which sander is best for hardwood floors?
For hardwood floors, a random orbital sander is typically the best compromise, offering fast material removal with a tendency toward a smooth, swirl-free finish. Start with mid-range grit and finish with fine grits, then apply the appropriate finish coat.
For hardwood, use a random orbital sander for an even finish with good material removal.
Can a detail sander replace an orbital sander?
A detail sander cannot replace an orbital sander for large flat areas, but it excels at edges and tight spaces. Use it after you’ve prepared most of the surface with a larger tool to finish corners and trim.
Detail sanders finish edges; they’re not a substitute for orbital sanders on large areas.
What grit sequence should I use when refinishing wood floors?
Begin with a coarse grit for primary removal, move to mid-range for leveling, and finish with a fine grit for a smooth surface ready for finish. Always test on a scrap piece first.
Start rough, then medium, then finish with fine grit for the best results.
Is dust extraction essential when sanding?
Yes. Dust extraction improves visibility, reduces health risks, and helps achieve a cleaner finish. Use a vacuum or dust collection system with appropriate filters.
Dust control is essential for safety and finish quality.
What safety gear should I wear when sanding?
Wear a dust mask or respirator, eye protection, and hearing protection. Use gloves if extended sanding causes vibration to your hands. Ensure good ventilation in the workspace.
Protect your lungs, eyes, and ears—safety first while sanding.
Main Points
- Match sander type to surface and finish goals
- Prioritize dust control with compatible extraction
- Use a grit progression from coarse to fine
- Reserve belt sanders for rough stock removal
- Include a detail sander for edges and tight spaces