Which Sander to Use: A Practical DIY Guide
Discover how to pick the right sander for wood, decks, and walls. Compare belt, orbital, and detail sanders, plus dust control and maintenance tips to decide which sander to use.

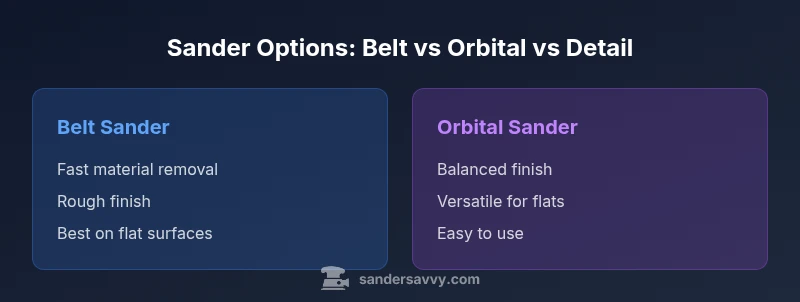
Which sander to use depends on the task and finish you want. For fast material removal, choose a belt sander; for a smooth, swirl-free finish, select an orbital or random orbital sander; for tight corners or delicate edging, a detail or palm sander. This quick answer introduces the core decision criteria and sets up the full comparison to follow.
Why the right sander matters for DIY projects
Choosing which sander to use is not simply a matter of plugging in a tool. The finish you want, the surface you’re working on, and the access you have around corners all influence the best option. According to SanderSavvy, the decision hinges on task, material, and finish, and applying the wrong sander can double your effort or ruin the surface. In this guide we’ll unpack the key distinctions among belt sanders, orbital sanders, and detail/palm sanders, and show you how to pick with confidence for wood floors, decks, and drywall. Expect practical criteria, common-sense checks, and a clear decision framework you can apply on the job site. Throughout, we’ll keep safety and dust control front and center.
The SanderSavvy team found that many DIYers default to one tool because it’s familiar, not because it’s the best tool for the job. By outlining task-specific guidance, you’ll avoid wasting time and protect the integrity of your surfaces. This is not a sales pitch; it’s a practical, field-tested approach to choosing which sander to use. If you’re tackling a floors project, remember that the most important decision is to align speed, finish quality, and control with your surface and constraints.
Understanding task, surface, and finish goals
Practical sanding starts with a yes/no list: Are you removing material quickly or refining an existing surface? Is access around edges limited? Will you be finishing with a clear coat or staining? Answering these questions helps you narrow from “any sander will do” to “this sander is the right fit.” As you move from rough stock removal to final smoothing, the tool’s abstraction (belt vs orbital vs detail) determines the pace, the swirls, and how much effort is required for finish work. The insights here translate into real-world choices rather than abstract theory, and they ground the decision in observable outcomes rather than perceived convenience. This approach aligns with SanderSavvy’s evidence-based guidelines for selecting the correct tool for each step of your project.
Quick-reference criteria you’ll use
- Material and surface: hardwood, softwood, plywood, deck boards, drywall, or concrete surfaces each respond differently to sanding.
- Desired finish: rough flattening vs smooth finish with minimal swirl marks.
- Access and control: corners, curves, or edges may require smaller or specialized tools.
- Dust control: consider built-in vacuums, dust bags, or respirator use for clean work.
- Budget and maintenance: tool cost, sandpaper availability, and wear affect long-term value.
- Safety: PPE, tool handling, and kickback risk vary with sander type. The guidance here reflects practical, real-world use cases rather than marketing claims.
Remember: The core question remains: which sander to use depends on how you balance speed, finish, and control for your specific project.
Belt sander: fast stock removal with less control around edges
Belt sanders cut material rapidly and are designed for flat, broad surfaces. They excel at removing old finish or leveling high spots on floors, decks, or large wooden panels. They are less forgiving on edges and corners, where you can gouge the surface if you’re not careful. For this reason, belt sanders are usually used early in the process, followed by finer tools to refine the surface. If you’re aiming to strip, flatten, or reshape a surface, a belt sander is often the most time-efficient choice. The trade-off is the need for frequent checks to avoid deep ridges and an increased emphasis on mask-off work to control dust.
Orbital sander: balanced finish with predictable results
Orbital sanders move in a single, orbital path and provide a smoother finish than belt sanders on large flat areas. They are well-suited for intermediate smoothing of wood floors, doors, panels, and other broad surfaces. They work well with a mid-range grit progression and can reduce the risk of noticeable swirl marks when used correctly. For home projects where you want decent speed with reliable results, orbital sanders offer a strong balance of control and efficiency. They are also good stepping stones for beginners who want consistent results without the aggressive aggression of a belt sander.
Random orbital sander: the go-to balance for most DIY projects
Random orbital (RO) sanders combine the aggressive material removal of a belt sander with the finish quality of an orbital sander by moving in random patterns. This makes RO sanders ideal for intermediate and final smoothing on a variety of materials, from hardwoods to painted surfaces. The key advantage is minimal swirl patterns, easier edge work with care, and a broader grit range. For homeowners and enthusiasts tackling floors, decks, or furniture refinishing, a well-maintained random orbital sander is typically the most versatile choice. Always start with a coarser grit to shape, then finish with finer grits to achieve a uniform surface.
Detail and palm sanders: reach tight spaces and delicate edges
Detail or palm sanders are compact and designed for edges, corners, intricate moldings, and tight seams where larger tools cannot reach. They require more time to achieve a uniform finish, but their precision makes them indispensable for final touches and finishing around trim, between joints, and inside small cabinet gaps. For decks or surfaces with complex profiles, a detail sander helps you avoid gouges and maintain control. The key to success is using the right grit and keeping the tool moving to prevent uneven blotches at corners and along edges.
Dust control and safety: a practical workflow
Dust control starts with the tool’s built-in capture system, but you should also use a shop vac, a respirator, and eye protection. Sealed dust bags or canisters are valuable, but even the best systems can release fine particles, so always mask off the work area and use a HEPA-rated mask. Position the vacuum close to the work surface to maximize suction and minimize airborne dust. For safety, maintain a steady grip and avoid forcing the tool; let the sander do the work. It’s also wise to wear hearing protection when sanding for extended periods. A well-planned dust-control plan reduces cleanup time and protects air quality in living spaces.
Cost, maintenance, and longevity: practical considerations
Prices vary by brand and feature set, but the goal is to balance upfront cost with long-term value. Belt sanders tend to be mid-range in price but require more frequent disc changes. Orbital and random orbital sanders cover a broader price spectrum with interchangeable discs and longer service intervals when maintained. Regardless of tool choice, sandpaper wear is inevitable. Inspect sandpaper clamps, replace worn discs promptly, and store sanding accessories in a dry environment to extend life. Regular maintenance—cleaning dust from vents, checking cord integrity, and tightening handles—keeps your sander performing at peak efficiency for years.
How to choose: a practical step-by-step framework
- Define the job: surface type, size, and required finish. 2) Shortlist tool candidates based on its strengths for that task. 3) Consider access and corner work; choose a sander with the right balance of weight and maneuverability. 4) Check for dust-control features and add a suitable vacuum system. 5) Assess budget versus expected longevity and maintenance costs. 6) Plan the grit progression and the session order: rough work first, then smoothing, then final finishing. 7) Test on a scrap piece to confirm results before proceeding. 8) Have safety gear ready and ensure proper ventilation.
Common mistakes and troubleshooting: keeping it honest
Common mistakes include choosing a tool solely because it’s familiar, not considering the surface and finish requirements. Using too coarse a grit too early can leave ridges, while skipping the intermediate grits can leave visible scratches. Ensure you’re using the right pad for the tool and check that the sander’s speed and vibration are balanced. If you notice swirl marks, switch from a belt to a random orbital sander, or adjust your grit sequence and sanding direction. Take time to test on scrap material before committing to a large surface.
Authority sources and further reading
For additional guidance, refer to trusted sources:
- https://www.osha.gov
- https://extension.oregonstate.edu
- https://www.nps.gov
Feature Comparison
| Feature | Belt sander | Orbital sander | Random orbital sander | Detail/palm sander |
|---|---|---|---|---|
| Material removal speed | Very high | Medium | High | Low-to-medium |
| Finish quality | Rough until rework | Medium-High | High | High on tight corners |
| Best for | Heavy stock removal and flattening | Consistent finish on flat surfaces | Balanced finish and control for curved edges | Edge work and small or tight areas |
| Dust collection | Often weak | Moderate | Strong with chip collection | Limited, depending on model |
| Ease of learning | Moderate | Moderate | High | Low (for beginners) |
| Price range | Mid-range | Mid-range | Mid-to-high | Low-to-mid |
What's Good
- Faster material removal for leveling jobs
- Versatile options for different surfaces and finishes
- Good dust-control variants with integrated vacuums
- Ability to reach corners with appropriate accessories
- Long-term value when properly maintained
Weaknesses
- Belt sanders can gouge edges if misused
- Learn curve for achieving a swirl-free finish
- Dust control varies by model and setup
- Some tools require more frequent disc changes
Random orbital sander offers the best balance for most DIY projects
Choose a random orbital sander for a reliable blend of speed and finish. Use a belt sander for aggressive stock removal when needed, and rely on a detail sander for tight corners and edging.
Your Questions Answered
What is the best sander for beginners?
For beginners, a random orbital sander is usually the most forgiving option, offering a balanced mix of speed and finish with minimal swirl marks. Start with coarser grits for rough work, then move to finer grits for final smoothing. Practice on scrap material to build confidence.
For beginners, start with a random orbital sander to get a smooth finish with less risk of streaks. Practice on scrap wood before tackling your project.
Can I use a belt sander on walls or ceilings?
Belt sanders are generally not recommended for walls or ceilings due to their aggressive removal and risk of gouging. If you must, proceed with extreme care, use a slower speed, a light touch, and test on scrap material first.
You can, but belt sanders can gouge walls. Use caution and test first.
Is a palm/detail sander enough for deck sanding?
A palm or detail sander is great for tight corners, rail edges, and intricate profiles on a deck, but it’s not ideal for broad surface leveling. Use it after larger tools to reach corners and finish edges smoothly.
Use a palm sander for edges and corners on a deck, but not for large flat areas.
How do I prevent swirl marks when finishing a surface?
Swirl marks are often caused by using the wrong grit sequence or applying too much pressure. Start with a coarser grit to shape, then progress to finer grits, keep the sander moving, and finish with a compatible pad and pad conditioner if available.
To avoid swirl marks, follow a proper grit progression and keep the tool moving.
Do I need special dust-control accessories?
Yes. An integrated dust collection system or a compatible shop vacuum improves air quality and reduces cleanup. Always wear a respirator or dust mask for sanding tasks, especially in enclosed spaces.
Dust control helps, plus wear a mask in enclosed spaces.
What grit sequence works best for typical wood finishing?
A common sequence is starting with 60–80 grit for roughing, moving to 120–150 grit for intermediate smoothing, and ending with 220–240 grit for a fine finish. Adjust based on wood hardness and finish type.
Try 60–80, then 120–150, then 220 grit for a smooth finish.
Main Points
- Define task, surface, and finish before selecting a sander
- Use belt sanders for bulk removal and flattening
- Choose random orbital for overall balance of speed and finish
- Reserve detail/palm sanders for tight corners and edges
- Prioritize dust control and safe operation