Orbital Sander vs Detail Sander: Which Is Right for Your Project
A practical, in-depth comparison of orbital sander vs detail sander for DIY floors, decks, and walls. Learn which tool to use for bulk sanding, edges, and finishing, plus tips for best results and budget-friendly setup.

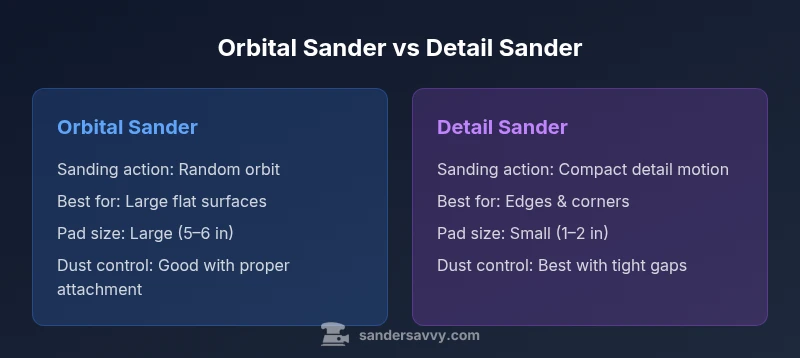
Orbital sanders excel at rapid material removal on large, flat surfaces, delivering a smooth base for finish. Detail sanders shine in corners, edges, and intricate contours where precision matters. For most DIY projects, an orbital sander is the versatile workhorse; add a detail sander if you frequently address trim, curves, or tight spaces.
Understanding the two sanding approaches
Two of the most common sanding tools in DIY settings are the orbital sander and the detail sander. In practice, the terms refer to distinct motion patterns, pad sizes, and typical use cases. An orbital sander uses a circular pad that spins while the orbit path creates a random pattern, reducing the risk of deep gouges. A detail sander, often a palm- or triangle-shaped tool, uses a small pad that moves in short strokes for precision work around edges, corners, and contours. The difference in motion translates to different finishing results: orbital sanders are forgiving on flat surfaces and bulk material removal, while detail sanders excel where precision matters. When refinishing a wood floor, you typically start with an orbital sander to level the surface, then switch to a detail sander for the last passes in corners and along baseboards. For walls, tabletops, or furniture, you’ll see the same pattern: bulk work with the orbital, finish work with the detail sander. As with any sanding task, selecting the right tool reduces time, dust, and frustration and helps you achieve a smooth, paint-ready surface. In this article, we compare orbital sander vs detail sander to illuminate when to reach for each tool and how to sequence them for best results.
Core differences you can feel
The practical differences between orbital sander and detail sander come down to motion, pad size, aggression, and control. Orbital sanders use a medium-to-large circular pad that orbits in a randomized pattern; the motion spreads impact over a wide area and minimizes gouging on flat boards. Detail sanders use a compact pad—often triangular—that oscillates in tight arcs, delivering pinpoint control at edges, corners, and along irregular shapes. Pad size directly affects the range you can cover before repositioning and the level of surface sheen you can achieve. In terms of aggression, the orbital tends to remove coatings and rough patches faster on broad surfaces, but it can leave slight swirl marks if the grit isn’t progressed properly. The detail sander is gentler and better for finishing in corners, but it lacks the broad-area speed. Dust management typically relies on a dust port; orbital models often pair well with a shop vac for continuous cleanup, while detail sanders are frequently used with a handheld vacuum or dust bag system to avoid clogging in corners. Ergonomics vary by weight and handle design, but most DIYers find orbital sanders comfortable for longer sessions on large surfaces; detail sanders feel compact and lighter when used for small-area work. Understanding these differences sets the stage for choosing the right tool for each job.
Best tasks for orbital sanders
For bulk material removal and surface leveling, the orbital sander is the workhorse. On wooden floors, it handles the initial leveling pass, smoothing out old coatings and uneven patches, and creating a uniform base for stain or finish. When used on walls or large furniture panels, an orbital sander reduces large swaths of material quickly without creating deep gouges, provided you move steadily and maintain even pressure. For deck boards, a larger orbital sander can tackle raised grain and rough surfaces before you apply sealant or stain. The key to maximizing its effectiveness is choosing the right grit progression. Start with a coarse grit to remove old coatings and obvious imperfections, then move through medium grits to begin leveling, and finish with a fine grit for a uniform surface. Always keep the pad flat to the workpiece, and do not press hard—let the motor and abrasive do the work. If dust control is a priority, pair the orbital sander with a compatible dust-collection system or vacuum; the larger pad produces more airflow and dust, so efficient capture matters to minimize cleanup time. Remember to step back frequently to inspect your progress and adjust your approach as needed.
Best tasks for detail sanders
The detail sander shines where the orbital sander loses effectiveness: corners, edges, crown molding, window frames, chair legs, and other tight spaces. The compact pad and precise motion allow you to reach into recesses and along radii that a larger unit cannot touch without leaving scratches or gouges. Use a fine-to-medium grit for finishing in profiles and along edge joints; a higher grit reduces the risk of leaving scratch marks while improving surface sheen. The detail sander is also valuable for blending edges when transitioning between coated and bare wood, when removing small layers of paint or varnish near trim, and for final smoothing just before applying finish. Because its stroke is shorter, you’ll want to be mindful of overworking small areas; the heat produced by rapid motion can cause gumminess or slight scorching on softwoods if left in one spot too long. To maximize results, maintain light, consistent pressure and keep the tool moving; lift slightly when you reach a corner and reset your line of attack to maintain uniform finishing across the area.
How to use each safely and effectively
Safety first: wear eye protection, hearing protection, and a dust mask. Before you start, inspect the pad for wear and remove any protruding grit from the pad. Ensure your dust-collection system is attached and operational. For technique, begin with a dry run on a scrap piece to confirm grip and balance. When using an orbital sander, keep the pad flat on the surface, move with steady, overlapping strokes, and do not linger in one spot. Let the grit do the work and gradually lighten pressure as the surface becomes smoother. Transition to a finer grit as you progress, and avoid tilting the sander at extreme angles. For a detail sander, use light strokes in a back-and-forth or circular motion depending on the profile; focus on edges, contours, and corners, and avoid excessive heat buildup by lifting slightly away from the surface after a pass. Always disconnect power before changing sanding discs or pads, and clean your work area to keep the feed rate consistent. Finally, select the correct pad and grit sequence for the wood species and coating you’re removing, and test in a small, inconspicuous area first.
Techniques for maximizing results: dust control and finish quality
Dust control is essential for clarity and finish. Use a vacuum with a HEPA filter attached to the orbital sander's dust port; if possible, connect both sander types to the same collection system to reduce airborne dust. Keep the work area closed or use a dust tent if you’re finishing indoors. For finish quality, avoid swirl patterns by using progressive grits and maintaining a consistent motion; evenly distribute pressure and check your progress frequently. When sanding wood, monitor the grain direction and adjust your approach to minimize cross-grain scratches. Some woods, like soft pine or poplar, are prone to fuzzing—the remedy is to adjust pressure or to use a sanding sealer after the final pass. Finally, always test your finish on scrap stock to ensure the desired sheen and smoothness before applying it to your project.
Budget considerations and buying guide
Both tools come in a wide range of prices, features, and accessories. If you’re just starting, a mid-range orbital sander with a good dust port and quality dust collection gives you the most versatility for bulk jobs. You can pair it with some sanding discs in varied grits to cover rough, mid, and fine passes. If your work heavily relies on corners and trim, a dedicated detail sander is a worthwhile add-on. For most homeowners, a two-tool setup that includes an orbital sander plus a palm/triangular detail sander offers the best balance of speed and precision on floors, walls, and furniture. Look for features like dust-collection compatibility, a comfortable grip, low-vibration design, and a supportive warranty. When budgeting, think in terms of the long-term value rather than upfront price, and plan for replacements such as sanding pads and discs. In all cases, consider used tools carefully to ensure safe operation and performance, and invest in good-quality discs that fit your sander’s pad.
Maintenance, accessories, and care
Take care of the pad and discs to extend tool life. Regularly clean the pad surface to remove built-up resin, glue, or wood fibers; replace worn pads promptly to prevent scratching. Inspect the dust port and hoses for blockages, and store the sander in a dry, clean area to prevent rust. Use the right accessories: hook-and-loop discs for orbital sander, and triangular or square tips for detail sander. Keep spare pads with the correct grit range, and track your sandpaper grits to avoid cross-contamination of surfaces. When changing grits, always disconnect power and inspect the tool's power switch and cord for safety. And finally, follow the manufacturer’s guidelines for maintenance intervals and lubrication if applicable.
Putting it all together: a recommended workflow
Plan your project by choosing the tool sequence based on material, coatings, and the final finish you want. For a wood floor, begin with an orbital sander using a coarse grit to remove old finishes and level the surface; move methodically with overlapping passes and check your progress with a straightedge or level. Next, switch to a finer grit for deglazing and preparing for finish; then use the detail sander to go along edges, under baseboards, and into corners left by the orbital. If you’re finishing with stain or polyurethane, test your approach on scrap stock and ensure your sanding dust is completely removed before applying the finish. The goal is uniformity in texture and sheen, achieved by careful grit progression, steady technique, and dust-control discipline. With the right sequence, you’ll minimize the risk of burnishing, swirl marks, or gouges, and you’ll finish with a smooth, paint-ready surface that accepts coatings evenly.
Comparison
| Feature | orbital sander | detail sander |
|---|---|---|
| Sanding action | Random orbit motion on a large pad | Compact detail motion for edges and corners |
| Pad size | Typically 5-6 inches | Typically 1-2 inches triangular |
| Best use | Large flat surfaces and bulk removal | Edges, corners, and contours |
| Dust management | Good dust collection with a larger dust port | Best with tight gaps and accessible ports |
| Aggressiveness control | Faster material removal with even progression | Gentler and more controlled on profiles |
| Weight/ergonomics | Heavier, designed for long sessions | Lightweight and agile for detail work |
| Ideal skill level | Great for beginners for rough work | Better for finishing tasks |
What's Good
- Versatile for large areas and bulk removal
- Faster progress on flat surfaces
- Good dust collection with proper setup
- Relatively forgiving on even pressure
Weaknesses
- Less precise in corners and tight spaces
- Can leave swirl marks if not progressed properly
- Detail work requires a second tool for efficiency
- Heavier and bulkier to handle in small areas
For most DIY projects, start with an orbital sander; add a detail sander for tight spaces.
Orbital sanders handle bulk work and large surfaces efficiently, while detail sanders finish corners and contours. A two-tool setup offers the best balance of speed and precision, especially on floors, doors, and furniture.
Your Questions Answered
What is the main difference between orbital sander and detail sander?
The orbital sander uses a random orbit motion on a larger pad for fast bulk removal, while the detail sander uses a compact pad with short strokes for precision work in corners and contours.
Orbital for bulk work, detail for edges and tight spots.
When should I choose orbital vs detail sander?
Choose an orbital sander for large, flat surfaces and coatings removal. Use a detail sander for corners, trim, and intricate profiles where precision matters.
Pick orbital for bulk work, detail for tight spots.
Can I use a detail sander on large surfaces?
You can, but it will be slower and may require more passes. An orbital sander remains more efficient for bulk surfaces.
Detail is for edges; orbital does the big jobs.
What grit progression should I follow?
Start with a coarse grit to remove coatings, progress through medium grit to level, and finish with fine grit for a smooth surface.
Coarse, then medium, then fine.
Is dust collection essential?
Yes. Use a capable dust-collection setup to protect your lungs and keep finishes clean. Both tools benefit from a vacuum or dust bag system.
Dust control matters for health and finish.
Do I need two sanders or can one tool do both tasks?
Not always, but for best results on floors or furniture, a two-sander approach saves time and improves finish.
Two tools give you speed and precision.
Main Points
- Prioritize orbital sander for bulk leveling on large flat areas
- Add a detail sander for corners, trims, and tight profiles
- Progress grit from coarse to fine for best finish
- Invest in a solid dust-collection setup for cleaner work
- Test your finish on scrap to avoid surprises