Which Sander Is Better: Orbital or Palm? A Practical Guide for DIYers
An analytical side-by-side guide comparing orbital and palm sanders, covering motion, finish quality, ergonomics, and best-use scenarios to help DIYers pick the right tool for floors, decks, and walls.

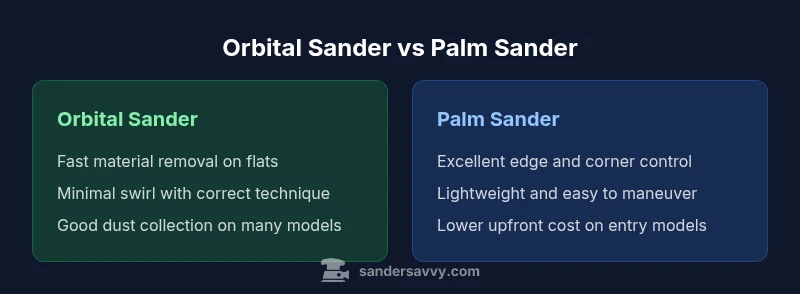
TL;DR: For most DIY projects, the orbital sander is the better all-around choice, delivering smooth finishes with less swirl and faster material removal. The palm sander excels for corners, edges, and tight spots where maneuverability matters. If you only own one sander, start with an orbital sander and add a palm sander for detail work.
Defining the Question: which sander is better orbital or palm
For homeowners and DIY enthusiasts, the central question when starting a sanding project is the classic trade-off between an orbital sander and a palm sander. In this context, we address the core differences in motion, surface area, and control. According to SanderSavvy, most DIY projects benefit from a versatile orbital sander for general prep, while a palm sander shines on tight spots and edges. The keyword which sander is better orbital or palm appears here to anchor the discussion and set expectations for practical decision-making. Understanding what each tool does best helps you avoid overbuying and ensures you finish with a quality surface instead of a rough patch. The orbital sander uses a moving disc in a random-orbit pattern to minimize visible swirl marks on flat surfaces, while the palm sander’s compact, low-profile design makes it easier to navigate along contours and into corners. This section also lays out common misconceptions about speed versus control, so you can evaluate performance in real-world projects rather than relying on marketing claims.
Performance Trade-offs: Finish Quality and Material Removal
When evaluating which sander is better orbital or palm for performance, the key differences lie in how aggressively they remove material and how forgiving the finish looks under different woods. An orbital sander combines a circular sanding action with randomized orbits, delivering faster material removal on flat panels while reducing the likelihood of visible swirl marks. It is particularly effective on hardwood floors and large surface areas where uniform stock removal matters. The palm sander, with its smaller footprint, provides enhanced control for edges, corners, and tight curves. It tends to remove material more slowly on broad surfaces, but it can leave a crisper edge and finer control in restricted zones. For softwoods where tear-out is a concern, the orbital sander’s even approach often yields a smoother final finish, especially when paired with appropriate grit sequencing and light pressure. In terms of finish quality, both tools can be excellent when used with the right technique; the choice hinges on project shape and required precision. For more on safety and dust control considerations, we refer readers to government and extension resources such as OSHA and university extensions.
Edge Work and Contoured Surfaces: Where Palm Shines
Projects that involve edges, rails, and irregular profiles demand tactile feedback and direct contact with the workpiece. The palm sander’s compact size—typically around 2-3 inches in width—lets DIYers follow curves, adapt to irregular surfaces, and reach into tight recesses that a larger orbital might miss. This advantage makes palm sanders especially valuable during furniture refinishing, cabinet edging, and trim work along walls where you must avoid gouging adjacent material. For large flat areas, you would pause to switch to the orbital sander to achieve uniform stock removal and a smoother overall surface. The practical takeaway is simple: use palm sanders for precision and contouring, and rely on orbital sanders for bulk material removal and leveling across expansive areas. This approach minimizes risk and optimizes results. To reinforce best practices, consider consulting safety and dust-control guidelines from reputable sources like OSHA and university extensions.
Motion, Vibration, and Comfort: Why Feel Matters
The user experience matters as much as raw performance. Orbital sanders typically have higher vibration due to larger contact areas, which can impact comfort during extended sessions. Modern models often incorporate low-vibration handles and anti-fatigue grips to improve control, especially when you’re flattening floors or performing long refinishing tasks. Palm sanders tend to be lighter and more comfortable for hand-held work in small areas, reducing fatigue when you’re detailing trim or finishing edges around cabinetry. The ergonomic factor matters for accuracy: the steadier your hands, the more even your finish. If you anticipate long sessions, a model with a vibration-damping system and a well-balanced handle design will help keep shake out of your work and your results consistent. For readers seeking more on dust and safety, see the government and extension resources cited in the text, including practical dust-control tips.
Attachments, Paper, and Friction: Sandpaper Choices that Matter
Discs used by orbital sanders are typically marketed in standard sizes, most commonly 5 inches, with hook-and-loop attachment systems. Palm sanders often use similar discs but may rely on different mounting patterns depending on the brand. The grit progression you choose is as important as the tool; starting with a coarser grit for material removal and gradually moving to finer grits yields smoother finishes. When selecting sandpaper, consider the wood type and the desired surface texture. For hardwood floors, you may begin with 60-80 grit and progress to 120-150 grit for prep, then finish with 180-220 grit for a polished feel. For softwoods or reclaimed boards, reduce aggressive scratches by moving to finer grits sooner and avoiding excessive pressure. In terms of maintenance, clean discs regularly and replace worn pads to prevent groove formation and uneven sanding. For readers seeking more on safety and technique, refer to the linked federal and extension resources within this article.
Dust Control and Filtration: Keeping the Air Clean
Dust is a constant factor in sanding projects. Both orbital and palm sanders generate fine particulates that can irritate eyes, lungs, and surfaces if not managed properly. A proper dust extraction system or shop vac can dramatically improve air quality and reduce cleanup time. When possible, connect a vacuum to your sander’s dust port, and use a high-efficiency filter in your vacuum for finer particles. Wear appropriate PPE, including a dust mask or respirator for extended sessions, and ensure good ventilation in your workspace. Government guidance emphasizes proper ventilation and dust-control strategies to minimize exposure during sanding tasks. We’ve included references to OSHA and extension resources to help you understand the best practices for your setup.
Skill-Building: Grit Sequencing, Pressure, and Speed
The way you apply pressure and the speed setting on your sander influences the outcome as much as the tool you choose. For most tasks, let the sander do the work with light to moderate pressure rather than pressing hard, which can leave grooves or uneven surfaces. Start with a lower grit to level rough spots and proceed through progressively finer grits for a smooth, even finish. Orbital sanders often benefit from moderate speeds when removing material on larger surfaces, while the palm sander can achieve precision at slower speeds on intricate shapes. The key is to practice on scrap wood first to calibrate your technique and determine how your wood type responds to different grits and speeds. For a deeper dive into technique, see the recommended safety and technique guidance from trusted institutions cited in this article.
Real-World Scenarios: When to Reach for Each Tool
Consider a typical project—refinishing a wooden tabletop. Start with an orbital sander to flatten the surface and remove old finish across broad areas. Switch to a palm sander for finishing the edges and to approach raised profiles or inlay seams where the orbital might not reach effectively. For a flooring prep job, the orbital will likely handle the bulk of the stock removal, with the palm sander used for border areas and tight corners where the sander body cannot fit. In deck work, the orbital excels on flat deck boards and large surfaces, while the palm sander helps around railings and posts where curves or tight grooves exist. A practical workflow that maximizes efficiency involves pairing the tools strategically rather than relying exclusively on one tool for every task. Readers can apply this approach to floors, walls, decks, and furniture projects, ensuring consistent results across all surfaces.
Common Mistakes: Avoiding Pitfalls with Either Tool
Rushing through with excessive pressure is a universal mistake that causes gouges and uneven finishes, especially on soft woods. Another pitfall is skipping the dust-collection step, which not only creates a messy workspace but also reduces visibility of surface irregularities. Swapping between grit sizes too quickly can leave scratch patterns that are hard to eliminate later, so plan your grit progression and take the time to inspect after each stage. For edges and tight spots, forcing a larger tool into small contours can cause gouging; in these cases, a palm sander with a careful, slow approach often yields better results. Finally, neglecting proper maintenance—keeping discs clean, replacing worn sandpaper, and ensuring the dust port is clear—will reduce performance and tool longevity. These insights align with widely used best practices that government and extension resources emphasize for safer, more effective sanding work.
Comparison
| Feature | Orbital Sander | Palm Sander |
|---|---|---|
| Motion and Finish Pattern | Random-orbit motion minimizes swirl for flat surfaces; fast material removal when used with appropriate grit | Compact, deliberate motion provides edge control and tight access but slower flat-surface removal |
| Best Use Case | General surface prep, floors, large flat panels | Edges, corners, detailed work, trim, and tight spots |
| Disc Size & Mounting | Typically 5-inch discs with hook-and-loop or similar mounting | Commonly 1/4- to 2-inch wide working area with compact disc mounting |
| Accessibility & Ergonomics | Balances power with reach on open surfaces; slightly heavier and noisier | Excellent reach in corners; lighter and easier to maneuver for detail work |
| Finish Quality | Excellent for large areas with proper technique; risk of swirl if pressure is uneven | Excellent for edges; finish may require extra passes with a larger sander on flats |
| Dust Control | Compatible with robust dust collection on many models; best when paired with a shop vac | Dust ports sized for compact setup; effective when paired with a capable vacuum |
| Typical Speed Range | Variable speeds common; higher speeds for material removal on flat surfaces | Typically fixed or lower-variation speeds; precise control for detail work |
What's Good
- Versatile for most projects when paired with the right grit sequence
- Reduces swirl marks on flat surfaces with random-orbit action
- Palm sanders excel for edges, corners, and intricate profiles
- Generally more affordable upfront than premium orbital kits
Weaknesses
- Orbital sanders can still leave minor swirl marks if pressed hard or used on softwoods
- Palm sanders remove material more slowly on large flat areas
- Lower-end models may have limited dust collection efficiency
- Using the wrong grit progression can create visible scratch patterns
Orbital sanders are the go-to for general prep; palm sanders win on edges and detail work
If you own only one sander, choose an orbital for versatility and smoother finishes across broad areas. Add a palm sander for corners, trim, and hard-to-reach spots to finish the job with accuracy. The best approach is to use both tools as a complementary pair, selecting based on surface geometry and the finish you desire.
Your Questions Answered
When should I choose an orbital sander over a palm sander?
Opt for an orbital sander when you have large flat surfaces to prep, such as floors or wide panels, and you want a smoother finish with efficient material removal. It’s also a good all-around tool if you don’t want to switch tools frequently. For tight areas, edges, and intricate profiles, a palm sander is superior.
Choose orbital for big flat areas, and use palm for edges and detailed spots.
Can I use a palm sander on wood floors or decking?
Palm sanders can be used for small touch-ups and edges on floors, but they’re not ideal for bulk material removal on large floor surfaces. For most floor prep, an orbital sander or a belt sander paired with proper technique will be more efficient.
Palms are good for edges, not bulk floor prep.
Do I need dust collection with these sanders?
Yes. Dust collection improves visibility, reduces cleanup, and minimizes health risks from fine particles. Most modern sanders offer dust ports; pair them with a compatible shop vac and use a respirator for extended work.
Yes—always use dust collection and PPE.
What grit progression should I follow?
Start with a coarser grit to level roughness and remove finish, then move to progressively finer grits to refine the surface. Typical sequences include 60-80, then 120, then 180-220 for hardwoods; adjust for softwoods and reclaimed boards.
Start rough, then finish smooth with finer grits.
Is vibration a concern with either tool?
Yes, especially on larger projects. Look for models with vibration-damping handles and weight-balanced designs. If you’ll sand for long periods, consider an orbital sander with a quiet motor and ergonomic grip for comfort and control.
Vibration matters—choose ergonomic, low-vibe models.
Can I share sandpaper between tools?
Yes, sizes and grits that fit the mounting system can be swapped between orbital and palm sanders. Ensure the grit is appropriate for the wood and the task, and replace worn discs to prevent gouging.
Swap grits as needed, keep discs in good condition.
Main Points
- Choose orbital for large flat surfaces and faster material removal
- Reserve palm sander for edges, corners, and detailed work
- Progress grit methodically to avoid scratching; never rush with pressure
- Use dust collection and PPE to improve safety and finish quality
- Practice on scrap wood to calibrate technique before real work