Palm Sander vs Orbital Sander for Decks: A Practical Guide
Compare palm sander vs orbital sander for deck projects. Learn which tool excels for edges, speed, dust control, and finish, with practical tips, grit guidance, and setup best practices from SanderSavvy.

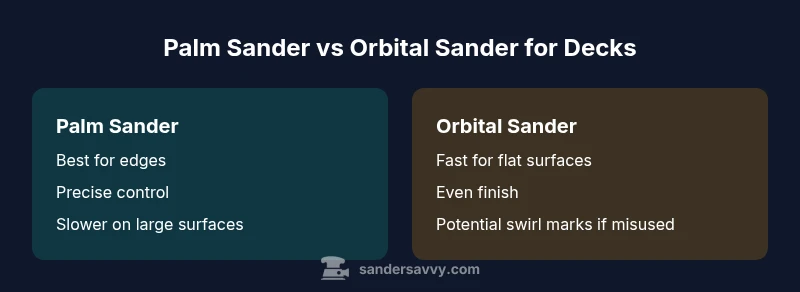
Palm sanders excel in tight edges and corners on a deck, offering superb control and less risk of gouging. Orbital sanders remove material quickly and deliver a smoother finish on large flat surfaces, especially with grits from 60 to 120. For best results, match your tool to the task: edges with a palm sander, large surface with an orbital, and consider dust collection and budget.
Deck Sanding Fundamentals: What makes a deck special to sand\n\nDeck surfaces differ from interior floors because they are exposed to weather, sunlight, and seasonal movement. Wood fibers can swell and shrink, and old finishes—like solid stains or sealers—may layer unevenly. Sanding a deck effectively starts with a plan: identify the boards' condition, pick a grit progression, and decide where edges require precision. In the palm sander vs orbital sander for deck decision, the edge case work often dictates the tool choice. The palm sander shines where control matters, such as near railings, stair treads, and tight gaps, while the orbital sander excels on open deck planks where speed and uniform removal can save time. SanderSavvy’s approach emphasizes testing a small area, then expanding as needed, and always factoring dust control and surface cleanliness into the workflow.
Palm Sander For Edges and Corners\n\nEdges, corners, and riser steps demand controlled, low-skill risk work. A palm sander’s compact footprint lets you follow the contours of rail posts, tongue-and-groove joints, and tight curves without gouging or leaving deep scratches. Start with 60 or 80-grit paper for edge work, then feather into 100- to 120-grit for a clean transition onto the main surface. Ergonomics matter: choose a model with a comfortable grip and a dust-collection bag or port to keep the workspace clear. While palm sanders are slower on broad surfaces, their precision at the deck’s margins often saves time in rework and helps protect delicate edging around fasteners.
Orbital Sander For Flat Deck Surfaces\n\nFor large, flat sections of a deck, the orbital sander is the workhorse. Its randomized orbit computes material removal quickly, creating a relatively even surface with fewer passes. Begin with coarser grits (60–80) to level raised fibers or old coatings, then sweep through 100–120 for a smoother finish. A vacuum attachment improves dust control, and a uniform pressure helps avoid dips and swirl marks. If your deck boards are wide and uniform, an orbital sander can finish efficiently without the precision constraints of a palm sander.
Grit Progression and Dust Management on Decks\n\nGrit progression is a core strategy for deck prep. Start rough to remove old finishes and uneven fibers, then move to progressively finer grits to achieve a smooth base for staining or sealing. Debris and fine dust can cause staining defects, so dust collection is not optional. Use a sanding mask when working in exposed environments, and keep a shop vacuum handy to capture debris at the source. Switching between tools mid-project should be planned; use the palm sander for edges and the orbital for bulk areas, which minimizes rework and maintains consistent finish quality.
Real-World Workflows: When to Switch Tools\n\nA practical deck workflow often looks like this: assess the surface, choose grit progression, and designate edge work to the palm sander. As the majority of the deck gets leveled, switch to the orbital sander for the main surface to accelerate material removal and improve finish. If you encounter stubborn splotches or resin pockets, a brief touch with the palm sander before resuming with the orbital can prevent gouges. Save final pass details for the area that will receive stain or sealant, ensuring uniform absorption.
Safety, Setups, and Maintenance\n\nSet up a stable, well-ventilated workspace and wear eye protection, a dust mask, and hearing protection. Check that the sander pads are in good condition and replace worn hooks-and-loops quickly to prevent snagging. When finished, remove dust with a shop vacuum, wipe with a tack cloth, and store papers in dry condition to maximize grit life. Regular maintenance—cleaning vents, inspecting cords, and testing dust ports—extends tool life and keeps sanding results consistent.
Cost, Value, and Longevity for Deck Sanding Tools\n\nBudget-conscious gardeners and homeowners often weigh upfront costs against long-term value. Palm sanders tend to be affordable and durable, while orbital sanders may carry a higher initial cost but offer faster completion times and more consistent results on wide surfaces. When evaluating value, consider dust-extraction efficiency, pad durability, and available grit ranges. Properly maintained tools last longer and support more decks over time, reducing total project cost and downtime.
mainTopicQuery1forWikidataLookupPlaceholderEnabledForPolicyOnlyNotUsedButKeptForSchemaCheckWithinBlockDataToMeetRequirementsForStructureOnly
Comparison
| Feature | Palm Sander | Orbital Sander |
|---|---|---|
| Best For | Edges and corners | Large flat surfaces |
| Finish Quality | Good edge control; minimal gouging | Smoother overall finish with even grit progression |
| Speed & Material Removal | Slower on broad areas | Faster on flat surfaces; rapid material removal |
| Dust Collection & Maintenance | Smaller dust bags; easy cleanup | Ported dust collection; more robust options |
| Ease of Use & Ergonomics | Excellent control in tight spaces | Easier to cover large areas with consistent pressure |
| Cost & Durability | Lower upfront cost; robust build | Moderate to higher upfront cost; durable |
What's Good
- Edge control and precision near railings, steps, and tight gaps
- Orbital sanders deliver fast material removal on large, flat deck sections
- Dust collection options help keep the work area cleaner
- Lightweight palm sanders reduce fatigue during edging work
- Orbital sanders provide a smoother finish when used with appropriate grit
Weaknesses
- Palm sander progress can be slow on large decks
- Orbital sander may leave swirl marks if not used carefully
- Dust collection quality varies by model and setup
- Two tools may be needed for optimum results on complex decks
Orbital sander is generally the better all-around choice for decks; use a palm sander for precise edges.
For most deck prep, start with an orbital sander for speed and an even finish. Reserve the palm sander for edges and intricate areas to prevent gouging. A hybrid workflow often yields the best results in terms of time, finish, and durability.
Your Questions Answered
Which sander is best for rough deck prep?
For rough removal, the orbital sander is typically faster on flat surfaces. Start with a coarser grit (40–60) to quickly level raised fibers or old coatings, then move to finer grits for a smoother base. Use the palm sander only where you need precision near edges.
For rough deck prep, start with the orbital sander to cover large flat areas, then switch to a palm sander for edges.
Can I switch tools mid-project?
Yes. A common workflow is orbital sander for main surface prep and palm sander for edges and corners. Plan a sequence to minimize rework and keep grit progression consistent. Have dust collection ready and test on a small area first.
Yes, you can switch as needed—start big with the orbital, then edge with the palm.
What grit should I start with for deck sanding?
Begin with a coarse grit (40–60) if you're removing old coats or rough fibers. Move to 80–120 for intermediate smoothing, then finish with 180–220 for a clean surface before staining. Align grit changes with your deck condition and desired finish.
Start rough, then move to finer grits for a smooth finish.
Is dust collection essential for deck sanding?
Yes. Deck sanding creates fine sawdust that can stain or irritate wood and skin. Use a sander with a dust port and a shop-vac, and wear a mask, especially outdoors where wind can disperse dust.
Dust collection is essential for a clean, safe deck prep.
How can I avoid swirl marks with an orbital sander?
Keep the sander moving in overlapping passes, maintain even pressure, and avoid lingering in one spot. Use fresh paper and ensure the board surface is clean. Start with a coarser grit to minimize deep scratches and finish with a finer grit.
Move steadily with even pressure and overlap passes to avoid swirls.
Main Points
- Use orbital sander for bulk surface prep
- Reserve palm sander for edges and corners
- Invest in a good dust collection setup
- Progress grit from rough to fine for even staining
- Test your approach on a hidden area before full pass