Random Orbital Sander vs Detail Sander: A Practical Comparison
A practical comparison of the random orbital sander vs detail sander to help homeowners and DIYers choose the right tool for smooth finishes, edge work, and dust control.

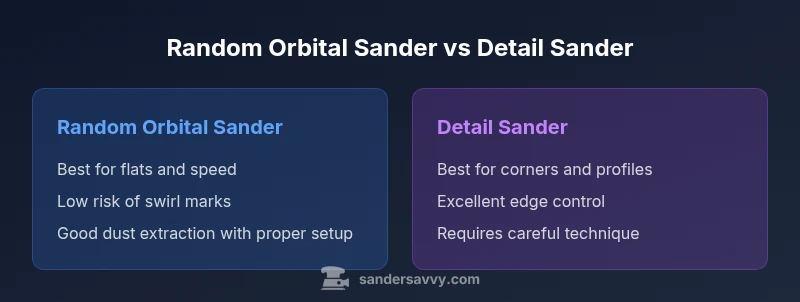
The quick comparison: For everyday woodworking with flat surfaces, a random orbital sander generally delivers faster prep with fewer swirl marks, while a detail sander excels in tight spots and finish touch-ups. For most DIY projects, the random orbital sander vs detail sander choice boils down to area size, desired finish, and dust management.
What Each Tool Is and How It Works
Both the random orbital sander vs detail sander are handheld wood finishing tools designed to smooth surfaces and remove old finishes. The random orbital sander uses a circular sanding pad that spins and simultaneously orbits in a non-repeating pattern. This combination minimizes traditional sanding scratches and delivers a uniform finish on flat surfaces. The detail sander, by contrast, features a compact, rectangular or triangular pad designed for tight corners, curves, and inside profiles where a round pad cannot reach. When you compare the two, the random orbital sander is the workhorse for large, flat areas, while the detail sander is the precision instrument for edges, gaps, and profile work. Both tools are part of a homeowner’s kit, and understanding their fundamental differences helps explain the ongoing random orbital sander vs detail sander decision in real projects.
In practical terms, expect the random orbital sander to cover more ground quickly, and expect the detail sander to excel where access is restricted. This is the foundation of how the SanderSavvy team approaches tool choice for typical floor, deck, and wall refinishing projects.
Abrasive Path and Movement: Why It Matters
The heart of the random orbital sander vs detail sander decision is how their sanding actions interact with the wood fibers. A random orbital sander combines an offset orbit with a random motion, which means there is no single planar scratching pattern that repeats in the same place. This dramatically reduces visible swirl marks on large, flat surfaces and makes feathering between passes relatively forgiving for beginners. The detail sander uses a narrow, rectangular pad that moves in more deliberate, often straight-line strokes. Its pathway is optimized for getting into corners, along edges, and around irregular contours. The result is superb control and finish quality in hard-to-reach areas, but it requires thoughtful technique to avoid creating chatter or gouging small features. In the arena of random orbital sander vs detail sander, the movement profile is the defining factor for finish consistency and time efficiency.
For most DIY tasks, your approach to sanding will shift once you start addressing edges, casings, and profiles. A few practice passes on scrap wood will reveal how the two motion patterns behave, which is a useful way to decide when to bring in the detail sander for “finishing touches” rather than relying on the random orbital sander alone.
Finishing Quality and Surface Preparation
Surface preparation quality is often the deciding factor in the random orbital sander vs detail sander comparison. The random orbital sander excels at prep work on broad, flat boards where you want to remove material quickly without creating unsightly cross-grain scratches. Because the pad spins and orbits, the tool self-levels minor unevenness, which helps produce a uniform base for stain, oil, or poly. However, for fine finishing tasks that demand meticulous edge treatment or tight radii, the detail sander shines. Its small footprint and straight- or corner-focused motion enable you to create perfectly smooth transitions in doorway frames, inlay joints, and curved edges without rounding away intricate features. The end result depends on grit choice, stroke discipline, and an ability to read wood fiber behavior. In practice, many projects require a two-stage approach: bulk removal with the random orbital sander, followed by finish work with a detail sander to clean up corners and profiles.
In the broader random orbital sander vs detail sander discussion, you’ll find that finish consistency improves when you align grit progression with material hardness, species, and existing coatings. Start with a coarser grit for rapid material removal and graduate to finer grits for a glass-smooth surface.
Dust Management and Vacuum Systems
Dust management is a practical concern that affects both tool choice and long-term health. The random orbital sander typically integrates well with standard bag or vacuum dust collection systems. The key is ensuring a consistent seal between the sander and the dust hose, as loose connections negate extraction efficiency and raise cleanup time. In contrast, many detail sanders have compact dust ports that connect to shop vacuums or dedicated dust collectors. When you compare random orbital sander vs detail sander in terms dust control, the main difference lies in how effectively each tool channels dust through its port and whether you can maintain continuous suction during aggressive passes. If you’re sanding indoors or in a shared space, pairing either tool with a capable dust extractor yields a cleaner finish and reduced exposure to fine particles.
Tip: use a high-quality respirator and keep windows open or use a fan to create negative pressure in your workspace during heavy sanding sessions.
Edges, Corners, and Tight Spots
This block dives into a core consideration of the random orbital sander vs detail sander: access. The random orbital sander’s round pad provides excellent surface coverage, but you’ll quickly notice its limitations near interior corners, tight radii, and along the edge of a rail or board with an adjacent wall. Here the detail sander’s rectangular head shines. Its flat edge allows you to ride right into corners and follow contoured profiles with precision. For tasks like door frames, window casings, or where two boards meet at a sharp angle, the detail sander minimizes material loss and preserves delicate edges. Practically, you’ll often use both tools in sequence: rough shaping with a random orbital sander, then precise touch-up with a detail sander to achieve uniform transitions and professional-looking edges. This approach illustrates the pragmatic stance in the random orbital sander vs detail sander decision for real-world wood projects.
A common strategy is to switch to the detail sander when you encounter a tight corner that the random orbital sander cannot reach without over-sanding adjacent surfaces.
Ergonomics, Comfort, and Vibration
Ergonomics are a quieter but essential factor in choosing between the random orbital sander vs detail sander, especially for longer sessions. Random orbital sanders tend to be heavier and operate with a larger palm contact area, which can reduce fatigue on expansive projects like floorboards or decks. However, their vibration patterns are smoother due to the offset orbit, contributing to comfortable handling for most users. Detail sanders are lighter and more agile, which is a benefit when you need to maneuver around small features; their compact size reduces reach but can increase control in delicate areas. The trade-off is that the more concentrated action can translate to higher perceived vibrational intensity in the hand and arm. If you’re planning several hours of sanding, try alternating between the tools to distribute strain and protect joints. Brand design, handle shape, and rubberized grips also affect perceived comfort, so test different models when possible.
As you consider random orbital sander vs detail sander ergonomics, the best choice depends on your hand size, grip style, and the typical scope of your projects.
Grains, Sandpaper Types, and Longevity
A key practical nuance in the random orbital sander vs detail sander discussion is sheet format, pad type, and adhesive vs hook-and-loop systems. Random orbital sanders commonly use hook-and-loop discs in a range of grits from coarse (40–60) for heavy material removal to fine (120–220) for finishing. Detail sanders often use small, rectangular sheets on a compact pad, with similarly broad grit ranges, but their higher precision calls for more attention to dust and surface consistency. Longevity depends on how you maintain the sanding pads, avoid loading with finishes, and clean the pad surface between passes. Replacing worn-out discs promptly ensures consistent contact with the wood and prevents uneven wear that may affect finish quality. If you work with hardwoods or softwoods, you’ll adjust grit sequences to achieve the same smoothness with different removal rates. In short, select sandpaper types that match the tool’s footprint and align grit progression with your project goals for best results in the random orbital sander vs detail sander conversation.
Price, Availability, and Value Over Time
From a cost-to-performance perspective, the random orbital sander often represents the most cost-effective option for homeowners who face a mix of large-area sanding and occasional detail work. Entry-level random orbital sanders typically come with a robust value proposition, especially when paired with quality dust extraction. Detail sanders tend to be cheaper upfront but see value when used frequently for edges, profiles, and curved surfaces. A practical rule is to consider the total scope of your projects over a season: floors, decks, and walls naturally demand more from the random orbital sander, while doors, trim, and insets justify keeping a detail sander handy. When evaluating price and value, consider maintenance costs, power needs, and compatibility with your existing dust-collection setup. The right balance between these tools depends on your project mix and long-term usage patterns.
To maximize value, think in terms of tool versatility: a single high-quality random orbital sander can replace several single-purpose abrasers for many jobs, but a dedicated detail sander pays off for intricate finishes and precise work.
Step-by-Step Quick-Start Guide for Projects
A practical, repeatable approach helps you leverage the strengths of both tools in the random orbital sander vs detail sander comparison. Step 1: Define the project scope and surface types. Note the presence of edges, curves, or flat areas. Step 2: Prepare the workspace and safety gear, ensuring proper ventilation and dust control. Step 3: Start with a coarse grit on flat surfaces using the random orbital sander to establish a smooth baseline. Step 4: Move to finer grits (120–220) to refine the surface, pausing to check for swirl marks and uniform abrasion. Step 5: Switch to the detail sander for tight corners, crevices, and profile edges, paying attention to transitions between areas. Step 6: Finalize with a non-load-bearing pass on the entire surface to blend edges and remove any stray particles. Step 7: Clean the work area, wipe the surface, and apply the chosen finish. Step 8: Inspect your work under proper lighting and address any remaining imperfections with targeted passes.
This workflow demonstrates how to combine the strengths of both tools to achieve a professional finish. Practice on scrap stock to fine-tune your technique before tackling a live project, then apply the same sequence to floors, decks, or walls for consistent results.
Comparison
| Feature | random orbital sander | detail sander |
|---|---|---|
| Best for | Flat surfaces and faster material removal | Edges, corners, and tight profiles |
| Finish quality | Smooth, minimal swirl on large areas | Precise, clean edges and contours |
| Abrasive path | Random orbital with offset orbit | Rectangular pad with straight-line strokes |
| Dust control | Wide compatibility with dust extraction systems | Integrated ports for shop vacs on many models |
| Ease of use | Fast for beginners on big surfaces | More controlled for intricate work |
| Price range | $60-$150 | $25-$90 |
| Best practice scenario | New floors, large furniture pieces, cabinets | Door frames, trim, inlays, and curves |
What's Good
- Fast material removal on flat surfaces with good control
- Excellent edge and corner work with the detail sander
- Broad grit range supports multiple finishes
- Strong dust extraction improves the workspace
Weaknesses
- Detail sander is slower on large, open areas
- Detail sander requires precise technique to avoid gaps
- Random orbital can leave minor swirl marks if misused
- Sander availability and accessory costs vary by model
Random orbital sander is the default workhorse; detail sander is the essential partner for edges
For most projects, start with the random orbital sander to shape flats and remove material efficiently. Bring in the detail sander for corners, profiles, and tight spaces to finish like a pro. The two tools together cover a full sanding workflow with better results and less waste.
Your Questions Answered
Which sander is better for finishing a table top?
For a table top, start with a random orbital sander to prime the surface and minimize noticeable sanding marks, then switch to the detail sander for any precise edge work or decorative profiles. Finish with fine grits to prepare for coating. This two-tool approach reduces the risk of visible swirl marks while preserving edges.
For table tops, use the random orbital sander for broad areas, then a detail sander for edges and profiles, finishing with fine grits for a smooth coat-ready surface.
Can you use a detail sander on large flat surfaces?
While you can, it’s not efficient for large flat areas due to its limited pad size. The detail sander excels on edges and contours. For large flats, a random orbital sander will finish faster with fewer passes and less risk of gouging. Use the detail sander only where access is limited or when a precise corner finish is required.
A detail sander on large flats is possible but slow; use it mainly for edges and tight spots.
How do I prevent swirl marks when using a random orbital sander?
To minimize swirl marks, keep the sander moving at a steady pace, avoid staying in one spot too long, and progress through grit levels gradually. Start with the coarsest grit you need and blend passes to eliminate patterns. Always ensure your sanding surface is clean and the pad is well-attached.
Move steadily, don’t dwell in one area, and blend grits to avoid visible patterns.
What grit sequence should I use for a typical wood project?
Begin with a coarser grit for initial material removal, then work through a progressive sequence to finer grits. A common path is 60/80 for roughing, 120 for smoothing, and 180–220 for final finishing, depending on the wood type and finish goals. End with a light pass on the final grit to remove last particles.
Start rough, then move through 60-80, 120, and 180-220 grits as needed.
Are both sanders safe to use for non-wood materials like metal or plastic?
These sanders are designed for wood and some soft materials; using them on metal can clog and dull the pad, cause irregular surfaces, and create safety hazards. For non-wood surfaces, consult manufacturer guidelines or use a tool specifically rated for the material. Always wear proper PPE.
They’re best for wood; avoid metal or hard plastics unless explicitly approved by the manufacturer.
Do I need a sanding sealer or finish after using these tools?
A sanding sealer can help improve finish clarity and reduce grain raising on certain woods, especially softwoods. After sanding, apply your chosen finish (stain, varnish, or polyurethane) following proper cure times. The tool choice accelerates prep, but the finish depends on preparation quality and the coating itself.
Sanding helps prep; sealers and finishes depend on the wood and project, not the tool alone.
Main Points
- Choose the random orbital sander for flat areas and speed
- Keep a detail sander handy for edges and tight spots
- Match grit progression to wood type and finish goals
- Invest in a good dust-collection setup
- Practice technique on scrap stock before live work