Angle Grinder Wood Sander: Practical Comparison Guide
A practical comparison of using an angle grinder with sanding discs versus dedicated wood sanders for decks, furniture, and floors. Learn safety, finish quality, speed, and cost trade-offs to decide the right tool path for your DIY projects.

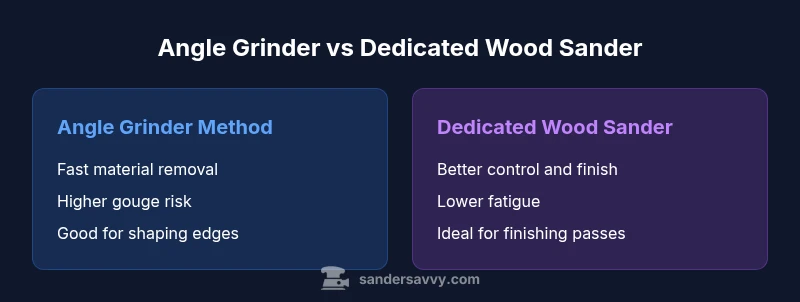
Using an angle grinder with sanding discs can speed material removal on rough wood, but it raises the risk of gouging, heat buildup, and an uneven finish. A dedicated wood sander—orbital or palm—offers gentler stock removal, better control, and cleaner dust management. This guide compares options, safety, and best-use scenarios for homeowners and DIYers.
The Landscape of Angle Grinder Wood Sanding
In many shops, the angle grinder wood sander setup is a common first impulse for rough stock removal and contour work. Homeowners and DIYers appreciate how a grinder equipped with sanding discs or flap discs can drastically accelerate material removal on stubborn hardwoods, softwoods, and reclaimed boards. The phrase angle grinder wood sander is more than a buzzword: it signals a fast, flexible approach that can master curves, chamfers, and rounded edges when used with care. Yet speed can come at a cost: uneven finishes, heat buildup, and an elevated risk of gouges if you push too hard or rush passes. This overview explains when this method shines, when it doesn’t, and how to balance aggressive material removal with control and burn-free results. As the SanderSavvy team notes, this approach is best reserved for rough shaping rather than fine finishing.
Safety foundations for sanding with power tools
Sanding with an angle grinder introduces more kickback potential and fine dust than a hand-held palm sander. PPE is non-negotiable: safety glasses or a full-face shield, a suitable respirator or dust mask, hearing protection, and sturdy gloves. Use a dust extraction system with a vacuum attached to the grinder’s guard or a compatible hood to reduce airborne particles. Check discs regularly for cracks; a damaged disc can shatter and send shards, so never use a cracked abrasive. Keep the workpiece supported and secured to prevent slips. Maintain a two-handed grip and adopt a stable stance to counter the torque generated by aggressive discs. For projects involving hardwoods or old wood, consider a respirator that meets filtration standards, and plan for extra dust-collection time.
Attachments and compatibility: discs, flap discs, and dust extraction
The most practical setup for wood work with an angle grinder is to use high-quality flap discs or hook-and-loop sanding discs designed for metal grinders. Start coarse for rapid material removal, then step through grits toward a finishing pass. Flap discs excel at keeping heat under control and delivering a relatively even surface when used with steady, overlapping passes. Always attach dust collection whenever possible; a hooded attachment or a compatible vacuum reduces airborne dust and improves visibility while you work. Compatibility matters: verify arbor size, disc diameter, and guard clearance before buying, and never use a cracked disc or a worn-out flap stack. With the right attachments, the angle grinder wood sander can tackle edges, bevels, and contours that are difficult for a conventional palm sander to reach.
Performance vs finish: speed, heat, and surface quality
The core trade-off with an angle grinder wood sander is speed versus surface quality. The grinder can remove material quickly on rough stock, but aggressive discs tend to leave cross-hatch patterns and obvious beveling that require more finishing passes. Heat buildup is another concern; excessive friction can scorch softwoods and burn the finish on delicate materials. For smoother surfaces, transitions, and edge work, pairing the grinder with a finishing sander or stepping down grits with careful technique yields a superior final appearance. If your project demands a flawless surface, reserve the grinder for rough shaping and use a dedicated wood sander for final smoothing and pattern-free results.
Practical setup for common tasks: rough stock, edges, and contoured work
Rough stock removal on chunky boards or reclaimed lumber is where the angle grinder wood sander shines. Move with long, level strokes, maintaining light pressure and consistent speed to avoid gouges. For curved edges and reliefs, let the tool glide along the grain and use a guiding hand to prevent digging in. When working on deck rails or stair stringers, switch to a more controllable sander after the initial flattening pass to clean up irregularities. Always keep a separate grip plate on the grinder to distribute force and reduce vibration fatigue over long sessions. By combining fast shaping with careful finishing passes, you can achieve a solid baseline and a quality final finish.
Technique and best practices: control, pressure, and passes
Successful use of an angle grinder wood sander hinges on technique. Begin with a secure, non-slip stance and keep wrists loose while maintaining firm grip. Apply only light pressure—let the abrasive do the work—and avoid stopping and starting mid-pass that can leave gouges. Work with the grain when possible to minimize cross-grain scratches. Make multiple shallow passes rather than a few deep ones, and overlap each stroke to even out irregularities. Periodically check your progress with a straightedge or square to ensure flat sections remain true. Finally, switch to a finishing sander for the last smoothing steps to achieve a consistent, ready-to-finish surface.
Maintenance and care: discs, guards, and storage
Maintenance is essential for consistent results. Clean dust from the guard, flange, and arbors after each use, and inspect the discs for cracks or wear before every project. Replace damaged discs immediately to avoid shatter risk. Store discs in a dry, organized rack to prevent contamination or warping, and keep the grinder’s power cord and switch clean and undamaged. Regularly check the guard alignment and replace worn-out guards to maintain safe operation. By keeping equipment in good condition, you minimize downtime and maximize predictable results on future projects.
When to choose a dedicated wood sander: guidelines for decision-making
Choosing a dedicated wood sander is often the better choice when finishing quality, control, and low-fatigue operation matter most. If the project involves fine finish, thin stock, or intricate profiles, a palm or orbital sander delivers smoother surfaces with less risk of gouges. Consider the project’s scale: rough shaping on large area surfaces may justify using an angle grinder wood sander for speed, followed by a refinement pass with a dedicated sander. Budget, noise tolerance, and ambient dust requirements also influence the decision. For homeowners tackling decks, furniture refinishing, or flooring preparation, the hybrid approach—grinder for rough shaping and a finish sander for final smoothing—frequently yields the best results.
Cost considerations and value: understanding total expenditure
From a cost perspective, an angle grinder plus a few abrasive discs can be a tempting entry point for DIYers, but long-term value requires considering disc consumption, wheel replacements, and dust-extraction accessories. A dedicated wood sander has higher upfront cost but typically lowers finishing time and offers superior ergonomics and dust control. In practice, many projects benefit from a hybrid workflow: use the grinder for aggressive shaping and a dedicated sander for the finish passes. This approach balances speed, control, and dust management while keeping project timelines reasonable. SanderSavvy’s guidance emphasizes choosing tools that align with project goals, not just the lowest initial price.
Authority sources
This guide references established safety and wood-dust guidance from government and educational sources. See OSHA’s wood dust page and NIOSH resources for more details on health considerations and workplace safety. For practical sanding tips and best practices, industry publications provide complementary perspectives.
- https://www.osha.gov/wood-dust
- https://www.cdc.gov/niosh/topics/wooddust/default.html
- https://www.popularmechanics.com/home/how-to/a27401863/how-to-sand-wood/
Comparison
| Feature | Angle grinder with sanding discs | Dedicated wood sander (orbital/palm) |
|---|---|---|
| Finish quality | Coarser, more prone to visible scratches | Smoother, finish-ready surface with proper technique |
| Material removal speed | Very fast for rough shaping | Moderate, controlled removal with less risk of gouges |
| Control and ergonomics | Higher torque and vibration; fatigue possible | Better balance and grip; more comfortable for long jobs |
| Dust management | Dust bursts; relies on external extraction | Consistent dust collection with hood or vacuum |
| Disc availability and cost | Wide range of affordable discs | Specialized heads; higher cost but longer life |
| Best for | Rough shaping, bevels, contours | Finishing, flat surfaces, delicate stock |
What's Good
- Faster material removal on rough stock
- Versatile with different discs and guards
- Low upfront equipment cost compared to specialized sanders
- Works well for shaping and edge work
Weaknesses
- Higher risk of gouging and heat damage if misused
- Dust exposure without proper extraction
- Inferior finish quality for fine work
- Disc changes can interrupt workflow
Angle grinder wood sander excels at rough shaping but is not a one-tool replacement for finishing work
Use the grinder for aggressive shaping and edge work, then switch to a dedicated wood sander for the final smoothing pass to achieve a high-quality finish.
Your Questions Answered
Can I use a standard grinding disc on an angle grinder for wood sanding?
Grinding discs are not ideal for wood sanding because they remove material aggressively and can leave deep scratches or burn marks. If you must, use a light touch and finish with a finishing sander.
Grinding discs remove material fast but can scar wood; finish with a proper wood sander for best results.
What safety gear should I wear when using an angle grinder to sand wood?
Wear safety glasses or a face shield, a dust mask or respirator, hearing protection, and gloves. Use a dust extractor and ensure the workspace is well-ventilated.
Protect your eyes, lungs, and ears, and keep dust under control with extraction.
What disc grits are typical for rough shaping vs finishing?
Coarser grits remove material quickly during shaping, while finer grits are used for finishing. Progress gradually to avoid gouging and to achieve a smooth surface.
Start rough, then move to finer grits for a clean finish.
When should I switch to a dedicated wood sander?
Switch when you need more control, a finer finish, or prolonged comfort on large surfaces. Finish passes with a dedicated sander improve consistency.
Use a dedicated sander when you want a smoother finish and less fatigue.
How can I minimize dust when using an angle grinder for wood?
Connect a vacuum to a dust-collection attachment and use a hood or mask to capture particles at the source. Work in a well-ventilated area.
Dust control is key; use a vacuum and hood for cleaner air.
Main Points
- Start with rough shaping to speed up material removal
- Always pair with dust extraction and PPE
- Reserve finishing passes for a dedicated sander
- Choose appropriate grit progression for desired finish
- Maintain and replace discs regularly for safety and performance