Grinder to Sander: A Practical Comparison for DIY Sanding
Compare using a grinder with sanding attachments against a dedicated sander. Practical guidance for homeowners and DIYers on safety, finish quality, and tool choice.

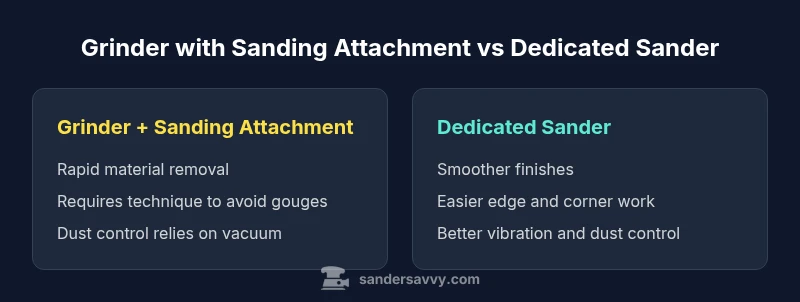
Grinder-to-sander decisions hinge on finish needs, surface condition, and dust control. A dedicated sander offers smoother results and edge control, while a grinder with a sanding attachment excels at rapid material removal and reshaping rough areas. For most finishing tasks, choose the sander; use the grinder for aggressive material removal when necessary.
The Grinder-to-Sander Dilemma: Core Differences
For many DIY tasks, homeowners face a practical dilemma: should I reach for a grinder or a dedicated sander when preparing wood, floors, decks, or walls? If you search for grinder to sander guidance, you’ll find the core distinctions come down to control, finish quality, and how each tool handles coatings. According to SanderSavvy, the choice between a grinder and a sander is not purely about power; it’s about how predictable the surface will be after refinement. A grinder, especially with a sanding attachment, can remove material quickly and reshape irregular edges, but it often requires more cleanup and skill to avoid gouges. A dedicated sander offers steadier motion and finer control, yielding a smoother final surface with less risk of accidental damage. In practice, many projects begin with the grinder for heavy removal and finish with a sander for final smoothing and edge work. The process demands a plan for dust collection, vibration management, and chosen abrasives. If you’re contemplating a grinder to sander shift, map your steps ahead—where you’ll flatten, where you’ll feather, and where you’ll leave a uniform, scuff-free finish. The right choice hinges on your surface type, coatings, room layout, and how much edge work you must address. As you evaluate attachments and grit, keep safety front and center: proper PPE, secure workholding, and a vacuum system designed for wood dust. This framework will guide you toward the tool that best fits your project.
Comparison
| Feature | Grinder with sanding attachment | Dedicated sander (orbital/belt) |
|---|---|---|
| Finish control | Variable depending on technique | Consistent and smooth |
| Speed and throughput | Fast material removal | Controlled finishing speed |
| Edge reach and corners | Challenging to control on tight spots | Excellent at edges and corners |
| Dust collection | Rely on external vacuum and attachments | Often integrated dust collection options available |
| Tool versatility | Also grinds metal and shapes edges | Specialized for sanding tasks |
| Cost and maintenance | Lower upfront cost with attachments | Higher upfront cost but longer tool life |
What's Good
- Versatility to remove material quickly
- Sanding attachments are readily available
- Useful for rough shaping and heavy coatings
- Can be used on multiple surfaces with appropriate attachments
Weaknesses
- Finish quality requires more skill to avoid gouges
- Higher risk of cross-grain scratches if used improperly
- Dust control can be challenging without a good vacuum
- Edge work often requires a separate tool for best results
Dedicated sanders prevail for everyday finishing; grinders with attachments are strong backups for roughing and shaping
For clean, consistent finishes, a dedicated sander is generally the better option. A grinder with sanding attachments offers speed for material removal but requires more skill and dust control. Use the grinder strategically for rough work, then switch to a sander for the final pass.
Your Questions Answered
When is a grinder with a sanding attachment an acceptable substitute for a dedicated sander?
A grinder with a sanding attachment can substitute for rough shaping or rapid residue removal when the coating is thick or uneven. It’s not ideal for final finishing where you require uniform surface texture. Always test on a scrap area first and incrementally progress to finer grits.
A grinder can handle rough spots first, then you switch to a dedicated sander for the final smoothing.
What safety steps should I follow when grinding before sanding?
Wear proper PPE, including eye protection, hearing protection, and a respirator if dust is thick. Securely clamp the workpiece, maintain a low-angle contact, and use a vacuum with attachment to minimize dust. Keep hands clear of the rotating pad.
Safety first: PPE, clamps, and a good dust vacuum are essential.
Can I achieve a mirror finish with a grinder or is a sander always required?
A grinder rarely yields a mirror finish without substantial follow-up with a high-grit sanding sequence. A dedicated sander, especially quality random-orbit types, can achieve finer finishes with less effort.
For a smooth finish, a sander is typically the go-to tool.
Which grit progression is typical when switching from grinder to sander?
Start with a coarse grit for initial material removal, then move to progressively finer grits for finish with a final polish. The exact grits depend on the wood type and coating; always test on scrap.
Begin rough, then finish with finer grits.
Is it worth buying a dedicated sander if I already own a grinder?
If you frequently sand surfaces to a smooth finish, a dedicated sander saves time and improves results. For occasional tasks, a grinder with attachments can suffice, provided you’re comfortable with technique.
For regular finishing work, a dedicated sander pays off in time and finish quality.
How do I protect edges when using a grinder for cleanup around trim and corners?
Use a corner sander or move slowly along edges, keeping the pad flat to minimize gouging. Practice on scrap trim first and consider masking adjacent areas to prevent accidental removal.
Take it slow around edges and practice first.
Main Points
- Assess surface type and coating before choosing a tool
- Choose a dedicated sander for edges and finish quality
- Use a grinder with sanding attachments for rapid material removal when needed
- Invest in a reliable vacuum system to manage wood dust
- Practice proper technique to minimize gouges and cross-grain scratches