Grinder vs Sander: Choosing the Right Power Tool for DIY
Explore the key differences between grinders and sanders, when to choose each tool, and practical tips for safety, dust control, and accessory use. A practical, data-informed guide by SanderSavvy.

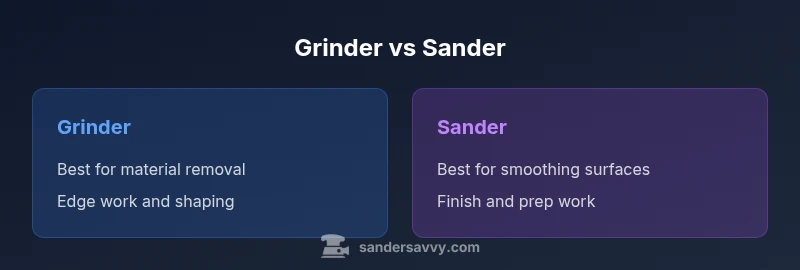
Grinders and sanders serve different core purposes. A grinder excels at material removal, shaping, and edge work, especially on metal and hard substrates. A sander specializes in smoothing and finishing wood, drywall, or plaster to a fine surface. For mixed tasks, pair a grinder with a sanding attachment or switch to a dedicated orbital sander for finish work. Prioritize dust control, guard usage, and appropriate accessories to ensure safety and results.
What Are Grinders and Sanders?
Grinders and sanders are among the most common power tools in any DIY toolkit, yet they are often misunderstood. A grinder, typically an angle grinder or a die grinder, is built for rapid material removal, shaping, and grinding metal, stone, and masonry. It uses wheels, discs, or burrs that cut, grind, or weld through tough material. A sander is designed to abrade surfaces to create a smooth finish. Sanders come in several forms—orbital, random-orbital, belt, and finishing sanders—each optimized for different materials and finishing requirements. For the homeowner tackling floors, decks, and walls, the choice between a grinder and a sander shapes the project’s trajectory, dust profile, and finish quality. According to SanderSavvy, understanding these roles helps you select the right tool for the task, minimizing waste and maximizing results.
When you’re new to these tools, focus on the task at hand: material removal vs surface finishing. If you anticipate heavy stock removal or edge work, a grinder will save time. If the goal is a smooth, paint-ready surface, a sander is the better choice. The camera-friendly advantage of a sander is its ability to lay down uniform texture with less risk of gouging than a grinder. The takeaway is practical: identify the end product first, then choose the tool that aligns with that finish.
SanderSavvy notes that many DIYers keep both tools on hand, using each for its strongest suit and swapping accessories to extend versatility. This approach reduces workflow friction on projects ranging from floor prep to deck refinishing and wall smoothing, while maintaining safety and control.
Comparison
| Feature | Grinder | Sander |
|---|---|---|
| Best for | Heavy material removal, shaping edges, metalwork | Surface smoothing, finishing wood/drywall/plaster |
| Finish quality | Lower surface finish quality if used aggressively | High-quality, uniform finish with proper technique |
| Control and precision | More aggressive control, higher risk of gouges | Greater control for fine work and delicate surfaces |
| Accessory versatility | Discs, wheels, burrs, flap discs | Orbital, belt, finishing, and sanding attachments |
| Dust management | Dust extraction possible but more secondary | Typically better controlled with shrouds and vacuums |
| Typical starting skill level | Intermediate to advanced for best results | Beginner-friendly with guidance and practice |
What's Good
- Grinders remove material quickly, ideal for shaping and aggressive material removal
- Sanders produce smooth finishes and reduce gouging risk when used properly
- Wide accessory ecosystem increases tool versatility
- Can be used on multiple materials with the right attachments
Weaknesses
- Grinders can be dangerous if guards and PPE aren’t used; more kickback potential
- Sanders may struggle with heavy stock removal and edge work
- Dust control is essential and sometimes challenging without a dedicated dust collection setup
Grinder for material removal and shaping; sander for finishing and smoothing.
Choose a grinder when the project demands rapid material removal or shaping, especially on metal or masonry. Opt for a sander when you need a fine, uniform surface finish on wood, drywall, or plaster. For mixed tasks, plan to switch between tools or use a grinder with sanding attachments to stay efficient.
Your Questions Answered
What is the primary difference between a grinder and a sander?
The primary difference is purpose: grinders remove material rapidly and shape edges, while sanders abrade surfaces to create a smooth finish. Accessory selection and technique determine how effectively each performs a given task.
Grinders shape and remove material fast, while sanders smooth surfaces for a clean finish.
Can I sand with a grinder?
You can perform light sanding with certain grinder attachments, but it requires care to avoid gouging and overheating. For most finish work, use a dedicated sander or a grinder with a sanding disc and proper technique.
You can approximate sanding with a grinder using the right disc, but it’s not ideal for a smooth finish.
What safety gear should I wear when using grinders and sanders?
Wear eye protection, hearing protection, a dust mask or respirator, gloves, and sturdy footwear. Use guards, ensure tool is unplugged when changing discs, and keep cords away from the work surface.
Always wear safety gear and use guards when operating these tools.
Which tool is better for woodworking versus metalworking?
For woodworking and drywall finishing, a sander is typically better. For metal shaping and cutting, a grinder is more suitable. If your project mixes materials, plan access and transitions accordingly.
Woodwork needs a sander; metalwork usually needs a grinder.
Do grinders require special grinding wheels or discs?
Yes. Use wheels or discs rated for the material (metal, masonry, or stone). Attachments should match the grinder’s arbor size and safety ratings to avoid damage or accidents.
Grinders use specific wheels or discs—make sure they fit your tool and material.
How do I manage dust when using either tool?
Use a shroud or dust-collection attachment and connect to a vacuum. Work in a well-ventilated area and wear a respirator for fine dust; avoid dry, dusty environments that can ignite with grinding sparks.
Keep dust under control with a good vacuum setup and ventilation.
Main Points
- Identify project goal first: removal vs finishing
- Pair tools with appropriate attachments to maximize safety and results
- Invest in good dust control for both tools
- Practice edge work and material removal on scrap pieces before starting real work
- Maintain guards and PPE to minimize risk