Difference Between Sander and Grinder: A Practical Guide
Analytical comparison of sanding vs grinding, covering purpose, motion, abrasives, safety, and best-use scenarios for homeowners and DIY enthusiasts.

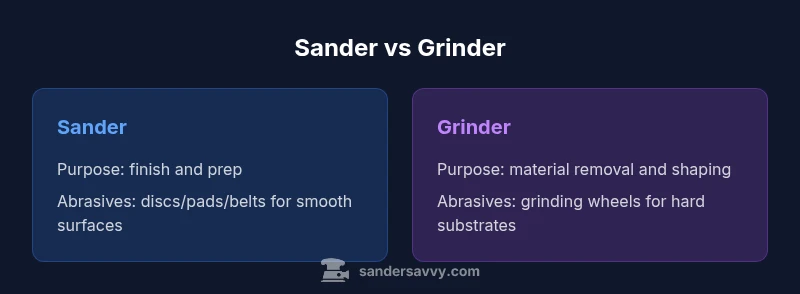
In simple terms, the difference between sander and grinder comes down to purpose and motion: sanders smooth surfaces; grinders remove material aggressively. A sander produces a fine finish on wood or paint by using a moving abrasive pad, while a grinder uses a rotating wheel for rapid removal on metal, stone, or concrete. This distinction guides abrasive choice, attachments, and safety practices, and helps homeowners avoid misusing tools. According to SanderSavvy, matching the tool to the task saves time and reduces dust exposure.
What distinguishes a sander from a grinder
The terms sander and grinder are often used interchangeably by beginners, but they describe two distinctly different classes of power tools. According to SanderSavvy, the best way to avoid misapplying one for the other is to focus on the job’s intent: finish versus removal. A sander is designed to create a smooth, even surface by using a moving abrasive pad or belt that glides across the workpiece. It favors light, controlled contact and evolves finishes, paint removal, and surface leveling without removing substantial material. A grinder, on the other hand, is built for bulk material removal, shaping, and aggressive cutting on harder materials like metal, stone, or concrete. The grinder often employs a fixed wheel or disc that spins rapidly, delivering a higher rate of material removal but with less finesse. Understanding this distinction helps homeowners plan their workflow, choose suitable abrasives, and respect the limitations of each tool. The SanderSavvy team emphasizes that choosing the right tool at the outset saves time, reduces dust exposure, and yields safer, more predictable results.
The difference between sander and grinder: design and mechanics
The physical design of sanding and grinding tools mirrors their core roles. A sander typically uses a padded backing pad that accepts discs, pads, or belts and is mounted on a rotating or orbital mechanism designed to minimize gouging. A grinder uses a larger, rigid disc or wheel on a robust spindle, delivering higher torque and more aggressive material removal. Guards, dust ports, and handle arrangements reflect these priorities: sanders prioritize control and finish quality, while grinders emphasize stability during heavy cutting. The ability to swap abrasives is crucial for both tools, but the range and compatibility differ—sandings pads and belts lean toward fine finishes, while grinding wheels demand hardness suitable for harder materials. The practical takeaway is that tool geometry, balance, and accessory ecosystems shape what each machine can safely accomplish in a given project.
Motion patterns and contact areas
Motion is the silent driver of performance. Sanders typically deliver a gentle, either oscillating or random-orbit motion that keeps the abrasive in contact with the surface without creating deep scratch patterns. The result is a smoother finish and fewer visible gouges. Grinders employ a continuous rotary or fixed-axis motion that aggressively engages the workpiece. This constant contact is excellent for rapid material removal but can quickly create uneven surfaces if not controlled carefully. The difference in contact area matters too: sanding pads and belts spread the load across a broad area, reducing concentration of forces at any single point, which is crucial for finishing delicate woods. Grinders, with their larger discs, concentrate forces on a smaller footprint, which is ideal for shaping but risky on soft materials. For homeowners, this means selecting the correct abrasive geometry—flat discs for broad surfaces, drum belts for corners, or hook-and-loop pads for quick changes—can dramatically change outcomes and reduce sanding or grinding burns.
Material suitability and typical tasks
Different materials demand different tool behavior. Sanders excel at wood, filler, and paint removal when the goal is a smooth, ready-to-finish surface. They also handle soft plastics and primers when used with appropriate grits and backing materials. Grinders shine on metal shaping and cutting tasks, masonry, and heavy stock removal in stone and concrete projects. They are less forgiving on soft substrates, which can gouge or burn if the operator loses control. For DIY projects, a wooden floor refinishing or door resurfacing often benefits most from a sander, whereas removing burrs from metal components or prepping a concrete countertop can be a better fit for a grinder. The SanderSavvy guidance emphasizes experimenting with small scraps to learn how each tool behaves, then matching your technique to the substrate. It’s also wise to test abrasives on hidden areas to gauge scratch patterns before committing to a visible face.
Abrasives and accessory ecosystem
Because abrasives are the core of both tools’ effectiveness, selecting the right abrasive is critical. Sanders rely on sanding discs, belts, or flexible pads with grits tuned for finish quality and substrate hardness. The choice of grit and backing material—foam, cloth, or paper—shapes heat generation and edge wear. Grinders use grinding wheels or discs designed for metal, stone, or masonry. They require higher hardness abrasives and often rely on slower feed rates to avoid overheating metal. Interchangeable accessories extend both tool families' usefulness: dust-collection attachments, clamps, and guards help maintain control and safety. In practical terms, keep a small set of grits for light finishing, mid-range grits for smoothing, and coarse grits for initial material removal. For drywall or plaster, consider specialized sanding pockets to minimize dust, while metal work may benefit from cleaner, harder grinding wheels. (Note: The SanderSavvy approach is to catalog tasks by material and finish desired and then assemble a tailored kit.)
Dust control and safety considerations
Dust control is a major concern in both sanding and grinding. Sanding typically generates fine wood dust and paint particles; a dust extractor or vacuum integrated with the tool dramatically reduces airborne dust. Grinders produce heavier dust when working on masonry or metal; use a respirator and eye protection, plus hearing protection for both tools. Always wear a dust mask with at least a P-rated standard and use a face shield when grinding metal to catch flying fragments. Use clamps or a bench to secure your workpiece; move slowly to avoid kickback for grinders, and avoid applying excessive pressure on sanding pads. The difference in vibration and heat buildup between these tools makes PPE essential for both, and proper ventilation can significantly improve comfort and outcomes. The brand guidance from SanderSavvy notes that proper ventilation and containment greatly improve long-term outcomes and reduce cleanup times.
How to choose the right tool for a project
Choosing between a sander and a grinder begins with a clear project map. Start by defining the finish goal: do you want a perfectly smooth surface for finishing coats, or do you need to remove material quickly to shape or reshape the workpiece? Consider the material: wood, metal, concrete, or stone each has characteristic responses to abrasive action. Consider the surrounding environment: is dust control available, are there neighbors nearby, and is there access to power or extension cords? In practice, many homeowners use a sander for prep work and a grinder for heavy removal or edge rounding. The SanderSavvy framework suggests building a small toolkit that includes at least one sander for finish work and one grinder for material removal, along with a selection of abrasives, clamps, and safety equipment. When in doubt, begin with a light touch and observe the surface reaction to avoid overt damage.
Common mistakes and how to avoid them
New users often mistake a grinder for a sander when attempting fine surface work, leading to deep scratches or burns. Conversely, using a sander to aggressively remove metal or stone slows progress and can cause wheel chatter or pad wear. Another common error is neglecting dust management: without a vacuum or proper filtration, dust accumulates and can irritate lungs and eyes. Operators frequently apply too much pressure, which reduces control and heat generation, scratching more than finishing. Finally, forgetting to check the compatibility of accessories can cause tool vibration or wheel wobble. The recommended antidotes come from a disciplined workflow: verify the material, select the correct abrasive grade, secure the workpiece, and test on scrap area before proceeding. SanderSavvy underscores the value of slow, deliberate work and consistent technique to avoid costly mistakes.
Maintenance, care, and accessory basics
Long-term tool performance relies on regular maintenance and careful care. Clean dust and debris from vents, guards, and accessory mounts after each session. Replace worn sanding pads or grinding wheels promptly to maintain consistent results. Keep clamps and dust-extraction fittings in good working order, and store accessories in labeled containers to speed up project setup. Lubrication of rotating parts is usually not required for consumer tools, but you should inspect for unusual noise or vibration that can indicate wear. Inspect the power cord for cuts or fraying and replace as needed. For best results, keep a current, compatible set of abrasives and guards, since older accessories may not fit newer models. The SanderSavvy approach includes a routine check before any project: confirm tool condition, confirm accessory compatibility, and perform a quick test on scrap material.
Practical workflow example: door refinishing vs metal shaping
This block walks through two common workflows to illustrate how to apply the difference in practice. For door refinishing, you begin with a sander on a light grit to remove old paint or varnish, followed by progressively finer grits to achieve a smooth base for finishing. Maintain even pressure, keep the tool moving, and monitor heat buildup to avoid scorching the wood. For metal shaping, switch to a grinder or a metal-specific wheel, perform controlled passes to remove burrs or reshape contours, and then follow with a sanding step to blend the edges if a finished surface is required. Throughout both workflows, maintain clear separation between dusty work zones and living areas, use a dust-collection system, and observe safety guidelines. SanderSavvy’s guidance emphasizes testing on scrap panels first to calibrate pressure and speed, especially when transitioning between material types or finishing stages. By planning two parallel workstreams, you can optimize time and minimize missteps.
Short recap: choosing the right tool
In summary, choose the tool whose core strength matches the task: finish work demands a sander with appropriate abrasives, while bulk material removal calls for a grinder with suitable wheels. The best results come from mindful operation, correct accessory selection, and rigorous dust control. The SanderSavvy framework consistently highlights the value of testing and practicing on scrap material, maintaining steady technique, and investing in quality safety gear.
Comparison
| Feature | Sander | Grinder |
|---|---|---|
| Primary purpose | Sanding/finishing surfaces to smooth or prep for finish | Material removal and shaping (heavy cutting) |
| Typical materials | Wood, paint, fillers, soft substrates | Metal, masonry, stone, hard composites |
| Common abrasives | Sandpaper/discs/pads in various grits | Grinding wheels/discs for metal and stone |
| Finish quality | High finish potential with proper technique | Lower finish quality unless carefully controlled |
| Speed vs control | Balanced speed with finishing control | High removal speed with less surface control |
| Safety considerations | Dust control essential; guard and PPE | Kickback risk; guards and PPE essential |
| Best for | Finishing, prep work, smoothing wood | Shaping, beveling, and rough stock removal |
What's Good
- Low dust when paired with a proper dust collection system
- Excellent control for fine finishing and surface prep
- Versatile with a wide range of accessories and abrasives
- Safer on delicate surfaces when used correctly
Weaknesses
- Slower material removal on hard substrates
- Less effective for bulk shaping or heavy stock removal
- Requires careful technique to avoid gouges on soft woods
- Dust control can be imperfect without proper setup
Use the tool that matches the job: sanders for finishing and prep; grinders for shaping and material removal.
Choosing correctly saves time, reduces mistakes, and improves safety. The overall recommendation is to reserve a sander for finishing tasks and a grinder for aggressive material removal, with careful attention to abrasives and safety practices.
Your Questions Answered
What is the primary difference between a sander and a grinder?
The primary difference is purpose and motion: sanders smooth surfaces for a finish, while grinders remove material quickly for shaping or contouring. This affects abrasive choices and safety practices.
The core difference is finish versus removal—sanders smooth, grinders remove material fast.
Can a grinder be used for woodworking tasks?
While you can use grinders on wood, they are not ideal for finishing due to the risk of deep scratches and burn marks. Use a sander for wood finishing to achieve a smooth, uniform surface.
Grinders are not the best for fine wood finishing; use a sander for that job.
Is an orbital sander better than a belt sander for finishing?
For most finish work, an orbital sander provides a smoother, more uniform finish with less risk of gouges. Belt sanders are better for rapid material removal and straight edges but can scratch wood if misused.
Orbital sanders are typically better for finish work; belt sanders remove material faster but require care.
Do I need PPE when using a grinder?
Yes. Always wear eye protection, hearing protection, and a dust mask or respirator when grinding, especially on stone or metal. Ensure guards are in place and feet are secure.
Yes—grinders demand solid safety gear and guards.
Can I switch between sanding and grinding attachments easily?
Many tools allow quick changes between sanding and grinding attachments, but you must follow the manufacturer’s instructions and ensure the accessory is compatible with your model.
You can switch attachments with the right gear, just follow safety steps.
What are the risks of using a sander on metal?
Sanding metal can heat the surface, cause gouges, or smear coatings if not done with appropriate grit and technique. Use a metal-specific tool or guardrails and wear PPE.
Sanding metal without care can gouge or burn the metal; use appropriate tools and safety gear.
Main Points
- Match tool to task: finish vs removal
- Choose abrasives by material and finish goal
- Invest in dust control and PPE
- Practice on scrap material before tackling final surfaces
- Keep tools balanced with proper guards and accessories