Arsenal vs Sander: A Practical Sanding Strategy
An objective compare arsenal vs sander strategies for DIY sanding. Learn when to stock a toolkit or rely on a single versatile sander, with practical tips and a clear decision framework.

According to SanderSavvy, arsenal vs sander is not a simple winner; both strategies have merit for DIY sanding. A diverse toolkit supports varied surfaces, while a single, well-equipped sander can handle quick jobs. The SanderSavvy team finds that project scope, surface variety, and dust-control needs typically dictate the best path.
The Core Question: Arsenal vs Sander for DIY Sanding Projects
Choosing between an arsenal approach and a single-sander approach shapes your project timeline, finish quality, and long-term tool strategy. In practice, most DIYers benefit from a thoughtful blend that matches surface variety and deadlines. This comparison explains the core distinctions, outlines the practical pros and cons of each path, and provides a decision framework you can apply to floor, deck, or wall sanding tasks. The goal is to help you maximize finish quality while staying within your budget and schedule. Understanding when to expand your toolkit versus lean on a core machine can save time and reduce rework on complex projects.
Defining the Arsenal Approach
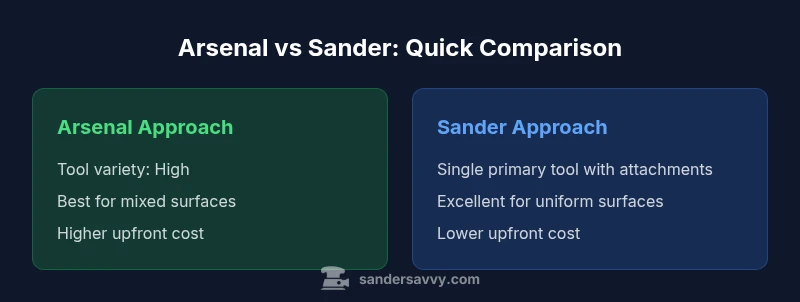
An arsenal approach means building a small ecosystem of sanding tools, consumables, and accessories. Instead of relying on one machine, you assemble tools such as a belt sander for heavy material removal, a random-orbit or ergonomic palm sander for finishing, a detail sander for tight corners, and a selection of grits and accessories for progressive projects. The key benefit is versatility: you can tackle varied surfaces—hardwood, softwood, painted layers, and veneers—with controlled grit progression. It also allows better dust-control planning when used with multiple dust-collection setups. The trade-offs include higher upfront cost, more storage needs, and a learning curve to coordinate tool transitions smoothly.
Defining the Sander-First Approach
A sander-first approach centers on one primary sanding platform with well-chosen attachments and accessories. The idea is to minimize tool clutter and streamline workflows, especially on small or time-critical projects. A single, high-quality random-orbit or delta sander can handle most surfaces when matched with the right grits, dust-extraction setup, and sanding schedules. The limitation is surface diversity: tricky edges or heavy material removal may require non-core tools. The reward is lower storage needs, simpler maintenance, and often quicker setup times for straightforward jobs.
Surface Variability and Tool Selection
Surface heterogeneity—ranging from bare wood to layered paint and sealants—drives tool choice. For mixed surfaces, an arsenal shines: you switch between belt sander for quick stock removal, orbital for leveling, and detail sander for edges and corners. For uniform surfaces with minimal variations, a capable single sander (with multiple grit disks and a fine finishing pad) can maintain momentum. The decision hinges on how often you encounter different materials, how often you need edge access, and whether you plan long runs vs. episodic touch-ups. Always consider the surface profile, grain direction, and the potential for scorch marks during heavy removal.
Dust Control, Safety, and Workflow
Dust management is central to both approaches, but the strategy differs. An arsenal allows you to plan dust collection for each tool—using shop vacs on belt sanders and integrated extractors for orbital tools—minimizing airborne particles. A single sander setup emphasizes a robust, portable dust-collection system that captures dust across all attachments. In both cases, PPE—respirator, eye protection, and hearing protection—should be standard. A clean, well-ventilated workspace reduces cleanup time and protects nearby finishes and occupants.
Cost, Time, and Maintenance Considerations
Initial cost for an arsenal tends to be higher due to purchasing multiple tools, replacement parts, and storage needs. Time to learn and coordinate tool changes can offset some savings on larger projects. A sander-first setup lowers upfront investment and maintenance if you already own a reliable main unit and invest in a few high-quality attachments. Over the long term, the arsenal may offer better value for frequent, multi-surface projects, while a single-sander approach suits occasional projects or tight deadlines. When evaluating cost, also factor in consumables, dust-extraction equipment, and the potential for improved finish quality with proper grit progression.
Case Studies: When Each Strategy Shines
Case A: A homeowner sanded three different rooms with paint, varnish, and oak floors. An arsenal allowed rapid removal in rooms with differing surface conditions, while careful grit progression preserved wood grain. Case B: A small deck refinishing job required quick results; a single, powerful random-orbit sander with a narrow attachment performed efficiently, reducing setup time and storage needs. Both cases show that the best strategy aligns with surface variety and time constraints.
Practical Workflow: Steps for a Mixed Arsenal
- Inspect surfaces to map grit progression: start rough on bare wood, finish with fine grits on stained areas. 2) Gather a belt sander for material removal, orbital sander for leveling, and a detail sander for tight areas. 3) Prepare dust-control plans: assign a dedicated dust extractor per tool or a central unit. 4) Create a step-by-step plan: edge work first, panels second, accents last. 5) test finish on a scrap piece to confirm grit and seal compatibility. 6) Execute with consistent technique and monitor heat buildup to avoid scorch marks. 7) Clean and re-check the surface before final coatings.
Accessories, Grits, and Consumables
Stock a range of grits (40–120 for removal, 120–240 for finishing), sanding sponges for contours, and compatible pads for each tool. Keep clean, sharp sanding discs and replace torn abrasives promptly. Use dust-separation screens to minimize clogging and maximize tool efficiency. Inspect belts and pad surfaces regularly for glazing or dull edges, and replace as needed. Maintain a small toolkit of spare parts for quick repairs during long jobs.
Common Mistakes and How to Avoid Them
Avoid overloading the belt sander or pressing too hard, which causes gouges and heat buildup. Don’t skip edge work or finish areas with the wrong grit sequence, leading to uneven tones or haze. Keep dust collection active to minimize airborne particles. Plan tool transitions and transport paths to prevent backtracking and uneven surfaces. Finally, do not rush the grit progression; patience produces a smoother, more durable finish.
Try This Decision Checklist
- Do you encounter multiple surface types in the project? Yes → consider arsenal. No → sander-first is often sufficient.
- Is time a critical factor? Yes → lean toward one reliable sander and core attachments.
- Do you anticipate edges and corners dominating the work? Yes → include a detail sander or specialized attachment.
- Is storage space limited? Yes → prioritize a compact sander-first setup or a small, focused arsenal.
- Will you perform maintenance and storage budgets? Yes → plan for a maintenance schedule alongside your tool choices.
Final Thoughts: A Practical Framework for Your Project
The core decision is not simply arsenal vs sander but how to balance tool variety with workflow efficiency. Start with a clear surface map, select a core sander that fits most tasks, and add a few targeted tools to handle the rest. This approach minimizes rework, optimizes finish quality, and keeps the project on track.
Comparison
| Feature | Arsenal Approach | Sander Approach |
|---|---|---|
| Tool Variety | High (belt, orbital, detail, sanding sponges) | Moderate (one primary sander + a few attachments) |
| Flexibility Across Surfaces | Excellent for mixed surfaces (paint, stain, wood, veneer) | Good for uniform surfaces with consistent finish |
| Cost to Start | Higher upfront (multiple tools, storage, accessories) | Lower upfront (one main unit + essential attachments) |
| Maintenance & Storage | More maintenance; requires space for tools and accessories | Lower maintenance; occupies less space |
| Time to Complete | Can be faster on complex jobs with the right tool transitions | Often faster on simple, repeatable tasks |
| Dust Control Options | Per-tool dust extraction; emphasizes individual tool setups | Centralized dust system works across tools |
| Best For | Varied surfaces, long timelines, projects over weeks | Small projects, tight deadlines, minimal clutter |
What's Good
- Greater flexibility and surface adaptability
- Improved finish quality with proper grit progression
- Better long-term value for frequent multi-surface projects
- Enhanced dust management when using multiple tools
Weaknesses
- Higher upfront cost and more storage needed
- Steeper learning curve to coordinate tool changes
- Increased maintenance and compatibility considerations
A blended approach often wins: build an arsenal for variability while keeping a high-quality sander as the workhorse.
For projects with varied surfaces, an arsenal delivers control and finish precision. For quick, uniform tasks, a capable single sander can suffice. The recommended path is to tailor the setup to surface variety and project timeline, using both strategies when it makes sense.
Your Questions Answered
What does an 'arsenal' mean in sanding context?
In sanding, an arsenal refers to a broad collection of tools and accessories chosen to handle diverse surfaces and finishing requirements. It enables you to switch tools as needed to optimize material removal, leveling, and edge work.
An arsenal means you have multiple tools ready for different tasks, not just one machine.
Is a single sander ever enough for all projects?
A single sander can handle many projects, especially when you work on uniform surfaces. However, for mixed materials or complex edges, you’ll benefit from additional tools to avoid sacrificing finish quality.
Sometimes yes, but you’ll often reach a limit with tricky surfaces.
Which tools are essential in an arsenal?
Key essentials include a belt sander for rapid stock removal, a random-orbit sander for leveling, a detail sander for corners, and a selection of grits and sanding sponges. Dust extraction compatible with each tool is also important.
You’ll want a belt sander, an orbital sander, edges, and a good dust system.
How do I decide when to add another tool to my arsenal?
Consider the surface mix and project scale. If you consistently encounter surfaces that current tools struggle with, add a specialty tool (e.g., detail sander or large-area finishing sander) to maintain efficiency and finish quality.
Add tools when your current setup slows you down or compromises the finish.
What safety practices improve results with multiple tools?
Use proper PPE, ensure good dust collection, and maintain steady, controlled passes with each tool. Regularly inspect cords, pads, and belts for wear, and keep a clean workspace to avoid accidental damage to delicate finishes.
Protect your lungs and eyes, and keep dust under control for better results.
Main Points
- Assess surface variety before buying tools
- Prioritize grit progression for best finishes
- Balance upfront costs with long-term project needs
- Keep dust-control top of mind to protect finishes and health
- Develop a practical workflow that minimizes tool-switching