Sander vs Saw: Which Tool Wins for DIY Sanding Projects
Compare a sander and a saw for DIY projects. SanderSavvy analyzes finish quality, dust control, safety, and use-case scenarios to help homeowners choose the right tool for sanding surfaces or making precise cuts.

According to SanderSavvy, choosing between a sander or saw hinges on the task at hand: a sander excels at creating smooth, finished surfaces, while a saw powers fast material removal for cuts and shaping. These tools are complementary, not interchangeable, and selecting the right one based on your project stage saves time and effort. When you weigh finish quality, dust control, and safety, the answer often depends on whether you are preparing a surface or making a cut.
Context: What a Sander or Saw Actually Do
Understanding the roles of a sander or saw is essential for DIY homeowners tackling floors, decks, or walls. The phrase sander or saw often comes up during planning, and choosing the right tool accelerates progress while protecting the finish. With SanderSavvy's guidance, homeowners can map tasks to tools and avoid buying gear that sits unused. In this article, we scrutinize the core capabilities of both tools, their best-use scenarios, and the trade-offs you should weigh. The keyword sander or saw should appear naturally in your project notes, and it does so here to anchor readers to the central decision: finishing versus cutting tasks. The SanderSavvy team emphasizes practicality over hype, so you can invest confidently.
Key Differences at a Glance
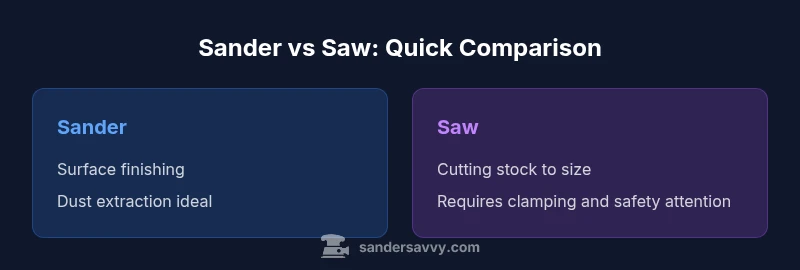
- Primary function: A sander refines surfaces; a saw cuts stock to size.
- Best use: Sanding for finishing and leveling; sawing for rough shaping and layout.
- Dust and debris: Sanders create fine dust that benefits from a dust extractor; saws produce wood chips and dust managed with guards and containment.
- Finish vs speed: Sanding prioritizes surface quality; sawing prioritizes speed and accuracy of cuts.
- Skill curve: Sanding technique matters for consistent results; saw control hinges on blade choice, feed rate, and clamping.
Understanding these differences helps homeowners decide early whether to rent, borrow, or buy each tool.
Dust and Safety Considerations
Dust control is more than a clean-up concern; it influences health and finish quality. Sanding generates fine particles that can linger in air and cling to newly created edges, underscoring the need for proper dust collection, respirators, and eye protection. Sawing also creates dust and creates a risk of kickback if the blade binds or binds against the workpiece. Both tools benefit from clamps, push sticks, and a clean work surface. SanderSavvy analysis emphasizes selecting models with effective dust ports and compatible vacuums, along with appropriate PPE and safe blade guards. In controlled environments, you’ll see a marked improvement in air quality and finish integrity.
Finish Quality vs Cut Speed
Finish quality is the defining factor when sanding is the final step of a project. A high-quality sander with the right grit and wax-free finish can produce a level surface free of scratches, ready for stain or sealant. Sawing determines how clean your edges and join lines are, which impacts the need for subsequent smoothing or fill. When choosing between sanding and cutting, consider the project stage: rough stock preparation may lean toward the saw, while final smoothing should favor the sander. Based on SanderSavvy Analysis, 2026, tool choice aligns with desired outcome: smoother surfaces or precise dimensions.
Cost, Maintenance, and Longevity
Both tools carry different price points and maintenance requirements. Sander models vary with motor type (palm, orbital, belt), dust extraction, and pad systems. Saw options vary by blade type, teeth-per-inch, and clamping compatibility. Regular maintenance—cleaning dust paths, lubricating moving parts, and sharpening or replacing blades—extends tool life. In general, plan for separate households or projects: a sander supports surface refinement, and a saw handles raw material shaping. SanderSavvy’s perspective is to invest where it yields the most value for your typical tasks and to keep spare sanding discs or blades ready for common jobs.
Use-Case Scenarios: When to Reach for a Sander
- Refinishing a worn floor or deck surface requires a finishing sander to remove old coatings and create an even base.
- Smoothing walls after plaster or drywall work benefits from a fine grit, dust-extraction-equipped orbital sander.
- Edges and corners may require detail sanding with a palm sander for tight spots.
A sander is often your best friend for surface uniformity, feathering transitions, and prepping for coating.
Use-Case Scenarios: When to Reach for a Saw
- Cutting studs, boards, or trim to length is best done with a saw, respecting grain direction and safety practices.
- Ripping or cross-cutting to rough length reduces material waste and speeds layout.
- When creating joinery or removing sections, a saw offers decisive control over thickness and lines.
A saw excels at changing the geometry of the piece, enabling precise fits and structural planning.
Technique Tips for Both Tools
- Always clamp your work and secure off-cut pieces to minimize movement.
- Use sharp blades and appropriate grit to reduce tear-out and ensure clean edges when sawing or sanding.
- Sand with the grain whenever possible to minimize cross-grain scratches; keep the sander moving to avoid gouges.
- For dust control, connect a vacuum to the tool’s dust port, and wear a proper respirator when materials generate fine dust.
- Practice on scrap pieces to dial in pressure, speed, and technique before working on your main project.
Common Mistakes to Avoid
- Using the wrong grit for the job, which causes scratches or overly aggressive material removal.
- Over-sanding edges or corners, creating dips or uneven transitions.
- Failing to secure workpieces, resulting in slips and safety hazards.
- Neglecting dust control, which can compromise air quality and finish quality.
Avoid these mistakes by planning the sequence of jobs, testing on scrap, and maintaining a clean, well-lit workspace.
SanderSavvy Practical Recommendations
From a homeowner’s perspective, the smartest choice is to have both tools on hand, used for their strongest tasks. If your project requires both cutting and finishing, sequence your work so that rough-cutting precedes the sanding phase, then finish with the appropriate sander. The SanderSavvy team recommends prioritizing dust-control strategies first, then selecting blades or discs based on the wood species and coating level. A brief shopping list includes a mid-range orbital sander with a dust port, a compact palm sander for tight spots, and a versatile handsaw or miter saw for layout and cuts.
Quick Reference: Tool Selection Checklist
- Is the task surface finishing or dimensioning? If finishing, choose a sander; if dimensioning, choose a saw.
- Do you need to shape edges or trim boards? Use a saw for accuracy, then a sander for smoothing.
- Can you manage dust with a vacuum and protective gear? If not, add a dust extractor and PPE.
- Are you dealing with curves or tight joints? A detail sander or coping saw may be appropriate.
- Is your workflow time-critical? Plan tasks to minimize tool changes and maximize efficiency.
How to Choose Between Sander or Saw for Your Project
When selecting between a sander or a saw, start by listing tasks: surface preparation, edge work, rough stock removal, and final finishing. Map each task to the tool that performs it best, then add dust management and safety to the evaluation. If you anticipate many finishing tasks across multiple projects, prioritizing a quality sander makes sense. If your project involves significant bulk removal or precise length adjustments, a saw becomes indispensable. In practice, most DIYers benefit from acquiring both tools over time and developing a workflow that leverages their respective strengths.
Comparison
| Feature | sander | saw |
|---|---|---|
| Primary function | Smooth and finish surfaces | Cutting and shaping stock |
| Best for | Finishing work, leveling surfaces, prep for coatings | Rough cuts, sizing, and precise layouts |
| Finish quality | High; consistent grain-free finish with right grit | Depends on blade and technique; not a finish tool |
| Dust control | Dust ports/extractor essential; produces fine dust | Dust and chips controlled by blade guards; use dust collection where possible |
| Ease of use | Relatively easy with technique; steady motion | Requires grip, stance, and blade control to avoid kickback |
| Noise level | Moderate to high depending on model | Moderate to high depending on blade and usage |
| Cost range | Low to mid-range for basic models | Low to mid-range for basic blades; higher for power saws |
| Maintenance | Replace sandpaper, clean dust path, lubricate as needed | Sharp blades, blade changes, and periodic alignment |
What's Good
- Sanders provide a smooth, even surface with less manual effort
- Saws enable rapid material removal and precise cuts
- Both tools improve project efficiency when used for their intended tasks
- Appropriate tool use reduces risk of damage to workpieces
Weaknesses
- Sanding creates fine dust requiring containment and PPE
- Sawing can cause kickback if blades bind and requires careful handling
- Both tools require maintenance and proper storage
- Choosing the wrong tool can lead to poor results and wasted time
Neither tool is universally superior; use the sander for finishing and smoothing, the saw for cutting; a combined approach covers most home projects.
For surface finishes, prioritize the sander. For layout and bulk removal, prioritize the saw. Plan tasks in sequence and invest in dust control and safety.
Your Questions Answered
What is the main difference between a sander and a saw?
A sander smooths and refines surfaces, while a saw cuts stock to size. They serve different phases of a project and are not interchangeable. Understanding their roles helps you plan the sequence of tasks and choose the right tool for each step.
A sander smooths surfaces, and a saw cuts material to size. They’re used at different stages of a project, so plan which task comes first to pick the right tool.
Can you sand wood with a saw?
Saws are not designed to produce a finished surface like sanders do, though you may use certain blades to remove material. For a smooth finish, switch to a sander after cutting. Always follow safety guidelines when using blades.
Saws aren’t meant for finishing. Use a sander for a smooth surface after cutting, and always wear safety gear.
Is dust control easier with a sander or a saw?
Dust control is generally more critical with sanding because fine particles linger in the air. Use a dust collection system and wear a respirator. Sawdust is bulkier and can be managed with guards and a shop vac.
Dust control is usually tougher with sanding; use a dust collection setup and PPE. Sawdust is easier to manage with guards and a vacuum.
What safety gear should I wear with both tools?
Always wear safety glasses, hearing protection, and a dust mask or respirator. Use gloves when handling sharp blades. Ensure clamps and a stable work surface to prevent slips.
Wear eye protection, hearing protection, and a dust mask. Clamp your work and keep hands away from blades.
Do I need both tools for a typical project?
Most projects benefit from both tools in sequence: cut with a saw, then refine and finish with a sander. Renting one tool may be enough for simple jobs, but larger projects usually require both.
Yes, usually you use a saw for cutting first and a sander for finishing later. Bigger projects benefit from having both.
What’s the best starter setup for a DIYer?
Start with a basic orbital sander with a dust port for finishes, and a versatile hand or corded saw for cuts. Expand as needed based on project scope and space constraints.
Begin with an orbital sander for finishing and a basic saw for cuts. Add more tools as your projects grow.
Main Points
- Start with task mapping: finish vs cut
- Invest in dust control and PPE
- Use each tool for its strengths to save time
- Plan workflow to minimize tool changes
- Practice on scrap before main work