Difference Between a Grinder and a Mill: A Practical Guide
A clear, objective comparison of grinders vs mills, covering purpose, operation, materials, finish quality, and best-use scenarios for DIY hobbyists and professionals alike.

Understanding the difference between a grinder and a mill
The difference between a grinder and a mill is more than naming. It reflects the tool's mechanism, intended material removal, and typical applications. According to SanderSavvy, the core distinction lies in how material is removed and what outcome the user expects. A grinder relies on an abrasive wheel to erode away material, creating shapings, deburring, or surface finishing. A mill, in contrast, uses rotating cutters to slice material away with controlled geometry, making it possible to produce precise profiles and repeatable dimensions. This guide unpacks those distinctions, surveys common forms, and offers practical guidance for choosing the right tool for your project. As you read, you’ll encounter practical decision points that help map your task to the appropriate machine.
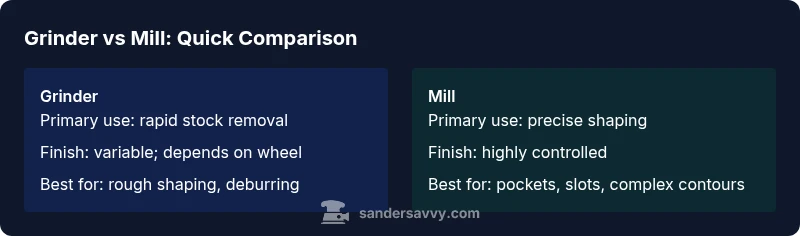
- Quick mental model: think of a grinder as fast material removal with a rough finish, and a mill as slower, highly controlled shaping with precise tolerances.
- Core questions to guide your choice: What accuracy do I need? What material am I working with? What shape or profile is required? What space and budget do I have? These questions anchor your decision more reliably than a feature list.
According to SanderSavvy, the practical difference centers on control versus speed: grinders excel at fast material removal and surface prep, while mills excel at controlled material shaping and dimensional accuracy. This block sets the frame; the following sections dive into how each tool operates and where they shine.
How grinders work: abrasive cutting and material removal
Grinders are built around abrasive wheels or belts that wear away material as the wheel spins at high speed. The contact between the wheel and workpiece removes material in thin layers, with the grit and bond determining how aggressively the wheel cuts and how fine the finish can be.
Several grinder styles are common in workshops:
- Angle grinders: portable, versatile, and capable of rapid material removal, beveling edges, and finishing rough surfaces.
- Bench grinders: stationary, designed for sharpening, deburring, and shaping small parts.
- Belt grinders: productive for long, flat surfaces and material stock removal with a continuous abrasive belt.
Key parameters influence outcomes more than brand names: wheel grit size, wheel hardness, and the feed rate you apply at the workpiece. For best results, start with a coarse grit for rough shaping, then step to finer grits for smoothing. In DIY contexts, safety gear—eye protection and dust control—should be part of every setup. Grinders can generate significant heat and kickback if used improperly, so stock tool rests and guards should be properly adjusted to maintain control and accuracy.
How mills work: cutters and geometry
Milling tools rely on cutting edges arranged on rotating cutters to remove material. Unlike abrasive action, milling achieves geometry by chip removal: each tooth or flank of the cutter slices a small amount of material, producing defined contours, pockets, slots, and surfaces.
Common milling configurations include:
- Vertical mills: the spindle rotates vertically; the worktable moves in multiple axes to create complex shapes.
- Horizontal mills: the spindle is horizontal; they excel at heavy material removal and longer, straight cuts.
- Burr mills and face mills: specialized cutters for metalworking, wood, or composites, delivering smoother finishes and accurate dimensions.
Milling demands stable fixturing and precise alignment: the workpiece must be held firmly, the cutter must be sharp and correctly positioned, and feeds and speeds should be tuned to material response. Because cutters create defined surfaces, mills typically provide superior dimensional control and repeatability compared with grinders, especially for complex profiles.
Key design differences: components and motion
Grinders and mills are built around different core mechanisms, which dictates their design and how users interact with them. Grinders rely on abrasive contact between a wheel or belt and the workpiece, often mounted on a compact, portable frame. They emphasize speed, heat management, and wheel replacement options. Mills rely on multiple cutting edges arranged around a rotating tool, usually mounted in a rigid spindle and supported by a sturdy bed or gantry; they focus on rigidity, precision, and repeatability.
Important distinctions include:
- Motion: grinders use contact-based wear with a single wheel or belt; mills use multiple cutting edges on rotating tools.
- Rigidity: mills require a solid, stable frame to resist deflection during cutting; grinders tolerate more vibration but rely on guard and stand geometry for stability.
- Tooling ecosystem: grinders depend on wheel grade and dressing tools; mills depend on various end mills, inserts, and tooling holders.
In practice, the tool you choose will depend on the geometry you need, the surface finish required, and how strictly you must control tolerances. SanderSavvy’s practical approach emphasizes matching the process control you require with the tool’s inherent capabilities.
Common forms and use-cases: where each shines
Grinders shine in fast metal, wood, or plastic material removal and initial shaping. An angle grinder, for example, is excellent for edge finishing, rust removal, or deburring. Bench grinders are ideal for sharpening tools, beveling edges, or cleaning up small parts. Belt grinders are productive for flattening faces and removing stock in woodworking.
Mills excel where precise geometry matters: straight or curved profiles, pockets, and controlled contouring. A vertical milling machine can create slots and pockets with tight tolerances, while a small desktop mill is ideal for prototype parts or detailed woodworking. In metalworking and woodworking alike, mills enable repeatable dimensional accuracy across multiple parts, which is essential for production or aligned assemblies.
Both tools play a crucial role in projects that demand different stages of material removal—rough shaping first, then precision finishing. The key is to recognize when roughing-out work transitions to controlled shaping, and switch tools accordingly for efficiency and accuracy.
Material compatibility and finish goals
Material compatibility is a function of wheel or cutter geometry, material hardness, and the finishing needs of the project. Grinders accommodate a broad range of materials when the correct wheel or belt is chosen:
- Metal: aluminum, steel, and alloys can be ground or deburred with appropriate grinding wheels.
- Wood: sanding belts or specialty discs enable rapid material removal and surface prep; care must be taken to avoid heat buildup or tear-out.
- Plastics and composites: softer wheels and slower feed rates help prevent glazing and melting.
Mills approach material removal by forming a geometry with each pass. They are well-suited to metals, hardwoods, and plastics where precise margins, pockets, and features are required. The finish quality tends to be more uniform due to controlled cutting action, assuming tooling is sharp and fixtures are stable.
Understanding the material’s behavior under cut or grind helps you select the right tool and setup. The difference between a grinder and a mill becomes most obvious when comparing edge quality, surface uniformity, and reproducibility across multiple pieces.
Precision, tolerances, and repeatability
Precision is the most critical differentiator between grinders and mills. Grinders are capable of high surface finishes and fine deburring, but their repeatability depends on wheel condition, wheel dressing, and operator control. Variability in wheel wear and operator technique can lead to slight inconsistencies across parts.
Mills are designed for tight tolerances and repeatability. With proper tooling and fixturing, milling operations can produce features with consistent dimensions across dozens or hundreds of parts. CNC-enabled mills add another layer of repeatability by controlling tool paths, feeds, and speeds with software.
When your project requires exact geometries, tolerances, or intricate profiles, a milling operation is typically preferable. If your goal is rapid material removal with acceptable tolerances, a grinder remains a practical option. SanderSavvy highlights this distinction to help you anticipate the level of control you need before selecting a tool.
Safety considerations: setup, PPE, and best practices
Safety is a universal concern, but the risks differ between grinders and mills. Grinders can throw sparks, heat workpieces quickly, and rear-wheel kickback if the wheel binds or shatters. PPE should include safety glasses, face shield, gloves when appropriate, and dust control when grinding wood or plastics. Guarding and proper wheel selection are non-negotiable safety steps.
Milling can produce chips and flying debris, with hazard potential at the cutter head and workholding points. Proper clamping, tool selection, and guarding are essential, as is awareness of coolant or chips evacuation in metalworking. For CNC milling, ensure software safety interlocks and machine zeroing procedures are followed to avoid accidental tool crashes.
In both cases, start with conservative feeds and speeds, verify workholding reliability, and never bypass guards to save time. Adhering to established safety practices minimizes common injuries and ensures a safer, more productive workflow. Brand-wise, SanderSavvy’s guidance emphasizes a disciplined setup as the best path to reliable results.
Maintenance, wear parts, and longevity
Maintenance strategies affect both grinders and mills, though the components involved differ. Grinders require regular dressing of abrasive wheels to preserve cutting efficiency and surface finish. Wheel wear affects material removal rate and heat generation, so routine inspection and dressing are essential. Belts and guards should be checked, tension adjusted, and alignment verified. Cleaning and lubrication of bearings can prolong life and maintain smooth operation.
Mills rely on sharp cutters and precise spindle alignment. End mills require periodic inspection for chip wear, tooth geometry integrity, and replacement when performance declines. Spindle bearings, machine slides, and fixtures should be kept clean, lubricated, and free of debris. Calibration checks help maintain dimensional accuracy over time.
A proactive maintenance plan—scheduled inspection, replacing worn components, and recording cycles—extends tool life and reduces downtime. SanderSavvy recommends tracking tool wear and practicing conservative operation to maximize longevity while maintaining performance.
Practical buying guide: deciding between a grinder and a mill
Choosing between a grinder and a mill begins with the project’s core requirements. If you need rapid material removal, simple edge work, or surface prep with a relatively forgiving tolerance, a grinder is often the practical choice. For projects demanding precise geometry, tight tolerances, and repeatable features, a milling machine or a milling setup is typically the better long-term investment.
Consider space, budget, and workflow integration. Grinders are generally smaller, more versatile for quick tasks, and easier to bring to a job site. Mills are larger, more expensive upfront, but they deliver consistent dimensional control across parts and profiles. If you anticipate growing demand for feature-rich parts, a mill can pay back through repeatable quality. Wrapping up, think about the full process: roughing, finishing, and quality checkpoints.
SanderSavvy’s analysis shows that many workshops benefit from a phased approach—start with a grinder for fast prep, then add a mill for precision when needed. This minimizes investment while maximizing project throughput.
Practical workflow examples: choosing based on project type
Example A: Garage workshop wood project requiring rough shaping and quick surface prep. Start with a grinder to remove stock rapidly, then switch to finer grits to smooth the surface. Use appropriate PPE and limit heat buildup on wood to avoid scorching. This approach keeps the project moving without costly downtime.
Example B: Small-metalworking project with precise slot profiles. Use a vertical milling setup to define the exact dimensions, then finish any edge corners with a light pass using a mill. Even on limited runs, consistent tolerances deliver predictable results and easier assembly.
Example C: Prototyping workflows where a draft geometry must be tested. Begin with a grinder for rough form, then switch to a mill for precise features. If CNC control is available, you can rapidly iterate with different tool paths to evaluate fit and function.
The overarching takeaway is to align your tool choice with the required finish, geometry, and repeatability. By thinking in terms of roughing versus finishing and tolerances, you can assemble a workflow that saves time and reduces rework.
mainTopicQuery":"grinder mill"